Raspberry Pi Camera Comparison 2026: Which Module for Which Project?
Connecting a camera to the Raspberry Pi takes two minutes. The hard part comes before that: which one? Between Camera Module 3, HQ Camera, Global Shutter, AI Camera and a plain USB webcam there are worlds of difference – in image quality, in the connector and in price. This Raspberry Pi camera comparison puts every official module side by side with the manufacturer’s own figures and answers the real question: which module fits your project and your board?
The technical figures in this article come from the official Raspberry Pi documentation (as of August 2026) – no estimated numbers and no copied marketing claims. Wherever I add something from my own experience with the camera projects on this blog, I say so explicitly.
A Raspberry Pi camera is a sensor module that talks to the processor directly over the CSI ribbon connector – no USB detour. The official modules range from 1.58 megapixels (Global Shutter Camera) to around 12 megapixels with autofocus (Camera Module 3) or an interchangeable lens (HQ Camera); you drive them with
rpicam-apps or the Picamera2 Python library. Raspberry Pi’s list prices run from $25 to $70, and street prices vary by retailer. Alternatively, an ordinary USB webcam works on every Pi.
The short answer: which camera for which purpose?
If you are in a hurry, here is the recommendation in one line each. The reasoning and all the datasheet figures follow further down.
| What you want to build | My recommendation | Why |
|---|---|---|
| First camera, photos and videos, time-lapse | Camera Module 3* Details ↓ | 12 MP, motorised autofocus from 10 cm, HDR video mode |
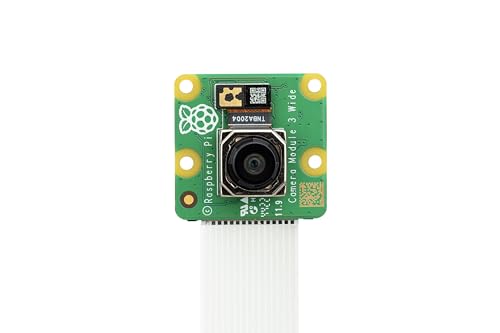
| Indoor monitoring, short distance to the subject | Camera Module 3 Wide (NoIR)* Details ↓ | 102° instead of 66° horizontal field of view, focus from 5 cm |
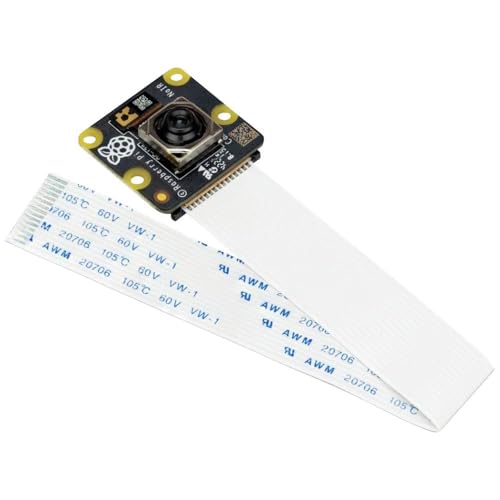
| Night vision with an IR illuminator | Camera Module 3 NoIR* or NoIR Wide* Details ↓ | no infrared cut filter, sees IR light |
| Extending an existing Camera Module 2 project | Camera Module 2 Details ↓ | 8 MP is plenty for 1080p streams; only worth buying new if it costs clearly less than the Camera Module 3 |
| Macro, microscopy, telephoto | HQ Camera – see IMX477 module* Details ↓ | C/CS or M12 thread for interchangeable lenses, up to 670 s exposure |
| Fast motion, several cameras in sync | Global Shutter Camera – see IMX296 module* Details ↓ | no rolling shutter distortion, external trigger input |
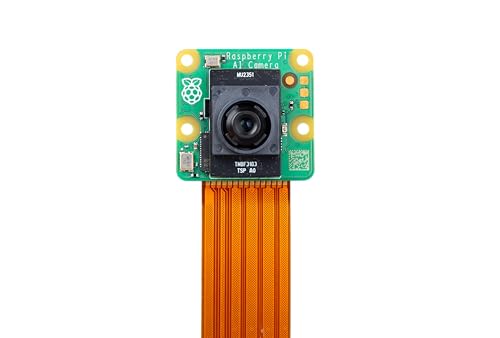
| Object detection without CPU load on the Pi | AI Camera* Details ↓ | the neural network runs on the sensor, not on the Pi |
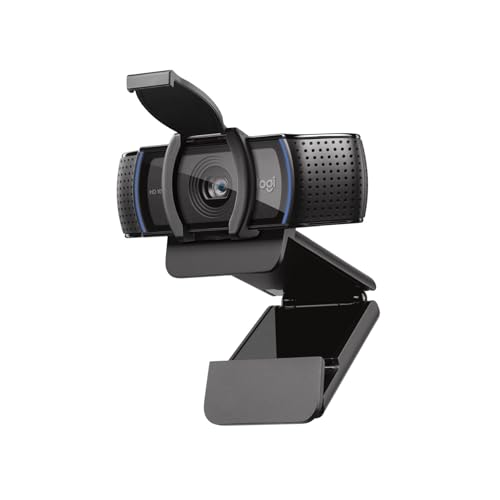
| Video calls, Pi 400/500, long cable run | Logitech C920s* (USB) Details ↓ | no CSI connector needed, cable length is up to you |
CSI module or USB webcam? The first decision
Before we get to individual modules there is a fundamental question to settle – it determines image quality, cable length and the software you will be working with later.
CSI camera modules sit on the dedicated Camera Serial Interface, a ribbon cable straight to the processor. The official software chain for them is rpicam-apps (rpicam-hello, rpicam-still, rpicam-vid) and the Picamera2 Python library. You get access to exposure time, gain, white balance and the sensor’s raw data – and, on the autofocus modules, to focus control as well.
USB webcams take the other route: they register as a UVC device and show up as /dev/video0. The official documentation describes the path via fswebcam and the V4L2 interface – not via rpicam-apps. In practice that means a USB camera is ready to go in 30 seconds, but you have far less control over the image parameters, and the camera hands you already-processed frames.
Which one when? My rule of thumb after a good few camera projects:
- CSI module when the camera is a fixed part of the project: time-lapse, surveillance, microscopy, object detection, anything involving image processing.
- USB webcam when the board has no CSI connector (Pi 400 and Pi 500), when the camera needs to sit several metres away, or when you want to plug and unplug it while the system runs – ribbon cables do not tolerate that.
- Both together is an option too: the Pi 5 has two CSI connectors, and that does not rule out additional USB cameras.
Will the camera fit my Pi? Connectors and cables
This is where most orders go wrong – and it has nothing to do with the camera module, it is the cable. Every Raspberry Pi camera uses the same 15-pin connector on the board. The computers do not.
| Raspberry Pi model | Camera connector | Cable required |
|---|---|---|
| Pi 1, Pi 2, Pi 3, Pi 3 B+, Pi 4 | 15-pin (standard) | the standard-standard cable in the box |
| Raspberry Pi 5 | 2 × 22-pin (mini), labelled CAM/DISP0 and CAM/DISP1 | standard-mini cable (check what’s in the box) |
| Pi Zero, Zero W, Zero 2 W | 22-pin (mini) | standard-mini cable (check what’s in the box) |
| Compute Module IO boards (CM4, CM5 & co.) | 22-pin (mini), CAM0 / CAM1 | standard-mini cable |
| Raspberry Pi 400, Raspberry Pi 500 | no CSI connector | USB webcam only |
Three consequences worth remembering:
- The Pi 5 and every Zero model need a standard-mini cable. The cable already attached to the camera is a standard-standard one and won’t fit. When the Pi 5 launched, Raspberry Pi announced that the Camera Module 3, HQ Camera and Global Shutter Camera would also ship with a 200 mm mini cable, but the current product pages only list one cable. Check what your retailer includes and add the mini cable to your order if in doubt. Officially the standard-mini cable comes in 200 mm, 300 mm and 500 mm.
- On the Pi 5 the camera and display connectors are identical. Both sockets do either job – two cameras, two displays, or one of each.
- The Pi 400 and Pi 500 are out. Neither keyboard computer lists a camera connector in its official specification. If you need a camera there, it is USB.
One more detail for Zero builders: the board dimensions and mounting holes of the Camera Module 3 are identical to the Camera Module 2, but the size and position of the sensor have changed. According to the documentation it therefore no longer fits the camera lid of the official Raspberry Pi Zero case.
Comparison table: every official camera module
These two tables are the heart of the comparison. The values come from the hardware specification in the official Raspberry Pi documentation. The Camera Module 1 has been discontinued and is no longer listed in the current version; its figures come from an earlier version of the specification. For the Camera Module 3 the figures apply to the standard and the NoIR variant alike – the only difference is the missing infrared cut filter.
Sensor, resolution and video modes
| Module | Sensor | Stills | Sensor resolution | Video modes | Optical size | Pixel size |
|---|---|---|---|---|---|---|
| Camera Module 1 (discontinued) | OmniVision OV5647 | 5 MP | 2592 × 1944 | 1080p30, 720p60, 640 × 480p60/90 | 1/4″ | 1.4 µm |
| Camera Module 2 | Sony IMX219, IMX355 from 11/2026 | 8 MP | 3280 × 2464 | 1080p47, 1640 × 1232p41, 640 × 480p206 | 1/4″ | 1.12 µm |
| Camera Module 3 | Sony IMX708 | 11.9 MP | 4608 × 2592 | 2304 × 1296p56, 2304 × 1296p30 HDR, 1536 × 864p120 | 1/2.43″ | 1.4 µm |
| Camera Module 3 Wide | Sony IMX708 | 11.9 MP | 4608 × 2592 | 2304 × 1296p56, 2304 × 1296p30 HDR, 1536 × 864p120 | 1/2.43″ | 1.4 µm |
| HQ Camera | Sony IMX477 | 12.3 MP | 4056 × 3040 | 2028 × 1080p50, 2028 × 1520p40, 1332 × 990p120 | 1/2.3″ | 1.55 µm |
| AI Camera | Sony IMX500 | 12.3 MP | 4056 × 3040 | 2028 × 1520p30, 4056 × 3040p10 | 1/2.3″ | 1.55 µm |
| Global Shutter Camera | Sony IMX296 | 1.58 MP | 1456 × 1088 | 1456 × 1088p60 | 1/2.9″ | 3.45 µm |
Optics, focus and exposure
| Module | Field of view H × V | Focus | Focus range | Aperture | Max. exposure | NoIR variant |
|---|---|---|---|---|---|---|
| Camera Module 1 (discontinued) | 53.5° × 41.4° | fixed | approx. 1 m to ∞ | F2.9 | 3.28 s | yes |
| Camera Module 2 | 62.2° × 48.8° | manually adjustable | approx. 10 cm to ∞ | F2.0 | 11.76 s | yes |
| Camera Module 3 | 66° × 41° | motorised autofocus | approx. 10 cm to ∞ | F1.8 | 112 s | yes |
| Camera Module 3 Wide | 102° × 67° | motorised autofocus | approx. 5 cm to ∞ | F2.2 | 112 s | yes |
| HQ Camera | depends on lens | manual, on the lens | depends on lens | depends on lens | 670.74 s | no |
| AI Camera | 66° ± 3° × 52.3° ± 3° | manually adjustable | approx. 20 cm to ∞ | F1.79 | 112 s | no |
| Global Shutter Camera | depends on lens | manual, on the lens | depends on lens | depends on lens | 15.5 s | no |
Three numbers in these tables matter more in practice than they look:
- Maximum exposure time decides astrophotography and long exposures. From the Camera Module 2 (11.76 s) to the Camera Module 3 (112 s) is a factor of 10; to the HQ Camera (670.74 s) a factor of 57.
- Pixel size tells you more about light sensitivity than the megapixel count does. The Global Shutter Camera has by far the largest pixels at 3.45 µm – with only 1.58 MP. That is exactly the point: more light per pixel, less data to process.
- Focus range is the most common source of disappointment. The Camera Module 1 only focuses from about a metre – completely useless for a macro project.
The modules in detail
Camera Module 3 – the standard most people should buy
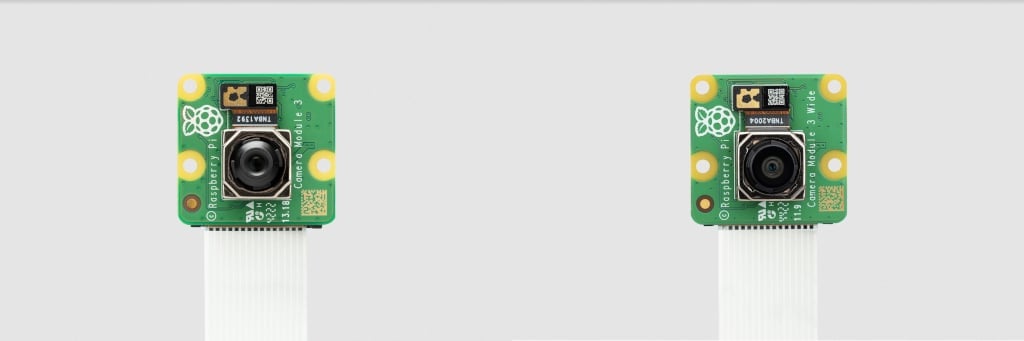
The Camera Module 3 with the Sony IMX708 is, to me, the default answer to the question of a first Pi camera. It delivers 11.9 megapixels, it is the only module besides the Wide variant with a motorised autofocus, and it handles an HDR video mode at 2304 × 1296 pixels and 30 fps. At 4 grams and 25 × 24 × 11.5 mm it stays tiny.
The autofocus is the real step up from the Camera Module 2. On a surveillance camera it barely matters; for time-lapse, document scanning or changing subjects it is worth a lot – you drive it straight from Picamera2 instead of turning a lens by hand.
One point from the official documentation worth knowing: there is evidence that the Camera Module 3 emits interference at a harmonic of the CSI clock rate, in the range of the GPS L1 frequency (1575 MHz). If you run the camera alongside a GPS receiver, keep that in mind – the bug report and the proposed workarounds are linked from the Camera Module 3 documentation.
👉 Get the module: Raspberry Pi Camera Module 3*
Camera Module 3 Wide – when 66° is not enough
Same sensor, same resolution, same autofocus – but different optics: a 2.75 mm focal length instead of 4.74 mm gives you 102° horizontal and 67° vertical field of view instead of 66° × 41°. That is not a nuance, that is a completely different camera for indoor use.
Do the maths: from two metres away the standard module covers roughly 2.6 metres of image width, the Wide variant a good 4.9 metres. If you want a corner of a room, a workbench or the entire build volume of a 3D printer in frame, buy the Wide. The price you pay is a marginally smaller aperture (F2.2 instead of F1.8) and the typical wide-angle distortion at the edges. In return it focuses from 5 cm instead of 10 cm.
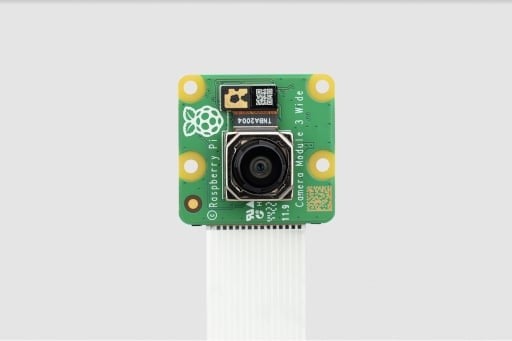
A small source of confusion when buying: Raspberry Pi markets the Wide variant as 120 degrees – that is the diagonal angle. The hardware specification lists 102 degrees horizontal and 67 degrees vertical for the same module. Both figures are correct; they just measure different angles.
👉 The regular Wide isn’t always in stock at Amazon. As an alternative, there’s the NoIR variant without the infrared cut filter (with less natural colours in daylight): Raspberry Pi Camera Module 3 NoIR Wide*
Camera Module 3 NoIR – night vision with an IR illuminator
NoIR stands for “no infrared filter”. Normal cameras filter infrared light out because it distorts colours. The NoIR variants do not – which is how they see the light of an infrared illuminator that is invisible to our eyes. That is exactly how night vision works.
Important, because it is regularly misunderstood: a NoIR camera does not see in the dark. It needs an IR light source, otherwise the image is just as black as with any other camera. Budget for the IR illuminator from the start. In daylight a NoIR camera’s colours also look less natural, because infrared light reaches the sensor as well – irrelevant for a pure surveillance camera, less so for a time-lapse in the garden.
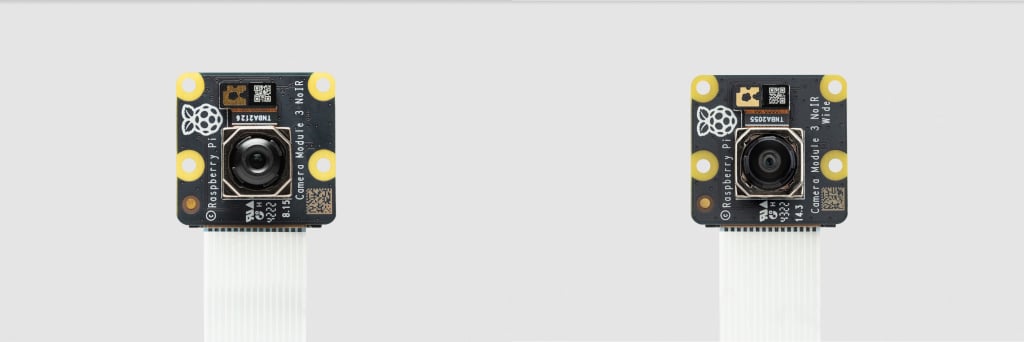
According to the documentation both NoIR modules ship with a square of blue gel that lets you assess the health of green plants – a nice side effect for grow projects.
👉 Get the modules: Camera Module 3 NoIR* and Camera Module 3 NoIR Wide*
Camera Module 2 – the 8-megapixel classic
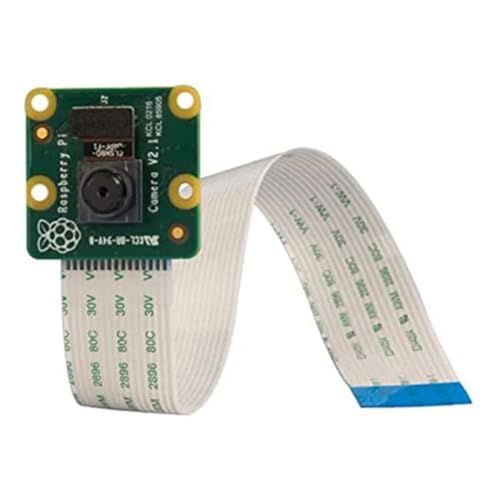
The Sony IMX219 with 8 megapixels has been around since 2016 and is still perfectly usable if your goal is a 1080p stream. The focus can be adjusted by hand, and at 62.2° its horizontal field of view is slightly narrower than the Camera Module 3’s 66°.
New sensor from November 2026: Camera Module 2 units made from November 2026 onwards use the Sony IMX355 instead of the IMX219, and that includes the NoIR version. Resolution stays at 8 megapixels, and Raspberry Pi says the new tuning gives better colours. You can tell which sensor you have from the “IMX355” printed on the board or by running rpicam-hello --list-cameras. If a new module doesn’t work straight away, Raspberry Pi recommends a full update with sudo apt update, sudo apt full-upgrade and a reboot.
The limits are clear, though: 11.76 seconds maximum exposure (instead of 112), no autofocus, no HDR video mode, and at 1.12 µm the smallest pixels of any official module – which shows in low light. I only recommend it in two cases today: you are extending an existing project, or the price gap to the Camera Module 3 is unusually large right now.
HQ Camera – interchangeable lenses and 670 seconds of exposure
The High Quality Camera has a lens thread, available either as an M12 or a C/CS-mount version. That puts you in a different league: macro lenses, telephoto lenses, zoom, even microscope optics. The only other official camera that takes interchangeable lenses is the Global Shutter Camera, which is built for a different job (see below). The IMX477 delivers 12.3 megapixels at 4056 × 3040 pixels, and its maximum exposure time of 670.74 seconds is the longest of any official module – which matters most for astrophotography.
It is noticeably bigger and heavier for it: 38 × 38 × 18.4 mm without a lens and 30.4 grams, against 4 grams for the Camera Module 3. For a case or a drone that matters. Like the Global Shutter Camera, it can be synchronised with other cameras: a wire on the XVS pin makes several cameras capture their frames at the same instant.
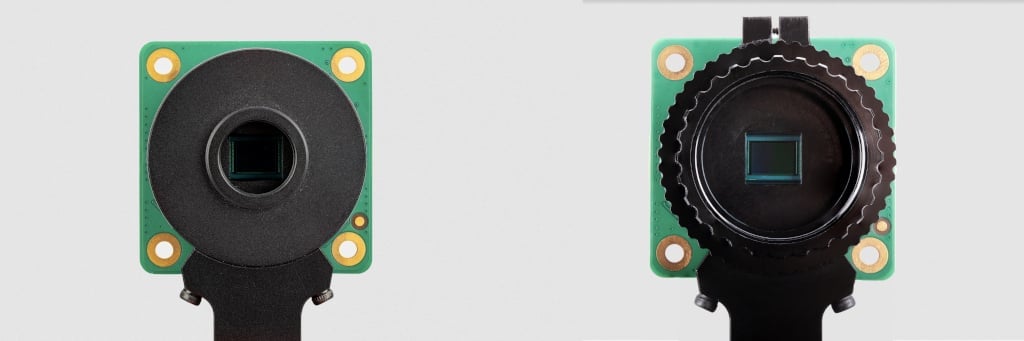
Raspberry Pi recommends two lenses for the HQ and Global Shutter cameras: a 6 mm wide angle (CS-mount, F1.2, 3 MP; 55° × 45° on the HQ) and a 16 mm telephoto (C-mount, F1.4–F16, 10 MP; 22.2° × 16.7° on the HQ). Budget for the lens – the camera alone does not take a picture.
Where to buy: the official HQ Camera is sold by authorised Raspberry Pi resellers. On Amazon you’ll mostly find modules from other manufacturers with the same IMX477 sensor and a C/CS thread – just not the original.
👉 IMX477 module with C/CS mount: Arducam IMX477 camera module with C/CS mount*
Global Shutter Camera – for everything that moves fast
Every other Pi camera uses a rolling shutter: it reads the image out line by line. If the subject moves while that happens, it warps. The official documentation gives the standard example: a propeller looks as though it is shimmering rather than rotating.
A global shutter exposes every pixel at once. The distortion disappears, several cameras can be synchronised to the same instant, and given enough light the exposure time goes down to 30 microseconds. The price: just 1.58 megapixels at 1456 × 1088 pixels.

That is deliberate, not a cost saving. The active sensor area measures 6.3 mm diagonally – similar to the HQ Camera – spread across far fewer but 3.45 µm large pixels. In machine vision that is exactly what you want: the more pixels a sensor produces, the harder real-time processing becomes. For part recognition, reading codes on a moving line or stereo capture, the Global Shutter is the right choice – for a pretty garden photo it is not.
The same caveat applies here: the camera comes without a lens. As with the HQ Camera, the original is sold by authorised Raspberry Pi resellers, while Amazon mostly lists IMX296 modules from other manufacturers. If you want to sync several cameras with an external trigger, check the datasheet for a trigger connection before you buy.
👉 IMX296 module with global shutter: Waveshare global shutter module IMX296*
AI Camera – object detection on the sensor itself
The AI Camera with the Sony IMX500 is conceptually something else entirely. The sensor module has a small image processor and a neural network accelerator built in. The camera therefore delivers two streams at once: the normal image and an inference stream carrying the input and output tensors of the model.
The practical difference: in a classic setup the camera sends images to the Pi and the Pi computes the object detection – on the CPU or with an accelerator. With the AI Camera the detection runs on the sensor. For the bundled MobileNet SSD model the documentation is unambiguous: object detection runs entirely on the camera, and the Pi does not need to post-process the output in any meaningful way.
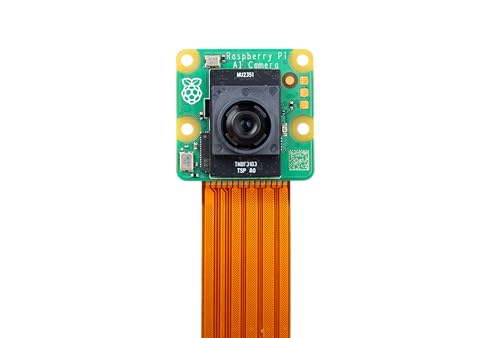
According to the AI Camera documentation it ships with ready-made models for object detection (MobileNet SSD) and pose estimation (PoseNet); your own PyTorch or TensorFlow models can be quantised and flashed via Sony’s Edge AI toolkit. The documentation’s examples assume a Pi 5 or Pi 4 Model B, but with minor changes they also run on the Zero 2 W and the Pi 3 Model B+.
As a plain photo camera it is unremarkable: 12.3 MP, 66° field of view, manually adjustable focus from about 20 cm, a maximum of 30 fps at 2028 × 1520. You buy it for the inference, not for the image quality.
👉 Get the module: Raspberry Pi AI Camera*
USB webcams – the pragmatic route
A USB webcam is not a fallback; in some cases it is the better choice. It is the only option for the Pi 400 and Pi 500, it can sit several metres away on an ordinary USB cable, and it survives being plugged and unplugged while the system runs – which a CSI ribbon cable does not.
What to look for:
- It must be UVC compatible – then Raspberry Pi OS needs no driver. Practically every brand-name webcam qualifies.
- Built-in MJPEG compression is mandatory, not a bonus. Uncompressed YUYV at 1080p30 is roughly 995 Mbit/s – that does not fit through a USB 2.0 port (480 Mbit/s gross). Without compression you only get Full HD at a much lower frame rate, or you have to drop the resolution.
- Watch the power supply on the Pi 5: with a 15 W power supply (5 V, 3 A) the Pi 5 supplies no more than 600 mA to all USB devices combined. That’s enough for a keyboard and mouse, but power-hungry devices such as external drives need more. If you plug in more than the webcam, use a 5 A power supply or a USB hub with its own power supply. Details in my power supply comparison.
- No autofocus hunting: for surveillance and OctoPrint, fixed-focus cameras often give a steadier image than ones that keep refocusing.
👉 Cheap entry point (720p): Logitech C270* – 1080p over USB: Logitech C920s*
Which camera for which project?
Datasheets are one thing, the typical Pi projects another. Here is the mapping for the applications people ask me about most often.
Surveillance camera
For a camera watching a room or a driveway, the angle of view counts far more than resolution – a 1080p stream is plenty, and every extra megapixel costs bandwidth and storage. My recommendation is therefore the Camera Module 3 Wide, and for night operation the NoIR Wide variant plus an IR illuminator. How to turn that into a finished camera is in my guide to a Raspberry Pi security camera with motionEye.
Time-lapse and plant monitoring
This is where the autofocus of the Camera Module 3 earns its keep, because the distance to the subject can change over weeks – a growing plant does move towards the camera. The long maximum exposure of 112 seconds helps with shots at dusk. The practical side is covered in my Raspberry Pi timelapse camera guide.
Monitoring a 3D printer (OctoPrint)
The build volume is close and the printer usually stands in a corner – a clear case for wide angle. The Camera Module 3 Wide, focusing from 5 cm, gets the nozzle and the whole bed into frame. If your Pi sits outside the printer and you need a longer run, a USB webcam serves you better – ribbon cables want to stay short. Matching guide: install OctoPrint on the Raspberry Pi.
Object detection and AI projects
There are two sensible routes. Either you take a normal camera plus an accelerator on the Pi – that is how my AI doorman with the AI HAT+ and Frigate works. Or you move the detection onto the sensor with the AI Camera. The second route is more elegant when you only need one model and want to keep the Pi free for other work; the first is more flexible when several cameras share one accelerator.
Microscopy, macro and astrophotography
Nothing works here without an interchangeable lens. The Global Shutter Camera has a lens thread too, but it only delivers 1.58 megapixels and exposes for 15.5 seconds at most – so the HQ Camera is the one to get. For astro, the 670.74-second exposure time is the deciding argument – no other official module comes close. Plan the lens into your budget; it is the more expensive half of the setup.
Video calls and desktop use
If the Pi runs as a desktop machine, a USB webcam is the right answer – not least because microphone and camera then come in one device. On the Pi 400 and Pi 500 it is the only option anyway.
Accessories you actually need
Three things are regularly forgotten on a first camera project:
- The right cable. The Pi 5 and every Zero model need a standard-mini cable (22-pin to 15-pin) if there isn’t one in the box. Officially it comes in 200, 300 and 500 mm: official camera cable for the Pi 5, 500 mm* or, as an alternative, a 22-to-15-pin cable, 300 mm*.
- A mount. The modules have mounting holes and weigh next to nothing – but they still have to be fixed somewhere. A printed case is the cheapest and most flexible solution.
- An IR illuminator for NoIR modules. Without infrared light, the missing filter buys you nothing at all.
And for the HQ and Global Shutter cameras, add the lens. Raspberry Pi names two recommended optics in the documentation: the 6 mm wide angle with a CS thread (F1.2, 3 MP) and the 16 mm telephoto with a C thread (F1.4 to F16, 10 MP). On the Global Shutter Camera the field of view comes out narrower than on the HQ Camera because of the smaller sensor – 45° × 34° instead of 55° × 45° with the 6 mm lens.
Buying recommendations at a glance
If you are still undecided after all that comparing: these are the five modules I recommend most often in practice.
The right choice for most people – 12 MP, autofocus, HDR video: Raspberry Pi Camera Module 3*

For surveillance, indoor use and 3D printers – the Camera Module 3 Wide, with a 102° field of view and focus from 5 cm.
For night vision with an IR illuminator – without the infrared cut filter:
For object detection without CPU load – neural network on the sensor:
For anything without a CSI connector – 1080p over USB, no ribbon cable:
Conclusion: three sentences instead of seven datasheets
If you do not know exactly what you need, take the Camera Module 3 – it is good enough in almost every discipline and the autofocus takes work off your hands. If the camera has to capture a room, a workbench or a printer’s build volume from close up, take the Wide variant; if it has to see at night, the NoIR version plus an IR illuminator. Everything beyond that – interchangeable lens, global shutter, AI on the sensor – you only buy if you recognised your application in the text above.
And whichever module you settle on: check your board’s camera connector before you order. A missing 22-pin cable has stopped more camera projects on the first evening than any piece of software.
Once the camera arrives, carry on here: set up the Raspberry Pi camera and take photos and videos. And if you are still undecided about the board itself, the Raspberry Pi model buying guide will help.
Sources for the technical figures: Raspberry Pi – Camera (documentation) including the hardware specification and lens recommendations, AI Camera and Camera software. Retrieved on 22 August 2026.
Frequently asked questions about Raspberry Pi cameras (FAQ)
Every official camera module fits the Pi 5 – just not with the standard cable attached to the camera. The Pi 5 has two 22-pin mini connectors (CAM/DISP0 and CAM/DISP1), while the cameras have a 15-pin connector. You therefore need a standard-mini cable. Depending on the camera and retailer, a 200 mm mini cable may be included, so check what’s in the box. Otherwise it is officially available in 200, 300 and 500 mm. Either connector can drive a camera or a display.
The NoIR variant has no infrared cut filter. That lets it see the light of an infrared illuminator, which makes it suitable for night vision. Without an IR light source, however, it sees no more in the dark than any other camera. In daylight the colours look less natural than with the standard module. Sensor, resolution and optics are otherwise identical.
Both have the same sensor and the same autofocus and differ only in the optics. The standard module covers 66 degrees horizontally, the Wide variant 102 degrees – from two metres away that is roughly 2.6 versus 4.9 metres of image width. Take the Wide for indoor use, surveillance and short distances, and the standard module for subjects several metres away.
Yes. Raspberry Pi OS recognises UVC-compatible webcams as /dev/video0 without a driver. The official documentation describes using them via fswebcam and V4L2 – the rpicam tools are meant for the CSI modules instead. For the Pi 400 and Pi 500, USB is the only option because neither has a camera connector.
On the Raspberry Pi 5, yes: it has two CSI connectors and each can take a camera. On all older models with only one connector it only works through additional USB cameras or third-party multiplexer boards. Compute Module IO boards also have two camera connectors.
The Global Shutter Camera with the Sony IMX296. Every other module reads the image out line by line (rolling shutter) and distorts fast movement. A global shutter exposes all pixels at once, allows exposure times down to 30 microseconds given enough light, and can be synchronised with further cameras over an external trigger. The trade-off is just 1.58 megapixels.
Yes. All Zero models – Zero, Zero W and Zero 2 W – use the 22-pin mini connector and need a standard-mini cable just like the Pi 5. Also note that the Camera Module 3 no longer fits the camera lid of the official Zero case because the sensor position changed, even though the board dimensions stayed the same.