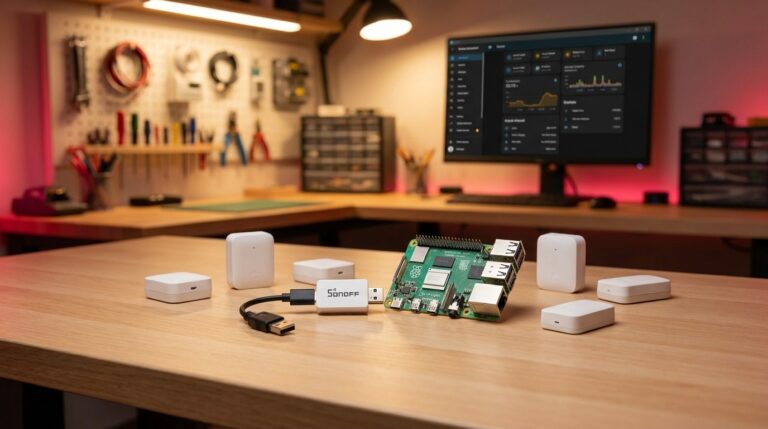
The AI Doorman: Real-Time Object Detection with the Raspberry Pi AI HAT+ & Frigate
You know the feeling: the smart camera at your front door triggers an alert every hour — sometimes because the wind moves a branch, sometimes because a cat walks past. What if you had surveillance that’s genuinely intelligent and only sends you a push notification when the delivery driver is actually at the door?
That’s exactly what the Raspberry Pi AI HAT+ combined with Frigate NVR delivers. In this guide I’ll show you how to break free from cloud dependency and run real computer vision (Edge AI) locally on your Raspberry Pi 5.
💡 Pro Tip: This article is part of our comprehensive Smart Home guide. Everything about hardware, installation and further projects: Home Assistant on the Raspberry Pi – The Big Hub 2026.
Parts List: Your AI Camera Setup
For this project we need hardware capable of handling the enormous computational load of real-time image processing.
- The host: Raspberry Pi 5 (8 GB RAM)* – Plenty of headroom for Docker and video decoding.
- The accelerator: Raspberry Pi AI HAT+ (13 TOPS, Hailo-8L)* – The heart of the setup. The NPU chip (Neural Processing Unit) handles all AI inference. The older AI Kit uses the same chip but is no longer made – if you already have one, this guide works just the same.
- The camera: Official Raspberry Pi Camera Module 3* – Or any good IP camera on your network (RTSP/ONVIF).
- Storage: an external USB SSD such as the Samsung T7 Portable SSD (1 TB)*, plugged into one of the blue USB 3 ports – 24/7 video recording destroys SD cards extremely quickly. An SSD is mandatory! You can’t add an NVMe SSD on top: the Pi 5 has a single PCIe connector, and the AI HAT+ takes it. If you want NVMe and a Hailo chip together, you need a board with two M.2 slots plus an M.2 Hailo module – see our NVMe HAT overview.
Why the AI HAT+? (CPU vs. TPU vs. NPU)
Until recently, makers had only two ways to run object detection: either torture the Raspberry Pi’s CPU (resulting in 100% load and 2 frames per second), or buy the Google Coral USB Accelerator (Edge TPU). The Google Coral was out of stock for years and is now outdated.
In 2026 the landscape has shifted: the official Raspberry Pi AI HAT+ brings the Hailo-8L chip directly to the Pi 5 via the fast PCIe interface. It replaced the earlier AI Kit; for the more powerful 26 TOPS version (Hailo-8), see our AI HAT+ overview.
| Accelerator | Interface | Performance | Availability | Frigate Support |
|---|---|---|---|---|
| Raspberry Pi 5 CPU | Internal | a few FPS | Excellent | Yes (high CPU load) |
| Google Coral USB | USB 3.0 | 4 TOPS | Poor | Yes (native) |
| Hailo-8L (AI HAT+ 13 TOPS) | PCIe (ribbon cable) | 13 TOPS | Good (AI Kit discontinued) | Yes (native) |
With 13 TOPS (tera operations per second), the Hailo-8L takes over object detection entirely. That leaves the Pi 5’s CPU free to decode the video streams and handle recording.
What is Frigate NVR?
Frigate is an open-source network video recorder (NVR) built for local AI object detection. Instead of reacting blindly to pixel changes (motion), Frigate uses machine learning models to classify objects.
You can define: “Record video when a person is detected in the ‘driveway’ zone. Ignore cars and dogs.”
Installation & Setup
Frigate runs as a Docker container. We assume you already have Docker and Docker Compose installed on your Raspberry Pi OS (64-bit).
Step 1: Install Hailo Drivers
Before starting Docker, the Raspberry Pi needs to recognise the Hailo chip on the AI HAT+. Frigate ships its own Hailo software inside the container and needs a driver on the Pi that matches it exactly. So don’t install Raspberry Pi’s hailo-all package – use Frigate’s installation script instead. Open a terminal and update the system first:
sudo apt update && sudo apt full-upgrade -y
Then download the script, make it executable and run it. It builds the driver, installs the firmware and sets up device permissions. Reboot when it’s done:
wget https://raw.githubusercontent.com/blakeblackshear/frigate/dev/docker/hailo8l/user_installation.sh
sudo chmod +x user_installation.sh
./user_installation.sh
sudo reboot
This applies to the current Raspberry Pi OS. To check which version you’re on, run cat /etc/debian_version: if the output starts with 12, you’re still on the older release. Its kernel ships an outdated Hailo driver that you have to disable before running the script – the steps are in the Frigate installation guide.
After rebooting, check that the chip is detected and the driver is loaded. The first command should list the /dev/hailo0 device, the second prints the driver version:
ls -l /dev/hailo0
cat /sys/module/hailo_pci/version
If Frigate fails later on and its logs (docker logs frigate) show max_desc_page_size given 16384 is bigger than hw max desc page size 4096, add this setting and reboot:
echo 'options hailo_pci force_desc_page_size=4096' | sudo tee /etc/modprobe.d/hailo_pci.conf
sudo reboot
With the AI HAT+, the Pi switches to the faster PCIe Gen 3 mode automatically. If you’re still using the AI Kit, enable it yourself:
sudo raspi-config → Advanced Options → PCIe Speed → Yes, then reboot.Step 2: Create the Frigate Docker Compose File
Create a folder for Frigate and navigate into it:
mkdir ~/frigate && cd ~/frigate
nano docker-compose.yml
Paste the following configuration. The key detail is passing /dev/hailo0 (the Hailo chip) into the container. /dev/dri/renderD128 is the Pi 5’s GPU – Frigate doesn’t use it for decoding at the moment, but the line does no harm. The Pi 5 decodes H.264 streams in software, which is why detection in step 3 runs at 1280 × 720 and 5 frames per second.
services:
  frigate:
    container_name: frigate
    privileged: true
    restart: unless-stopped
    stop_grace_period: 30s
    image: ghcr.io/blakeblackshear/frigate:stable
    shm_size: "512mb"
    devices:
      - /dev/hailo0
      - /dev/dri/renderD128
    volumes:
      - /etc/localtime:/etc/localtime:ro
      - ./config:/config
      - /mnt/ssd/frigate/media:/media/frigate
    ports:
      - "8971:8971"
      - "8554:8554"
      - "8555:8555"
/mnt/ssd stands for wherever your USB SSD is mounted – change the path if yours is different.
Step 3: Configure Frigate
In the same folder, create a config directory and inside it a config.yml file:
mkdir config && nano config/config.yml
Here we configure Frigate with the native Hailo-8L detector and enable recording to the SSD:
mqtt:
  enabled: False  # set to True for Home Assistant, see the conclusion

detectors:
  hailo:
    type: hailo8l
    device: PCIe

model:
  width: 320
  height: 320
  input_tensor: nhwc
  input_pixel_format: rgb
  input_dtype: int
  model_type: yolo-generic
  labelmap_path: /labelmap/coco-80.txt

cameras:
  front_door:
    ffmpeg:
      inputs:
        # Replace with the RTSP URL of your IP camera
        - path: rtsp://user:pass@192.168.178.55:554/stream1
          roles:
            - detect
            - record
    detect:
      width: 1280
      height: 720
      fps: 5
    objects:
      track:
        - person
        - dog
        - car
    record:
      enabled: True
      continuous:
        days: 7
      motion:
        days: 7
      alerts:
        retain:
          days: 14
      detections:
        retain:
          days: 14
This keeps the full recording for 7 days and clips with detected people, dogs or cars (alerts and detections) for 14 days. The config matches Frigate 0.18. Guides that put retain and events directly under record were written for older Frigate versions – Frigate rewrites those files to the new format on startup.
Step 4: Start Frigate & Log In
Start the container:
docker compose up -d
Get the admin password from the logs: Frigate generates a one-time password on first startup and writes it to the container logs:
docker logs frigate 2>&1 | grep -i "password"
You’ll see a box of asterisks with a line like Password: 3f9c…. Make a note of this 32-character password!
Open your browser and navigate to your Raspberry Pi’s IP address on port 8971 over https (e.g. https://192.168.178.50:8971). Frigate uses a self-signed certificate, so you’ll need to accept the browser warning once. Log in with username admin and the password from the logs. You can then set your own password under Settings → Users.
Conclusion: Privacy Meets High Tech
With Frigate and the Raspberry Pi AI HAT+ you’ve built a professional, fully local AI doorman. When something moves in front of your camera, the Hailo chip decides in milliseconds whether it’s worth notifying you.
No data flows to Google, Amazon or Ring. Everything happens locally on your SSD at home. Combine this setup with Home Assistant and you can automatically switch on the outdoor light whenever a “person” is detected! For that, Frigate needs an MQTT broker such as Mosquitto (here’s how to set one up: MQTT on the Raspberry Pi). Then set mqtt to enabled: True in config.yml and add the broker’s address and login with host, user and password.
Questions about configuring your specific cameras? Drop them in the comments!
Your team at raspberry.tips
Frequently Asked Questions: Frigate NVR with Raspberry Pi AI HAT+
Frigate is an open-source, fully local NVR with AI object detection. Combined with the Raspberry Pi AI HAT+ (Hailo-8L NPU), it detects persons, cars, and animals in real time – no cloud, no subscriptions.
CPU-only works but is slow on multi-camera setups. The AI HAT+ (Hailo-8L, 13 TOPS) offloads all inference to hardware, enabling real-time detection without throttling.
Any RTSP/ONVIF IP camera: Reolink, Hikvision, Dahua, TP-Link Tapo. Raspberry Pi Camera Module 3 via go2rtc bridge. Best results with H.264/H.265, 1080p cameras.
Through the official Frigate integration, which you install from the Marketplace (formerly HACS). You’ll need an MQTT broker such as Mosquitto that both Home Assistant and Frigate connect to – set mqtt to enabled: True in Frigate’s config.yml and add the broker’s address, username and password. For the server address, use http://your-pi-ip:8971 after turning off TLS in Frigate under Settings → System → TLS, because Home Assistant won’t trust the self-signed certificate. After that, all cameras and detected objects appear as entities you can use in automations, e.g. a Telegram alert with a snapshot when a person is detected at the front door.
motionEye detects motion by comparing frames — so it also triggers on wind, cloud shadows or insects. Frigate detects objects using AI and specifically reports people, vehicles or animals. In return, motionEye is far less demanding and even runs on a Pi Zero.
Yes — Frigate is open source and processes everything locally on your hardware; the recordings never leave your network. Optionally, Frigate+ offers a paid service for individually trained detection models, but it is not required for operation.