Arduino UNO Q Setup – Getting Started with App Lab
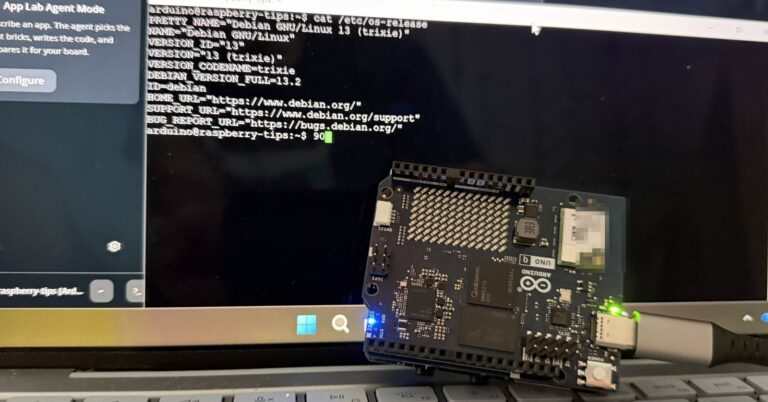
With the Arduino UNO Q, for the first time there is an Arduino board that is also a fully-fledged Linux computer: a Qualcomm processor runs Debian, right next to a classic microcontroller handling the real-time work. In this guide I will walk you through the complete Arduino UNO Q setup step by step – from the first USB connection through the new Arduino App Lab development environment to a fully updated board running its first example apps.
This article kicks off a small tutorial series about the UNO Q here on raspberry.tips – as a Raspberry Pi blog we are naturally curious how the board compares to the Pi and what you can build with it. All articles of the series are collected in the new Arduino category.
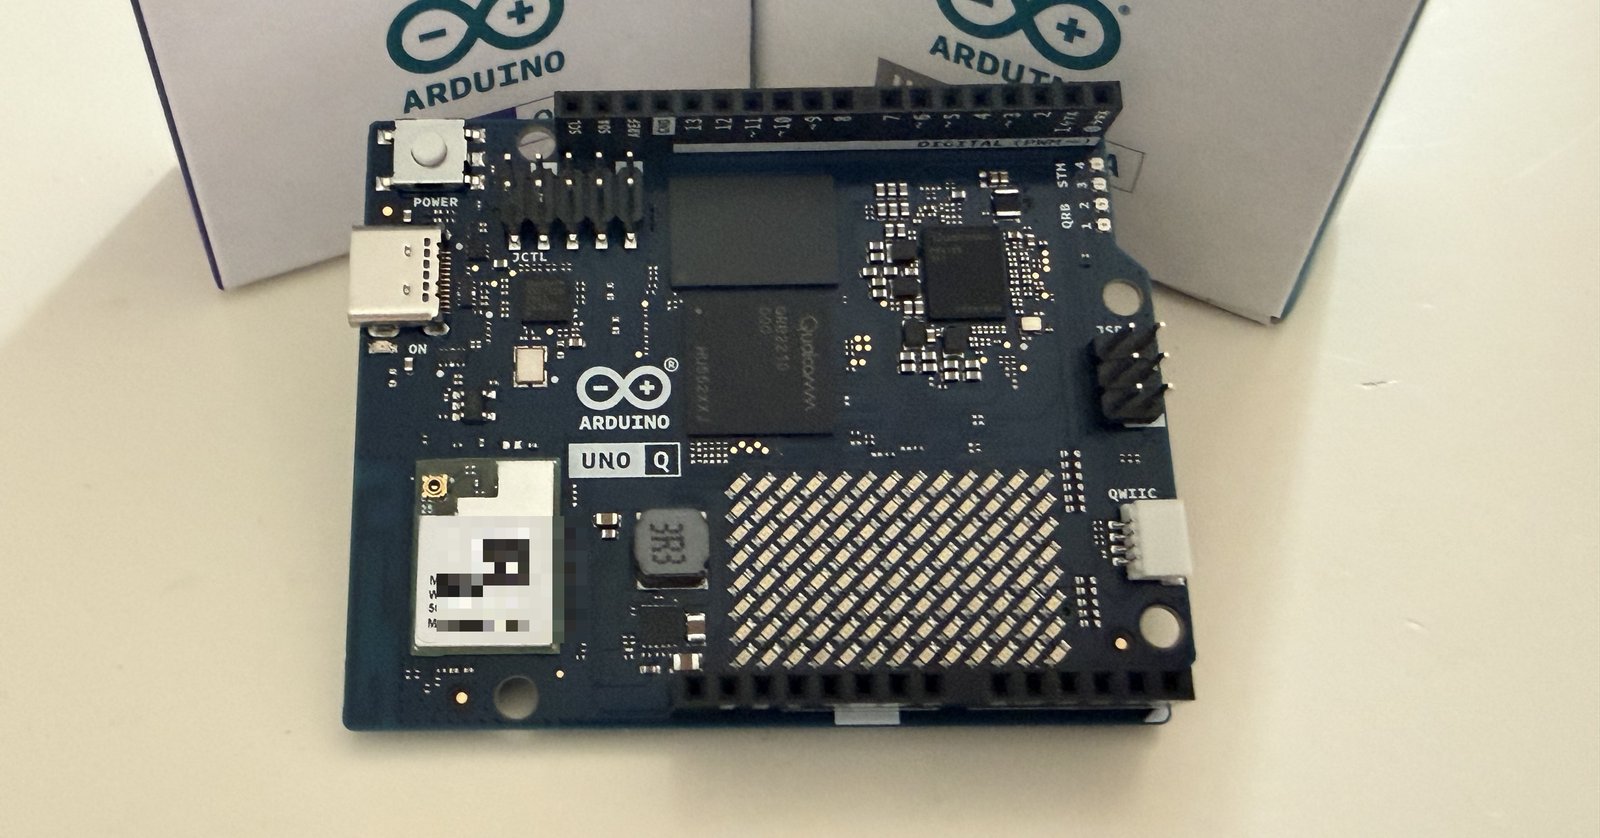
The Arduino UNO Q is a hybrid board in the classic UNO form factor: a Qualcomm Dragonwing QRB2210 (quad-core Cortex-A53, 2 GHz) runs a full Debian Linux, while an STM32U585 microcontroller handles real-time I/O with Arduino sketches in parallel. It comes in two variants: 2 GB RAM/16 GB storage ($59) and 4 GB/32 GB ($79; Arduino Store prices as of October 2026).
What makes the UNO Q special: two brains on one board
Arduino calls the concept “Dual Brain”: two completely different chips work together on the board. The Qualcomm Dragonwing QRB2210 (four Cortex-A53 cores at 2.0 GHz, Adreno GPU) runs a Debian Linux with upstream support – hosting Python apps, containers and even small AI models. The STM32U585 (Cortex-M33, up to 160 MHz, 2 MB flash) takes care of what Arduino has always been good at under Zephyr OS: switching pins, reading sensors and reliably handling time-critical tasks – programmed as a regular Arduino sketch.

On top of that comes a feature set you would not expect on a UNO at first glance: a blue 8×13 LED matrix right on the PCB, Wi-Fi 5 (2.4/5 GHz) plus Bluetooth 5.1, a Qwiic connector for sensors (3.3 V only) and of course the classic UNO headers that still accept shields. On the bottom side there are two additional high-speed connectors for so-called carrier boards – these will later allow MIPI cameras, displays and audio to be attached.

| Component | Arduino UNO Q |
|---|---|
| Processor (Linux) | Qualcomm Dragonwing QRB2210, 4× Cortex-A53 @ 2.0 GHz, Adreno GPU |
| Microcontroller (real-time) | STM32U585, Cortex-M33 @ 160 MHz, 2 MB flash, 786 kB SRAM |
| RAM / storage | 2 GB / 16 GB eMMC or 4 GB / 32 GB eMMC |
| Operating systems | Debian Linux (MPU) + Zephyr OS (MCU) |
| Wireless | Wi-Fi 5 dual-band (2.4/5 GHz), Bluetooth 5.1 |
| Highlights | 8×13 LED matrix, Qwiic (3.3 V), UNO shield headers, carrier connectors |
| Power | USB-C (5 V/3 A), alternatively 5 V pin or VIN (7–24 V) |
| Form factor | Classic UNO format |
Variants and pricing
The UNO Q comes in two configurations: 2 GB RAM with 16 GB eMMC ($59) and 4 GB RAM with 32 GB eMMC ($79; Arduino Store prices as of October 2026). For pure App Lab experiments driven from your PC, the smaller variant is fine. If you plan to run the board as a standalone mini computer with a monitor or want to try larger AI models, go for the 4 GB version – that is also what Arduino recommends for single-board computer mode. I am using the 4 GB variant (ABX00173) throughout this series.
Besides the bare boards, Amazon carries official bundles straight from Arduino: the UNO Q 4GB with a 45 W USB-C power supply* and the UNO Q 2GB with an 8-in-1 USB-C hub*. If you just want the board itself, you can get the 4 GB* or 2 GB* version on its own.
What you need for the setup
- an Arduino UNO Q (2 GB or 4 GB variant)
- a USB-C data cable – charge-only cables will not work
- a PC or Mac with internet access (Windows, macOS or Linux)
- a Wi-Fi network (2.4 or 5 GHz) the board can join
You do not need a power supply for the initial setup: connected to your PC, the USB port powers the board. The UNO Q knows two operating modes – the PC-hosted mode shown here, where you control the board from your computer via App Lab, and single-board computer mode, where monitor, keyboard and mouse connect directly to the board through a USB-C dock with Power Delivery and you work on the Debian desktop. For getting started, PC-hosted mode is the easiest route. If you want to run the UNO Q as a mini PC on Debian with a monitor attached, there is a separate guide for that.
Installing Arduino App Lab
The whole setup runs through Arduino App Lab – the new development environment that combines Arduino sketches, Python apps and AI models under one roof. Download App Lab for your operating system from the official download page and install it as usual. You do not strictly need the classic Arduino IDE for the UNO Q – it can still program the microcontroller side of the board if you prefer to stick with sketches.
Linux users: App Lab needs a one-time udev rule before it can talk to the board over USB. The quickest way is the script from Arduino’s Zephyr core repository: grab it with curl -O https://raw.githubusercontent.com/arduino/ArduinoCore-zephyr/main/post_install.sh, then run chmod +x post_install.sh and sudo ./post_install.sh. Unplug the board and plug it back in afterwards. If you’d rather add the rule by hand, it’s in the official user manual. Windows and macOS need nothing extra.
Arduino UNO Q setup: the first-start wizard
Step 1: Connect the board and select it
Connect the UNO Q to your computer via USB-C and start App Lab. After a few seconds the board appears on the start screen as uno-q with a “New Board” badge. If it does not, try a different USB port – and double-check that your cable is really a data cable. Clicking the tile starts the wizard.

Step 2: Board configuration – name and keyboard layout
The wizard guides you through the basic setup in three steps. First you pick the keyboard layout (relevant for desktop use later) and assign a board name. The name doubles as the hostname on your network – choose something descriptive in case you run several boards later.

Step 3: Connect to Wi-Fi
In the second step the UNO Q scans the available networks – thanks to dual-band Wi-Fi both 2.4 and 5 GHz networks show up in the list. Click your network, enter the password and wait a moment: once “Connected” appears with a green check mark, confirm with Confirm. The board needs the connection for the updates coming up next and later for Network Mode, where App Lab discovers the board on your LAN without a USB cable.


Step 4: Set the Linux credentials
Finally you set the password for the Linux user arduino. Remember it well – this is what you will use to log in via SSH or on the desktop later. Confirm finishes the wizard.

Step 5: Install updates
Right after the setup App Lab reports available updates – in my case among others the Zephyr core for the microcontroller, the Arduino CLI and the App Lab foundation. Click Install updates and be patient: besides the packages, the board pulls several container images (the base for App Lab’s “Bricks”), which can take a few minutes depending on your connection.

At the end the installer reports “Board update completed successfully” – after clicking Restart App Lab the board is fully up to date.

A first look at App Lab
After the restart you land in the actual App Lab interface. At the bottom left you see your connected board including terminal access, on the left the sections Apps, Inspirations, Examples and the Bricks Manager – Bricks are ready-made building blocks such as camera detection, LED matrix control or a local language model that you combine into your own apps. The App Lab Agent Mode is intriguing as well: you describe in plain text what the app should do, and the AI agent picks the Bricks and writes the code.

For a first quick win, have a look at the Inspirations: examples like “Color your LEDs” or “UNO Q Pin Toggle” run without any extra hardware and directly demonstrate the interplay of Linux web interface and microcontroller – you can control the on-board LED matrix from your browser in under a minute. To create and program an app of your own, follow the marble maze project.
Troubleshooting: common pitfalls
- Board does not show up: Nine times out of ten a charge-only cable is to blame – it must be a USB-C data cable. Otherwise try another USB port and restart App Lab.
- Linux does not detect the board: the udev rules are missing – download and run
post_install.sh, then reconnect the board (see above). - Board does not appear in Network Mode: App Lab discovers boards via mDNS – your firewall must allow UDP port 5353, and board and computer have to be on the same network.
- Update seems stuck: The container images are several hundred MB. The log window shows the progress (“Pulling image 1/5 …”) – only cancel if nothing moves there anymore.
What comes next
Your UNO Q is now ready to go. To get into the Debian system over SSH, copy files across and use the terminal, head over to The UNO Q’s Debian System: SSH, Terminal & More. The question we care about most – where can the UNO Q replace a Raspberry Pi, and where can’t it? – is answered in our hands-on review of the UNO Q against the Raspberry Pi 5. You’ll find every other article in the series, from the marble maze to the AI print watchdog, in the Arduino category. Have fun experimenting!
Frequently asked questions about the Arduino UNO Q
Yes. Sketches run on the STM32U585 microcontroller under Zephyr OS – from the code’s point of view little changes. You program it either through Arduino App Lab or, as before, through the Arduino IDE 2 or the Arduino CLI, both of which address the microcontroller side of the board directly.
Yes, in single-board computer mode: using a USB-C dock with Power Delivery you connect a monitor, keyboard and mouse directly and work on the board’s Debian desktop. Arduino recommends the 4 GB variant for this. There is also Network Mode, which lets App Lab discover the board on your local network without a USB cable.
For App Lab experiments driven from your PC, the variant with 2 GB RAM and 16 GB storage ($59 in the Arduino Store) is enough. If you want to use the UNO Q as a standalone mini computer or try local AI models, go for the 4 GB variant with 32 GB storage ($79, as of October 2026).
Mechanically and pin-wise yes – the UNO Q uses the classic UNO form factor including the headers. Mind the logic levels though: the I/O side of the UNO Q works with 3.3 V (the Qwiic connector is 3.3 V only as well). Older shields that strictly expect 5 V logic need a level shifter.
Partially. The UNO Q ships a real Debian Linux, but with four A53 cores and at most 4 GB RAM it is clearly weaker than a current Pi 5 – in return it has the real-time microcontroller on board that the Pi lacks. For the full comparison, see our hands-on review of the UNO Q vs. the Raspberry Pi 5.