Arduino UNO Q Project: Build a Marble Maze – a Deep Dive into the Real-Time Chip
Time for the first real Arduino UNO Q project on raspberry.tips – and we are starting with a game: a marble maze on the built-in LED matrix. You tilt the board, a glowing ball starts rolling, and you balance it past pulsing holes through three levels to the goal. Sounds like a toy? It is – but at the same time this project is the best deep dive into the part of the UNO Q that most reviews barely touch: the real-time microcontroller STM32U585. It is exactly this chip that makes the difference between a ball that steers buttery-smooth and one that stutters.
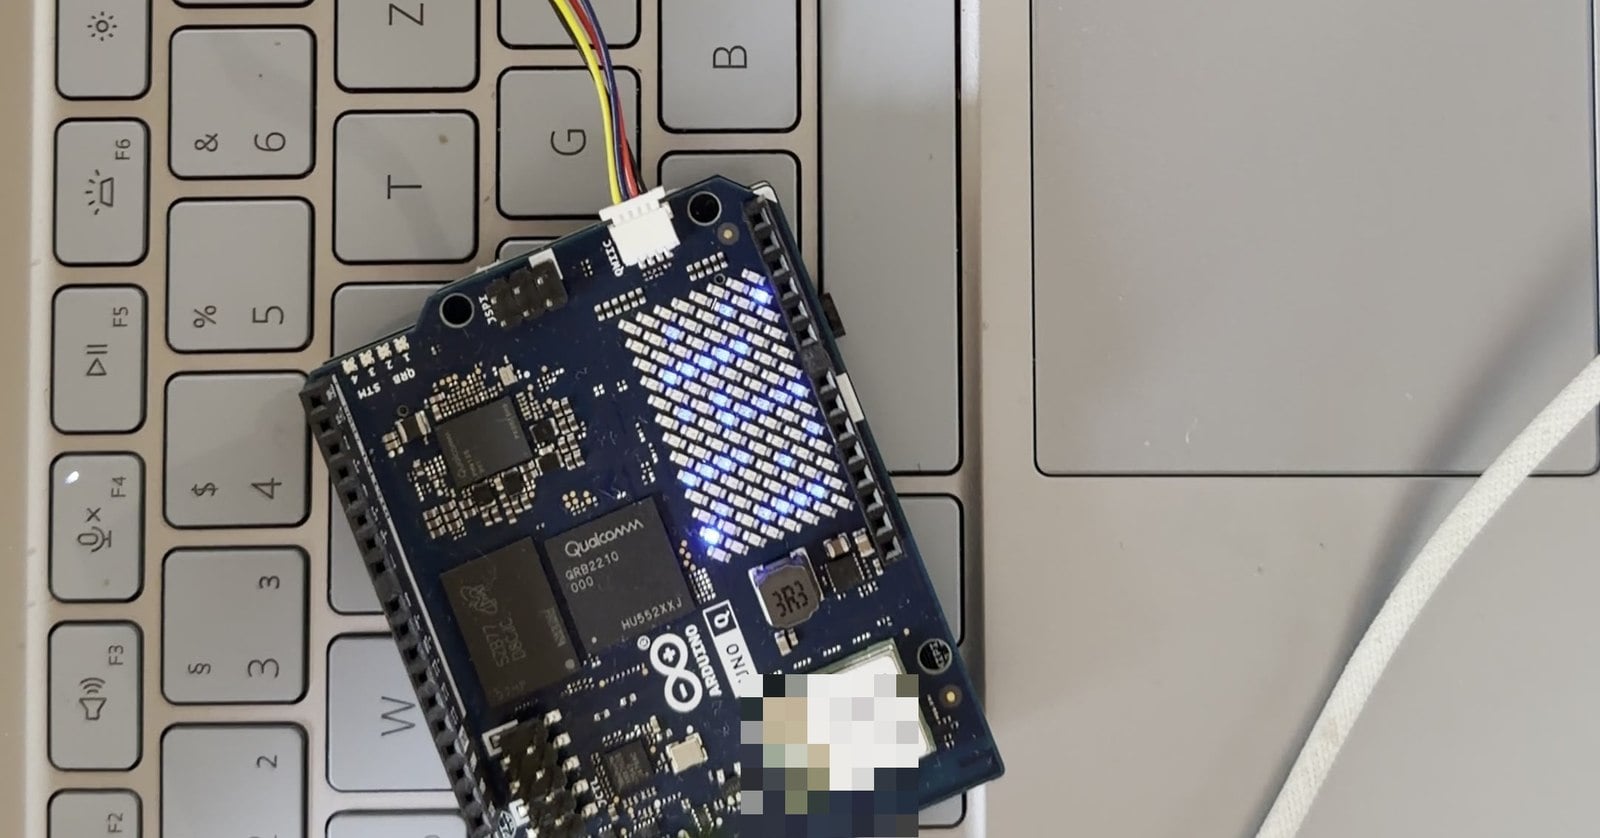
A tilt-controlled marble maze with three levels on the Arduino UNO Q’s 8×13 LED matrix. The tilt comes from a Modulino Movement (6-axis IMU, around $15) on the Qwiic port, and the entire game logic runs in real time on the STM32U585 – without touching the Linux side at all. Effort: about 30 minutes, no soldering, the complete code is on GitHub.
Why a marble game is the perfect test for the real-time chip
The UNO Q famously has two brains: the Qualcomm processor runs Debian Linux, while the STM32U585 (Arm Cortex-M33, up to 160 MHz, 2 MB flash, 786 kB SRAM) takes care of the electronics under Zephyr OS – pins, sensors, the LED matrix. “Real time” does not mean “particularly fast” here, but “guaranteed on time”: the microcontroller works through its loop at a steady pace. Zephyr is a lean real-time operating system: unlike Linux, it won’t push your sketch aside because something more important just came up.
For our game that means: the loop runs at about 50 ticks per second. Every tick reads the accelerometer, computes the ball physics and redraws the matrix, then the sketch waits 20 milliseconds. Since reading the sensor and drawing take almost the same time on every pass, the gap between two ticks stays practically constant. On a Linux system (whether the Linux side of the UNO Q or a Raspberry Pi) there is no such guarantee from user space: it mostly works, but as soon as the system gets busy, individual iterations arrive late – the ball jumps, the controls feel mushy. Annoying in a game, a real problem in a motor controller or control loop. This division of labour – Linux for the heavy lifting, microcontroller for everything time-critical – is the core idea of the UNO Q.
And the best part: the Linux side stays completely free. While the STM32 runs the game, the Qualcomm processor could analyse a camera image or serve a web page in parallel – more on that later.
The hardware: UNO Q and Modulino Movement
- an Arduino UNO Q – our guide Arduino UNO Q Setup covers the initial configuration
- an Arduino Modulino Movement* (6-axis IMU with LSM6DSOX) – if you don’t own a board yet, there is a UNO Q 4GB bundle with the Modulino Movement*
- the Qwiic cable from the Modulino box – plug it in, done, no soldering involved
The Modulino connects to the white Qwiic port on the board edge (marker 12 in our interactive board guide). The port sits on the I²C bus Wire1 and works at 3.3 V – both details that matter in the code in a moment. Place the Modulino flat next to or behind the board, or stick it right onto it with an adhesive pad: it measures the tilt, so it should move together with the board.

Creating the app and adding the library
In Arduino App Lab, create a new app via the plus next to “Apps”. You don’t have to type the code – it lives in our GitHub repository for the UNO Q series in the labyrinth folder. Two steps:

sketch/sketch.ino→ replace its content with sketch.ino- add the
Arduino_Modulinolibrary via the Add Sketch Library button (see below)
The second step is the one you would otherwise trip over for sure: without the library the build aborts with fatal error: Arduino_Modulino.h: No such file or directory. The app’s sketch.yaml cannot be edited directly in App Lab (as of 0.10.0) – instead, click the library icon (“Add Sketch Library”) in the left sidebar, search for Arduino_Modulino and add it. App Lab then writes it into the build profile itself – the app’s sketch.yaml looks like this afterwards:
profiles:
  default:
    platforms:
      - platform: arduino:zephyr
    libraries:
      - Arduino_Modulino (0.9.0)
      - STM32duino VL53L4CD (1.0.5)
      - STM32duino VL53L4ED (1.0.1)
      - Arduino_LSM6DSOX (1.1.2)
      - Arduino_LPS22HB (1.0.2)
      - Arduino_HS300x (1.0.0)
      - ArduinoGraphics (1.1.5)
      - Arduino_LTR381RGB (1.0.0)
default_profile: default
Then click Run – the first build downloads the libraries and takes a little longer. By the way, only Arduino_LSM6DSOX (the driver for the IMU inside the Modulino) actually does any work for the game; the rest is dependency baggage of the Modulino family.

How the game works
The levels: eight lines of text
In the sketch, each level is nothing more than eight text lines of 13 characters – one per matrix row: # is a wall, O a hole, S the start, G the goal and . free space.
{
  "S...#........",
  "..O.#..O.#...",
  "....#....#.O.",
  ".#..#.##.#...",
  ".#....#..#...",
  ".#.O..#..#.O.",
  ".#....#......",
  "....O.#....G.",
},
The physics: 50 times per second, tick by tick
The heart of the game is the loop on the STM32. Every tick it reads the acceleration from the Modulino, applies friction and moves the ball – with positions between the LED cells, so the motion looks smooth:
movement.update();
float ax = movement.getX();      // tilt in g
float ay = movement.getY();

vx = (vx + ax * ACCEL) * FRICTION;   // accelerate + friction
vy = (vy + ay * ACCEL) * FRICTION;

float nx = px + vx;                  // wall in the way? Bounce off
if (isWall((int)(nx + 0.5f), (int)(py + 0.5f))) { vx = -vx * 0.3f; }
else { px = nx; }
If the ball rolls onto a hole, it blinks three times and restarts at the beginning; if it reaches the goal, a winning wave sweeps across the matrix and the next level loads. The whole game – physics, collision, animations, three levels – is about 200 lines of code, and the 160 MHz Cortex-M33 is bored running it: the actual load is far below one percent of what the chip could do.
The display: eight brightness levels instead of on/off
A detail hardly anyone knows about the UNO Q matrix: it is not just on/off, it supports eight brightness levels per LED. With matrix.setGrayscaleBits(3) we unlock the mode and give each game element its own brightness – keeping everything distinguishable on a single-colour display:
- Walls: dimmed, permanently on
- Holes: pulse faintly – clearly visible, clearly “dangerous”
- Goal: pulses brightly
- Ball: full brightness

Calibration: if the ball rolls the wrong way
Depending on how the Modulino sits next to the board, the axes may be swapped or mirrored. Three constants at the top of the sketch handle that – on our setup INVERT_X = -1 was needed so that left actually means left:
const bool SWAP_AXES = false;  // true: left/right and forward/back swapped
const int  INVERT_X  = -1;     // sign of the left/right axis
const int  INVERT_Y  = 1;      // sign of the forward/back axis
Build your own levels
The best thing about the text level format: your own mazes are a two-minute job. Copy one of the three level blocks in the sketch, draw your own layout with #, O and . (8 lines of 13 characters, exactly one S and one G) and reload the app. Two tips from experience: keep corridors at least one cell wide – and play every level through in your head before you subject the ball to it. The first version of our third level had a path that only led through a hole – you only catch dead ends like that by tracing the route.
Outlook: the Linux side isn’t even playing yet
So far the game uses the microcontroller exclusively – the Debian side of the UNO Q sits idle. That is exactly where a second part gets interesting: via the bridge between the two worlds, the sketch could report every completed level to a Python script that builds a high-score web page from it – real-time game on the M33, web interface on the Qualcomm, both on one board. If that sounds interesting, tell us in the comments. You will find all articles of the series in the Arduino category and the complete code in the GitHub repository. Happy balancing!
Frequently asked questions
Because the microcontroller keeps a steady beat: the game loop runs about 50 times per second at even intervals, with no Linux scheduler getting in the way. Linux offers no such guarantee – under load, individual iterations arrive late and the controls feel mushy. This division of labour is the core idea of the Arduino UNO Q.
For the sketch from this article, yes – it uses the Arduino_Modulino library and its LSM6DSOX driver. With a different I²C accelerometer on the Qwiic port (3.3 V!) the principle works the same, but you have to adapt the sensor readout to its library.
Not one to one. The UNO R4 WiFi has a 12×8 matrix with a different driver and no Qwiic port on Wire1 like the UNO Q. The game logic could be ported, but the level format and matrix rendering would need adjustments.
In the sketch, every level is a block of eight text lines with 13 characters each: # for walls, O for holes, S for the start, G for the goal. Copy a block, change the layout, reload the app – and trace the path once in your head first, so no route leads through a hole.
Barely more than the board at idle – in our tests the UNO Q drew around 0.4 W idle and 1.4 W under full load in total. The game logic doesn’t even begin to stress the 160 MHz microcontroller.