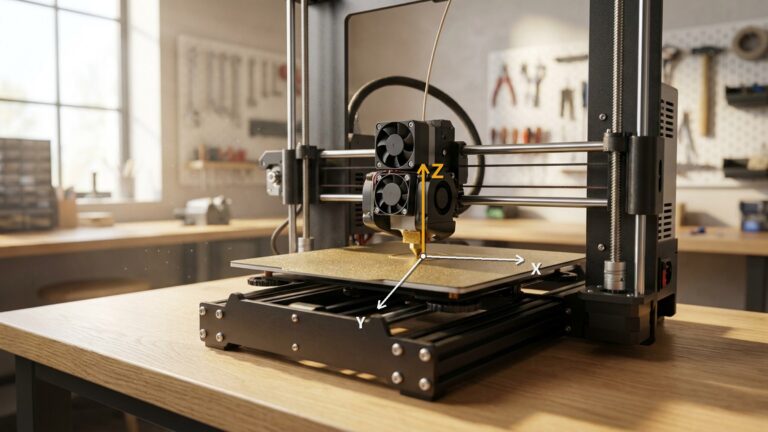
Elegoo Neptune 4 Plus Review: Assembly, First Prints and the ElegooSlicer
A 3D printer suddenly showing up on a Raspberry Pi blog needs a word of explanation. The short version: the two machines complement each other better than you might think. The Pi handles the web interface, the camera monitoring and the smart home integration while you print – and in return, the printer produces exactly the parts you can’t buy anywhere for your Pi projects: perfectly fitting cases, brackets for HATs and displays, mounting plates – and with a large build volume, even rack panels and cluster enclosures for your homelab.
That’s exactly why it’s the Elegoo Neptune 4 Plus and not the smaller model: 320 × 320 × 385 mm of build volume is far more than you need for a Pi case – but just right when a 10-inch rack panel is supposed to come off the bed in one piece. This article covers what’s in the box, assembly and initial setup. Everything that came after – Z-offset, the Home Assistant integration, a camera and our own Pi 5 case – has its own article; you’ll find them all linked at the end.
The specs at a glance
The Neptune 4 Plus* belongs to the large-format class and ships with Klipper-based firmware – that’s the key difference from classic Marlin printers and the reason the high speed figures are realistic at all.
| Build volume | 320 × 320 × 385 mm |
| Weight | 14.4 kg (net) |
| Firmware | Klipper-based, Elegoo’s own interface (test unit: V1.4.1.4, UI 1.2.22) |
| Hotend | all-metal, 60 W ceramic heater, up to 300 °C |
| Heated bed | up to 110 °C, single heating zone |
| Extruder | direct drive, 5.2:1 gear ratio |
| Nozzle | 0.4 mm (included) |
| Enclosure | none, open frame |
| Connectivity | Wi-Fi, USB stick, LAN |
| Where to buy | check availability* |
Two of these points matter more in everyday use than they look on the spec sheet. The open frame means: the hotend can reach the 300 °C needed for ABS, ASA and nylon, but without an enclosure, large parts in those materials still like to warp. For PLA and PETG – the day-to-day materials for most makers – it’s a non-issue. And you’ll definitely notice the 14-plus kilograms when setting it up: this printer needs a sturdy table and preferably a permanent home.
One point worth clarifying, because other reviews report it inconsistently: some articles claim the Neptune 4 Plus has a dual-zone heated bed that only heats the inner zone for small objects. A look at the Klipper configuration of my test unit shows: there is exactly one heating circuit – the dual-zone control is a feature of the smaller Neptune 4 Pro, not the Plus.
What’s in the box and assembly

The packaging is the first good impression: everything sits in precisely cut foam, the two Z profiles are packed separately, the printhead has its own cardboard tray, and there’s a round cutout for the filament spool. For a 14-kilogram machine shipped across the world, that’s not a given – nothing arrived bent or scratched.

All the tools you need are included: two screwdrivers, a set of hex keys, an open-end wrench and neatly sorted bags of screws. You won’t need anything from your own toolbox.
Assembly itself is manageable because the printer arrives largely pre-assembled. It essentially comes down to three steps:
- Place the gantry on the base and bolt it down
- Mount and connect the printhead
- Attach and wire the fan unit

I hardly needed a printed step-by-step manual – the included USB stick carries a genuinely well-made assembly video that shows every move. That beats any leaflet, because you can see exactly which way round the connectors go.
Elegoo has also published an assembly video: Neptune 4 Plus assembly on YouTube. It shows a slightly newer revision than my test unit, but the steps are the same. I’m deliberately linking rather than embedding the video – that way nothing loads from Google when you open this page.
From box to first print took me about an hour – calibration included. If you’ve never assembled a 3D printer before, plan for an hour and a half and take your time.
Initial setup

After powering on, the printer greets you with a tidy start screen on the touch display: Print, Prepare, Settings and Level, plus the current axis positions and nozzle and bed temperatures below. On the very first boot the system takes a moment and shows a note that it’s still starting up – just wait, that’s normal.
Calibration: the step that matters most

Level starts the automatic bed probing. The printer first asks for permission to home all axes – confirm with Confirm, and it will home and then probe the bed point by point.
Take your time with this step and let it run all the way through. On a bed this size, the odds that the corners sit slightly differently from the centre are far higher than on a 220 mm bed – and that’s exactly what later decides whether the first layer sticks across the whole surface.
Here’s a detail that isn’t in the manual but can be read from the printer’s Klipper configuration: the automatic probing measures 36 points across a 275 × 275 mm area – the outer two centimetres of the 320 mm bed are never probed. If you place a large part right up to the edge, you’re printing on uncalibrated territory. The practical rule: inset large-format prints a few centimetres, and put small parts in the centre anyway.
Setting up Wi-Fi

Under Settings you’ll find the Wi-Fi setup. The printer scans for nearby networks, you pick yours and enter the password on the on-screen keyboard. It then shows the assigned IP address – write it down, because network access and the Home Assistant integration will run through it later.

The exact IP is listed under About Machine, along with the build volume and the installed firmware version – which you’ll want when installing an update or searching a forum for a specific issue.
The first test print

Elegoo makes the start easy: the USB stick already contains a pre-sliced test model, a small Buddha figurine, prepared for the 0.4 mm nozzle and PLA. You don’t need to install a slicer or pick any settings to find out whether your assembly went right. And that’s exactly how it should be – the first print is a check of the build, not the moment for your own experiments.

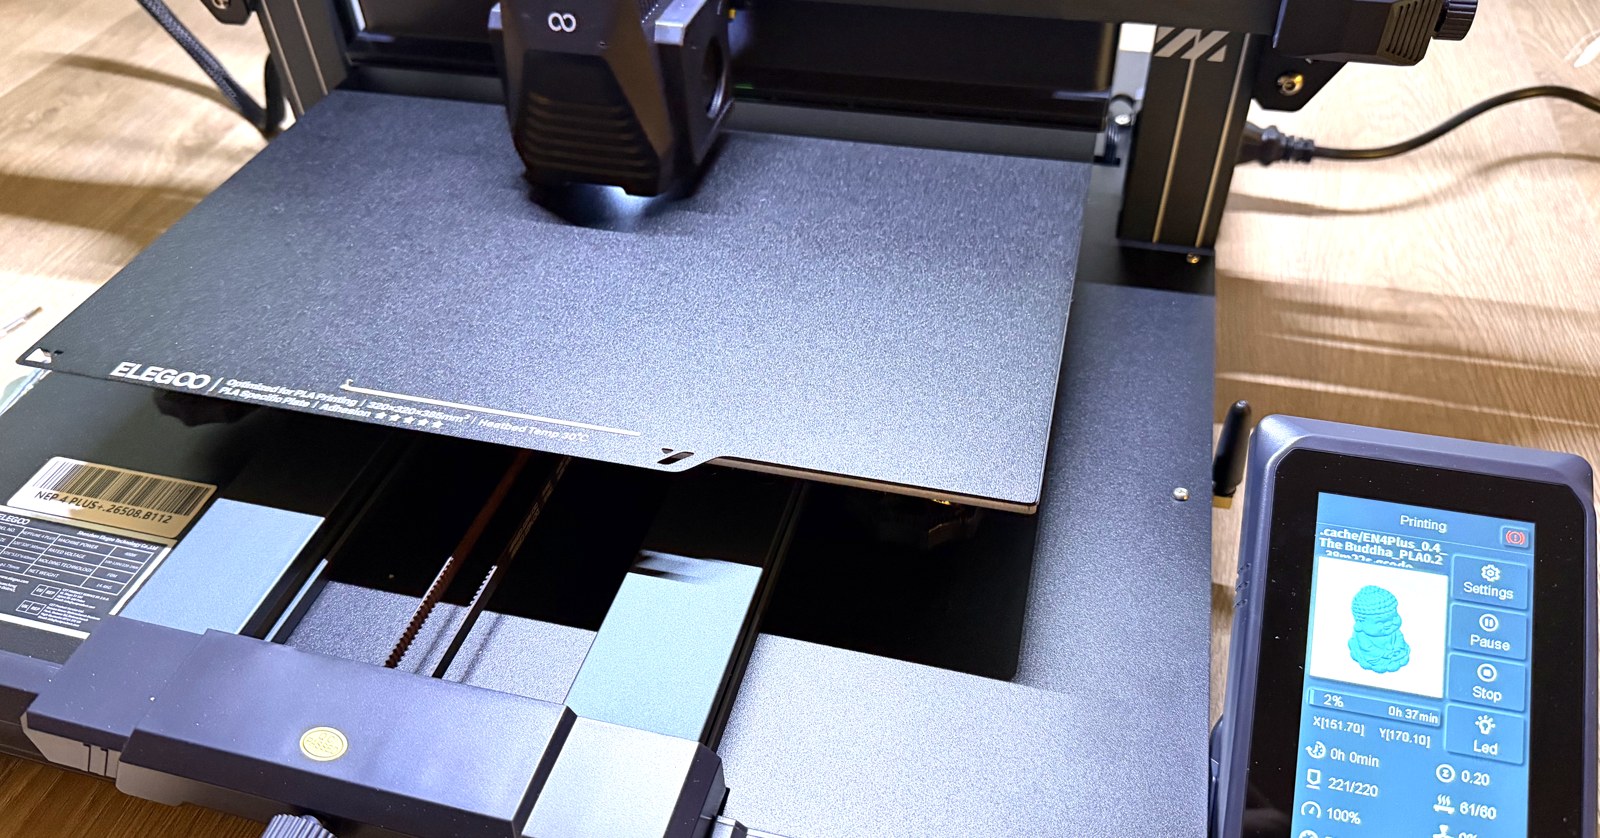
While the bed heats up and the print starts, the display shows progress, remaining time, temperatures and current speed. My figurine was done in just under 40 minutes.

The result is respectable for a first print with zero fine-tuning: clean layers, no visible gaps, and even the fine structures on the head and robe came out sharp. The included filament is a gradient material shifting from white to yellow – it looks pretty on the figurine but makes judging the surface a bit harder than a solid colour would.
What’s still open at this point: a pre-sliced vendor model is a friendly test. It only gets interesting with your own models, your own slicer settings and, above all, large parts that actually use the bed. That’s exactly where the next section picks up.
Your own slicer: setting up ElegooSlicer
A pre-sliced vendor model is nice confirmation, but for your own parts you need a slicer – the program that turns a 3D file into movement commands for the printer. Elegoo provides the ElegooSlicer (download on GitHub), and it’s no longer a Cura derivative but based on OrcaSlicer. That’s good news, because it fits a Klipper printer much better – but it also means many settings have different names than Cura veterans expect.

After installation, a wizard walks you through three steps: login region first, then printer selection, filaments last. You don’t need an account for local use – skip it.

In the printer selection, pick the Neptune 4 Plus – the matching profile ships with the slicer, nothing to import. In the filament selection, tick what you actually use; the list can be extended any time.
Connecting the printer – don’t rely on auto-discovery

Here was the first little stumbling block: under Device the slicer scans the network for printers on its own – and it did not find my Neptune 4 Plus, even though it sits in the same Wi-Fi. No drama, because manual setup works instantly:
- Device → Add printer → tab Add Manually
- Select Elegoo and Elegoo Neptune 4 Plus as the model
- Enter the IP address shown under About Machine at Hostname, IP or URL
- Leave the Access Code field empty
The fact that this works without an access code has a reason I’ll come back to later: internally the printer runs Klipper and exposes its API on the local network without authentication. Convenient for setup – but something you should know.
Switch on expert mode, or you’ll search in vain

By default, ElegooSlicer shows only a handful of settings. If you go looking for perimeters or top layers, you simply won’t find them – they’re hidden. Next to the Process entry sits a small toggle between Basic, Advanced and Expert. Only the last level shows everything.

Second terminology stumble: perimeters are called “wall loops” here and live in the Strength tab, not under Quality. If you can’t find something, use the magnifier at the top right of the process settings – the full-text search across all tabs saves a lot of clicking.
For a sturdy case part I changed very little on the stock profile 0.20mm Standard @Elegoo N4Plus 0.4 nozzle:
| Tab | Setting | Value |
|---|---|---|
| Quality | Layer height | 0.2 mm |
| Strength | Wall loops (= perimeters) | 3 |
| Strength | Top / bottom shell layers | 5 / 4 (default) |
| Strength | Sparse infill density | 20 % |
| Others | Brim type / brim width | Auto / 5 mm |
| Support | Supports | off |
Three wall loops instead of the usual two are deliberate: the case part has a narrow lip, and with only two walls it comes out flimsy. And the brim is no beginner’s crutch: Elegoo slices its own demo model with a 5 mm brim – on this machine it’s evidently part of the recipe. It snaps off cleanly after the print.
Three traps when picking profiles
My first prints of my own walked straight into several traps that turned out to be entirely avoidable – here they are, so you can skip them:
- The nozzle size is encoded in the profile name. The process list shows entries like “0.12mm Draft @Elegoo N4Plus 0.2 nozzle” and “0.12mm Fine @Elegoo N4Plus 0.4 nozzle” right next to each other. The printer ships with a 0.4 mm nozzle – if you only look at the layer height and grab the 0.2-nozzle profile, you get extrusion lines half as wide and end up puzzled by a patchy first layer.
- The filament profile controls more than temperature. “Elegoo PLA” and “Elegoo PLA Matte*” don’t differ on nozzle and bed (both 220/60 °C), but they do on part cooling: 100 percent versus 60–80 percent fan. More cooling means more shrinkage stress – on long, narrow parts exactly the difference between sticking and peeling off. Pick the profile that actually matches your spool.
- The plate type is its own setting. Next to the printer selection sits a dropdown for the build plate – for the stock plate it should say High Temp Plate.
One reassuring find from comparing the profiles: Elegoo keeps the first layer identical across all quality levels – 0.2 mm high, 0.5 mm wide, 50 mm/s at gentle acceleration, whether you print 0.2 or 0.12 mm layers. Printing finer is no riskier than the standard on this machine. If the first layer won’t stick, it’s almost never the quality level. Check which side of the build plate is facing up first – it is coated on both sides, and the two sides are meant for different materials. Why that is such a reliable trap is further down. If the side is right and it still won’t hold, then it is the plate itself: wash it with dish soap and warm water (isopropyl alcohol tends to smear skin oils around rather than remove them) and re-level.
Slice and print – no USB stick required

One click on Slice plate and the preview shows the result layer by layer, colour-coded by line type. More important are the numbers at the bottom right: 28 minutes 49 seconds total and 7.37 grams of filament – that’s 2.45 metres, or pennies in material cost. The 3D printing cost calculator shows what a part really costs once electricity, wear and failed prints are included. For a test part that saves you hours of failed prints, that’s a good trade.

And now the best part: you don’t need the USB stick anymore. Via Print, the slicer sends the file straight to the printer over Wi-Fi. The dialog shows your Neptune with IP address and current status, plus two toggles – Upload and switch to printer page and Upload and Print. If you just want to upload and start at the machine later, leave both off.

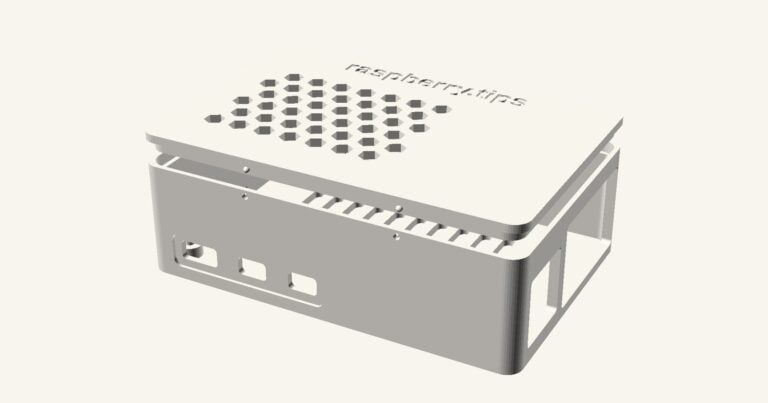
This is what a result from your own slicing looks like – a self-designed case for the Raspberry Pi 5. The design, the calibration and the free download of the print files are all in Raspberry Pi 5 Case 3D Print.
Smoother surfaces: the settings that actually matter
My first reflex for better surfaces was “finer layers”. The effect was sobering: on a boxy part made of vertical walls and flat plates, 0.12 mm looks almost exactly like 0.2 mm. Fine layers smooth slopes and curves – the Buddha figurine benefits, a case barely does. The direct comparison of two identical parts shows it:

What actually shows on straight parts:
- Outer wall speed from 160 down to 60 mm/s – the stock profile is tuned for speed, not looks
- Outer wall acceleration down to 2000 mm/s² – removes the ripples behind edges and corners (ringing) that the fast drivetrain otherwise produces
- Seam position set to “Aligned” – the little blobs at the layer change line up in one vertical seam you can rotate into a corner, instead of being scattered across every wall
- Ironing (Quality tab, type “Top surfaces”) – the nozzle re-traces top faces with a minimal flow; the single biggest effect for visible top surfaces and embossed lettering
- Matte filament – scatters light and hides layer lines; glossy material shows every single one
And once, it’s worth visiting the Calibration menu at the top of the slicer: the pressure advance test is the biggest lever against bulging corners on a Klipper printer – twenty minutes, then it applies to every part. Once your settings feel right, save them as your own preset via the disk icon – otherwise they’re gone with the next profile switch.
Filament: what really matters
A few closing words on material, because more failed prints start here than at any slicer setting. The Neptune 4 Plus prints standard 1.75 mm filament – you’re not locked to any brand. More important than the manufacturer is the condition of the spool: moisture is the biggest enemy. Filament absorbs water from the air, and you’ll recognise a damp spool by fine strings between parts, rough foamy surfaces and a quiet crackling at the nozzle as the water evaporates.
PLA is the most forgiving and tolerates a few weeks of open storage. For this test I printed Elegoo PLA Matte in beige* – matte filament has the pleasant side effect of hiding layer lines much better than glossy material. PETG and TPU are more sensitive, and nylon is practically unprintable without drying.
Two small investments save a lot of frustration here: opened spools belong in vacuum bags with silica packs* rather than on an open shelf – or in a DIY dry box with a hygrometer. And if you print PETG or TPU regularly, a filament dryer* takes the worry away completely – warm the spool at 50 to 60 °C for a few hours before printing, done. For pure PLA printing you don’t strictly need either; for anything beyond it, it’s money well spent.
Five stars that lead you astray: the two sides of the build plate
The mistake that cost me two weeks after the build had nothing to do with the printer. The very first lines kept peeling off. PLA worked most of the time, PETG never held once. I tried everything the forums suggest: washed the plate, re-levelled, adjusted the nozzle gap, raised the bed temperature, added a brim. Every time a little better, never good.
The answer had been printed on the front edge of the plate the whole time, I simply never read it. The supplied spring steel sheet is coated on both sides, and the two sides are meant for different materials. And the labelling is exactly what leads you astray:
| Label | fine side | textured side |
|---|---|---|
| Name | PLA Specific Plate | Textured PEI Plate |
| Materials | Optimized for PLA Printing | PLA / TPU / ABS / PETG / Carbon-Fiber |
| Adhesion | ★★★★★ | ★★★ |
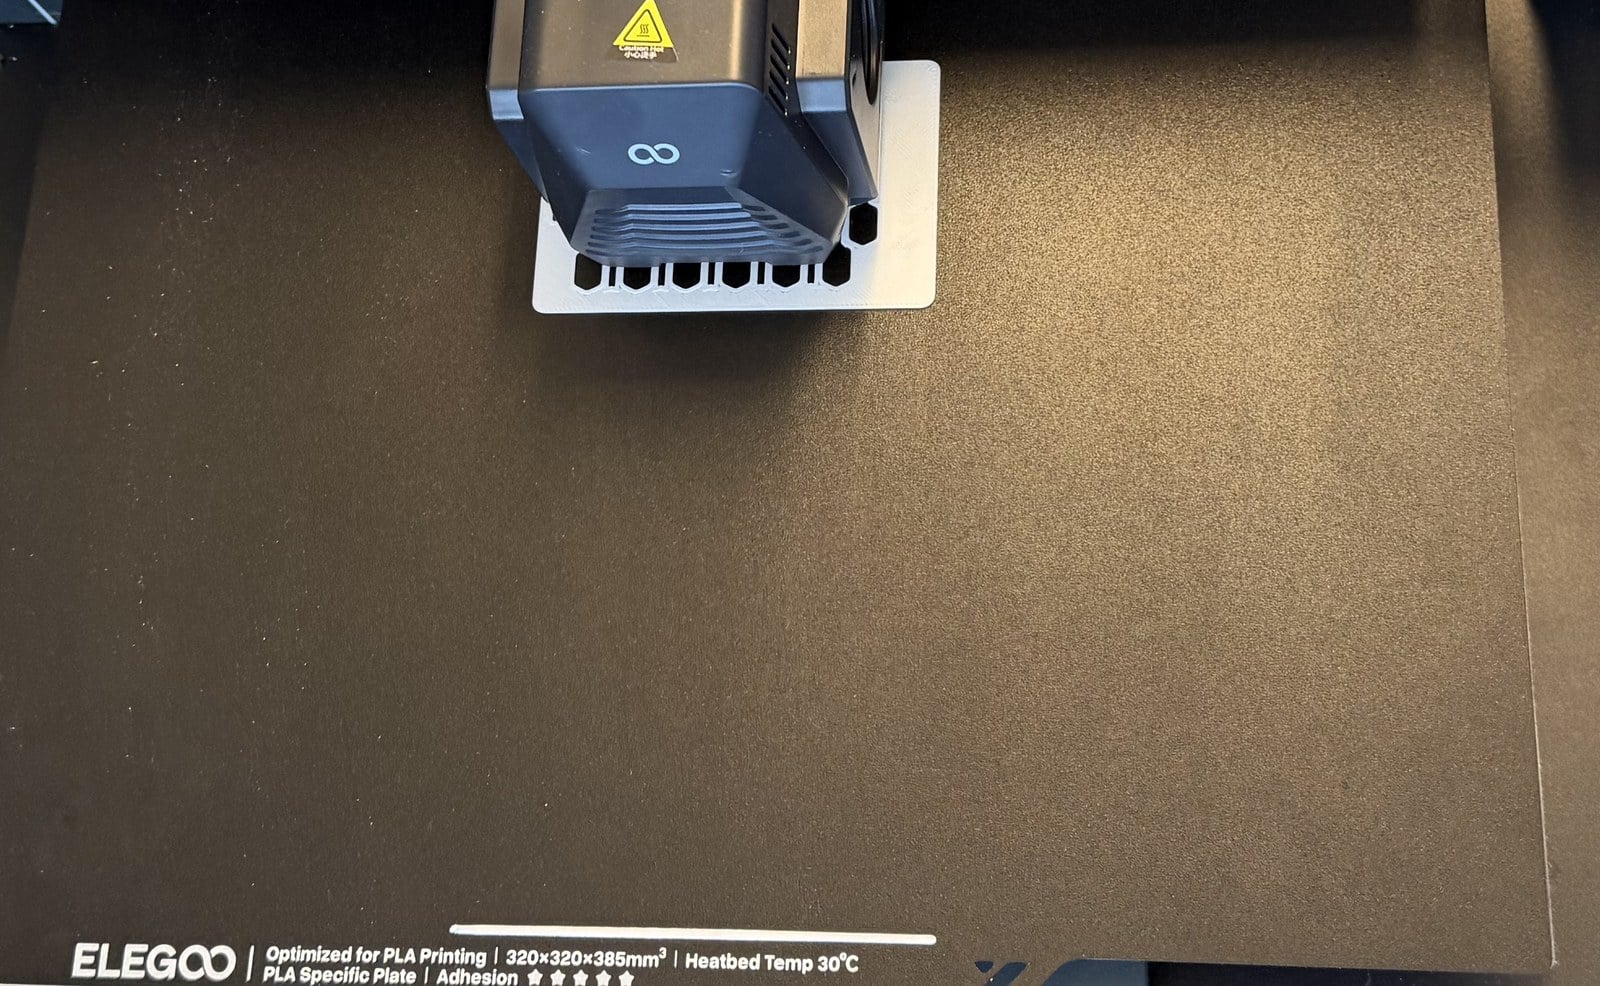
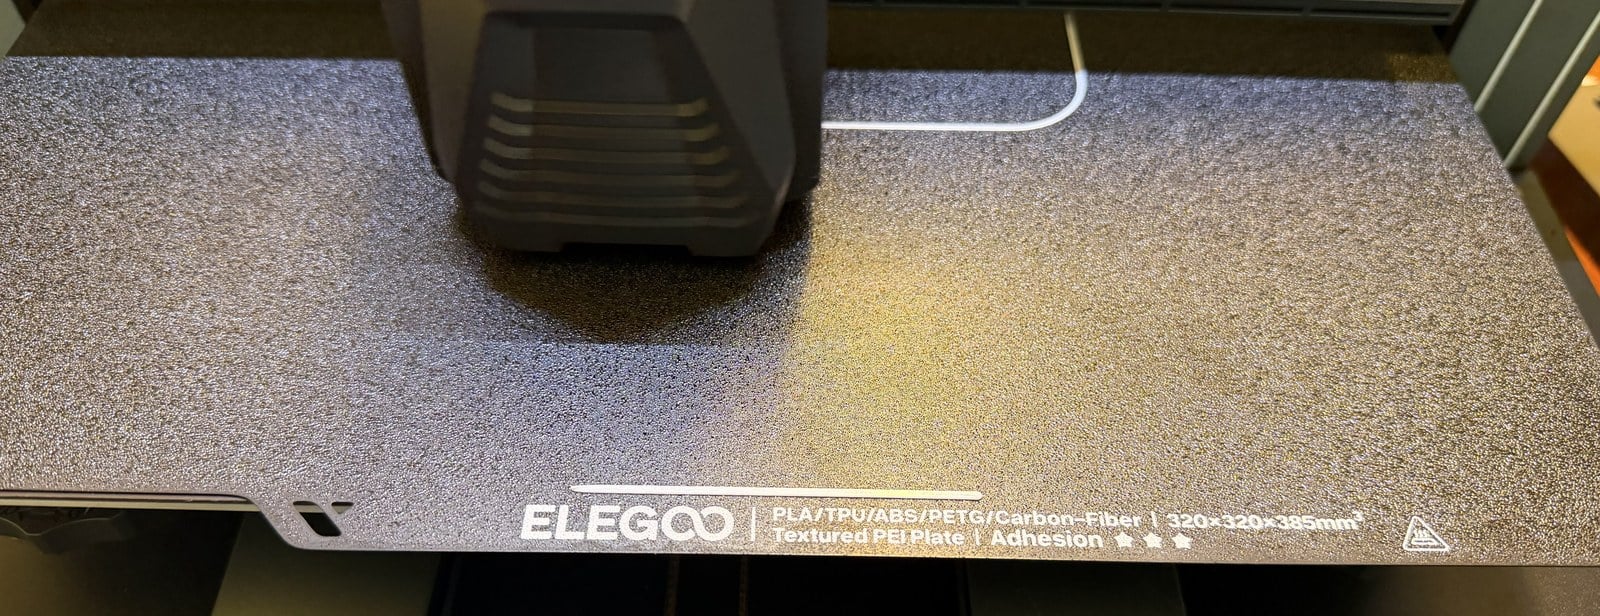
The side carrying five out of five stars is the restricted one. PETG, ABS, TPU and carbon appear exclusively on the three-star side. The rating refers to adhesion strength for the material each side is designed for – but it reads like a school grade, and nobody voluntarily picks three stars over five. So for two weeks I had been printing PETG on a plate made for PLA.
Elegoo does document this: the product page for the dual-sided build plate describes both surfaces, including the note that the PLA side adheres particularly strongly even at low bed temperatures and produces smoother bottom surfaces. It is just that nobody reads the product page of a part that ships with the printer anyway.
The label on the PLA side calls for a 30 °C bed, while the supplied slicer profile runs 60 °C. I have always printed at the profile’s 60 °C.
So if your prints will not stick: look at the label along the front edge of the plate first and check whether your material is listed there at all. It takes ten seconds and may save you two weeks of looking in the wrong places.
Which accessories are worth printing first is covered in Neptune 4 Plus printable upgrades: 5 useful parts the printer makes itself.
Verdict so far
Elegoo nailed the onboarding: well packed, complete tools included, a comprehensible assembly video, one hour to the first print and a result you can show around. For anyone assembling their first 3D printer, this is a friendly experience.
The interesting questions came afterwards – and each of them now has its own article:
- Setting the Z-offset: why the first print fails and how to get the first layer right
- Connect your 3D printer to Home Assistant: Klipper and Moonraker on the network and in your smart home, no modifications needed
- Raspberry Pi 5 case 3D print: the real acid test, with our own design and a free download
- Neptune 4 Plus printable upgrades: five useful parts the printer makes itself
- Camera and timelapse: webcam setup, live view in Fluidd and timelapses with a Raspberry Pi
- Adding the BTT Eddy Duo: bed mesh in 13 seconds, zero point without a Z offset
- Filament storage: build a dry box with a hygrometer
Have fun assembling – and take your time with the levelling.