Raspberry Pi GPS Time Server with PPS and chrony
A Raspberry Pi normally gets the time from the internet, so without a connection it has no idea what time it is after booting. The Pi 1 to 4 have no real-time clock, and the Pi 5’s built-in clock only keeps running while the power is off if a battery is plugged into its J5 connector. A GPS module solves this, because GPS satellites broadcast very precise time. This guide walks you through setting up a GPS time server using the module’s PPS signal and the chrony time service, then pointing the other devices on your network at it.
In short
With a GPS module that outputs a PPS signal and chrony, your Raspberry Pi becomes a time server that delivers accurate time to your home network, even without internet access.
- What you need: a GPS module or GPS HAT with a PPS pin you can connect to. Many cheap GPS boards don’t have one.
- Watch out: gpsd has to run with the
-noption and be enabled at boot. Otherwise chrony never gets the time. - Pi 5 and Pi 500: the serial port is
/dev/ttyAMA0, and we recommend thepps-rp1overlay for PPS. - Home network: you point other Pis at your time server with a small extra config file (
NTP=).
NMEA is the text a GPS module sends over the serial port every second, containing the time and position. These sentences arrive with a variable delay, and according to the chrony documentation the time you get from them is only accurate to within a few milliseconds.
PPS (pulse per second) is an electrical pulse the module sends at the exact start of each second once it has worked out its position (a fix). It’s far more accurate, but it doesn’t tell you which second is starting. That’s why chrony uses both: the time of day from NMEA and the precise start of the second from PPS.
Stratum describes how far a time server is from the reference clock. GPS time counts as stratum 0, so your Pi with PPS reports itself as stratum 1. Each server that takes its time from another server adds 1 to that number.
Choosing a GPS Module: Wired or HAT
What matters is a PPS pin you can connect to. The GPS chip itself almost always produces the pulse, but many boards only route it to an LED. That’s the case with many GY-NEO6MV2 boards and with NEO-M8N modules made for drones, which only break out VCC, GND, TX, RX and sometimes a compass. So check the connector labels before you buy: one of them needs to say PPS, 1PPS or TP (timepulse).
There are two options, and the setup only differs in the GPIO number:
| Wired module | GPS HAT | |
|---|---|---|
| Example | Waveshare L76K GPS module* (not the HAT) | Adafruit Ultimate GPS HAT* |
| Connection | five wires to the GPIO header, cable and antenna included | plugs onto the Pi, but you have to solder its connector on first |
| PPS pin | GPIO 18 (pin 12) | GPIO 4 (pin 7), hard-wired |
| Best for | a cheaper start and placing the antenna where you like | a tidy build with no loose wires |
A word of warning about the Waveshare L76K HAT: it looks similar, but according to its schematic the PPS signal only goes to an LED, not to a GPIO pin, so it won’t work for a time server. For general GPS module wiring and how to display your position, see our guide How to Use a GPS Module with a Raspberry Pi.
What You Need
- A Raspberry Pi* with a 40-pin header running Raspberry Pi OS, such as a Pi Zero 2 W, Pi 3, Pi 4, Pi 5 or Pi 500.
- A GPS module with a PPS pin, such as the Waveshare L76K*, or the Adafruit Ultimate GPS HAT* plus a soldering iron* to attach its connector.
- A clear view of the sky for the antenna, for example on a windowsill. Behind walls or metal, the module often can’t get a signal.
- Access to the Pi’s terminal, either directly or over SSH.
Step 1: Connect the GPS Module
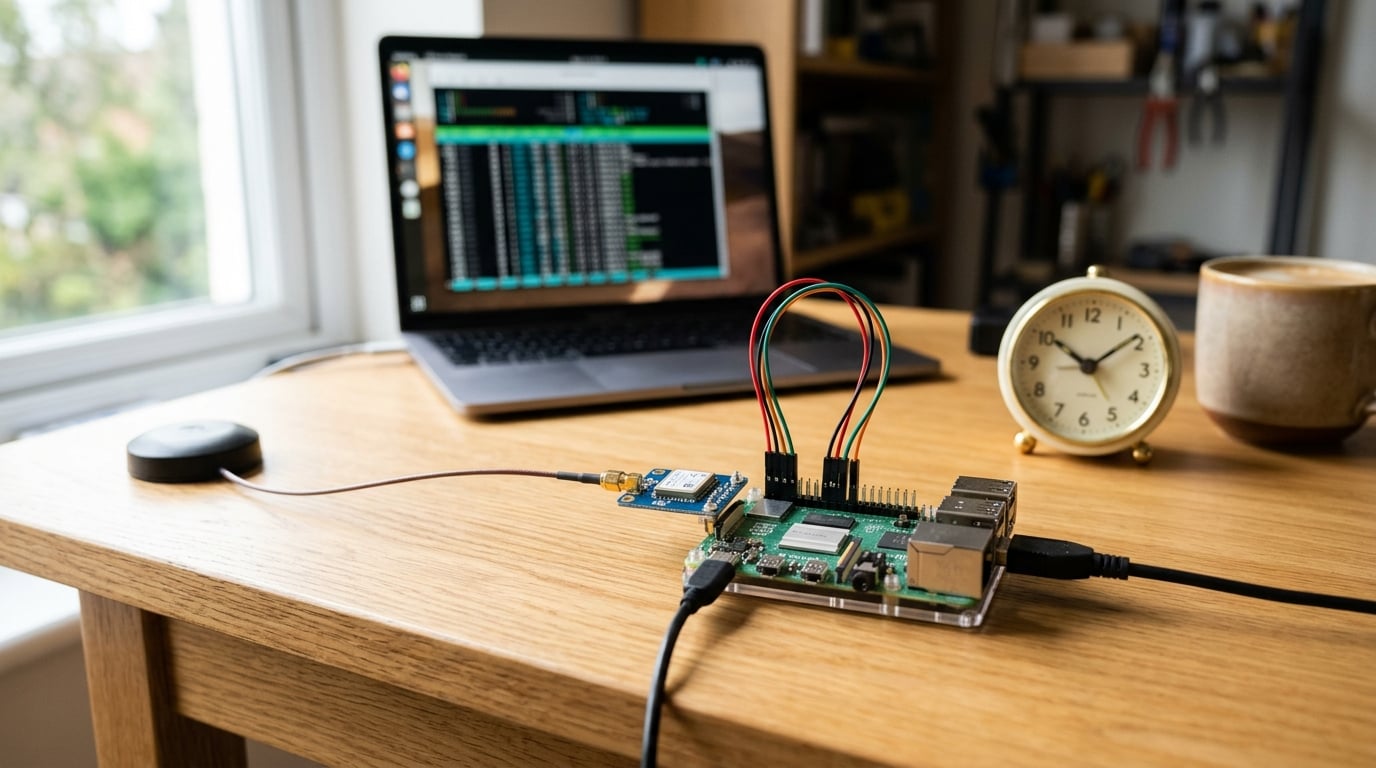
Shut down the Pi before you wire anything. If you have the Adafruit HAT, skip to the last paragraph of this step. Connect the Waveshare L76K with the supplied cable as shown below. TX and RX cross over: the module’s transmit pin goes to the Pi’s receive pin and vice versa.
| Module pin | Raspberry Pi | Purpose |
|---|---|---|
| VCC | Pin 1 (3.3 V) | Power |
| GND | Pin 6 (GND) | Ground |
| TX | Pin 10 (GPIO 15, RXD) | Data from module to Pi |
| RX | Pin 8 (GPIO 14, TXD) | Data from Pi to module |
| PPS | Pin 12 (GPIO 18) | Pulse per second |
The module runs on the 3.3 V from pin 1, which keeps its signals at the level the Pi’s GPIO pins are designed for. Waveshare’s own Pi guide leaves the PPS pin unconnected, but for a time server you need it. Our interactive pinout shows where each pin is. The layout is the same on every model with a 40-pin header.
The Adafruit HAT plugs straight onto the Pi. It uses the same serial port but sends the pulse to GPIO 4. Wherever the next steps say GPIO 18, use 4 instead if you have the HAT.
Step 2: Set Up the Serial Port and gpsd
First, enable the serial port on the GPIO header. Start the configuration tool:
sudo raspi-configChoose 3 Interface Options → I6 Serial Port. Answer No when it asks whether a login shell should be accessible over serial, and Yes when it asks whether to enable the serial port hardware. Select Finish and reboot. The login shell has to go, otherwise system messages end up on the same serial port as the GPS data.
Next, install gpsd. This service reads the module and passes the time on to chrony:
sudo apt update
sudo apt install gpsd gpsd-clients
Open its settings file:
sudo nano /etc/default/gpsdChange the DEVICES and GPSD_OPTIONS lines so the file looks like this. On a Pi 5 or Pi 500, use "/dev/ttyAMA0" for DEVICES:
DEVICES="/dev/serial0"
GPSD_OPTIONS="-n"
USBAUTO="true"- DEVICES is the serial port. On every model before the Pi 5 it’s
/dev/serial0, while on the Pi 5 and Pi 500 the port on the GPIO header is always/dev/ttyAMA0. - -n makes gpsd start reading the module right away. Without it, gpsd waits for a client program to connect first. chrony isn’t a client, it just waits for gpsd to send it the time, so without
-nit would never get any data. The gpsd time service HOWTO calls this option out for exactly that reason. - USBAUTO stays as it is. It lets gpsd also pick up a USB GPS receiver when you plug one in.
Save with Ctrl+O and Enter, then exit nano with Ctrl+X. Out of the box, Raspberry Pi OS only starts gpsd when a program asks for it, so the first command below makes sure gpsd runs every time the Pi boots. Then restart gpsd and use cgps to check whether the module can see satellites:
sudo systemctl enable gpsd
sudo systemctl restart gpsd
cgps
Once the Status line shows 3D FIX or 2D FIX, the module has found its position. The first fix can take a few minutes. If it stays on “NO FIX”, the antenna needs a clearer view of the sky. Press q to quit cgps. Our GPS module guide has more help with getting a first fix and with data that doesn’t arrive at all.
Step 3: Enable and Test PPS
To make the Pi detect the pulse on GPIO 18, you load an overlay. Open the boot configuration:
sudo nano /boot/firmware/config.txtOn every model before the Pi 5, add this line at the end of the file:
dtoverlay=pps-gpio,gpiopin=18The same line also works on the Pi 5 and Pi 500, but there’s a dedicated overlay for their RP1 chip that supports extra chip features such as a Schmitt trigger on the input. That’s the one we recommend, and it also uses GPIO 18 by default:
dtoverlay=pps-rp1The two overlays name the pin setting differently: gpiopin= for pps-gpio and pin= for pps-rp1. Both take the GPIO number, not the physical pin number. So with the Adafruit HAT, the line is dtoverlay=pps-gpio,gpiopin=4, or dtoverlay=pps-rp1,pin=4 on a Pi 5 or Pi 500. Save the file and reboot with sudo reboot.
After the reboot, there’s a new device called /dev/pps0. Install the PPS tools and test the pulse:
sudo apt install pps-tools
sudo ppstest /dev/pps0
When the module has a fix, a new line appears every second with assert, a timestamp and a counter after sequence. The digits after the decimal point stay almost the same from one line to the next. Press Ctrl+C to stop the test. If you get a timeout message instead of new lines, the pulse isn’t arriving. See Troubleshooting for what to check.
Step 4: Install and Configure chrony
Out of the box, Raspberry Pi OS keeps its clock in sync with systemd-timesyncd. It only talks to time servers on the network and can’t use GPS or PPS. chrony can do both and also works as a time server for other devices. When you install it, apt removes systemd-timesyncd automatically, because the two packages can’t be installed side by side:
sudo apt install chronyYou need two things for the configuration. The first is your home network, which you can work out from the Pi’s IP address:
hostname -ITake the first address, replace its last number with 0 and add /24. So 192.168.1.10 means your network is 192.168.1.0/24. The second is your gpsd version:
gpsd -VFrom version 3.25 onwards, chrony gets the NMEA time from gpsd through a socket, as shown below. If your system has an older version, replace the SOCK line with refclock SHM 0 offset 0.5 delay 0.1 refid NMEA noselect.
Your settings go into a separate file in /etc/chrony/conf.d. chrony reads it in addition to the main file, /etc/chrony/chrony.conf, and a later package update won’t overwrite it. Create it:
sudo nano /etc/chrony/conf.d/gps.confAdd these four lines. Put your own network after allow. On a Pi 5 or Pi 500, the socket name uses ttyAMA0 instead of serial0, so that line starts with refclock SOCK /run/chrony.clk.ttyAMA0.sock:
refclock PPS /dev/pps0 lock NMEA refid GPS
refclock SOCK /run/chrony.clk.serial0.sock offset 0.5 delay 0.1 refid NMEA noselect
local stratum 10
allow 192.168.1.0/24
The two refclock lines come from the chrony documentation on gpsd:
- PPS reads the pulse straight from
/dev/pps0.lock NMEAties it to the NMEA time, so chrony knows which second is starting. - SOCK gets the NMEA time from gpsd.
offset 0.5compensates for the delay of the serial data, andnoselectmakes sure chrony never sets the clock from this less accurate source on its own. The name in the SOCK line has to match the device inDEVICES, because that’s the name gpsd looks for. - local stratum 10 keeps time service running for your network when neither GPS nor the internet is available, so your devices at least stay in step with each other. If the Pi boots with no fix and no internet, though, it hands out a wrong time until the module gets a fix.
- allow lets devices on your network ask the Pi for the time. By default, chrony doesn’t answer requests from other devices.
You can leave the internet time servers in the main file as they are. When you’re online they act as a fallback, and when you’re offline they do no harm. If the Pi restarts without internet access, chrony sets the clock as soon as the module has a fix again.
gpsd connects to the socket that chrony creates when it starts, so restart chrony first, then gpsd. When the Pi boots, systemd starts them in the right order automatically.
sudo systemctl restart chrony
sudo systemctl restart gpsd
Step 5: Check the Sync
After the restart, chrony needs a few minutes before it trusts the time sources, so GPS won’t have a * straight away. To see where things stand, run:
chronyc sourcesEach line is one time source. The Reach column shows whether data has been arriving from that source recently. For NMEA, it should be above 0 after about a minute, and Last sample shows the measured offset. For GPS and NMEA, the first character is #, which marks a locally connected reference clock. The second character shows how chrony is using the source:
*next to GPS: chrony is setting the clock from the PPS signal.?next to NMEA: that’s normal, becausenoselectmakes this source a helper for PPS only.x: chrony considers the source a falseticker, because it disagrees too much with the others.+: the source is combined with the selected one.-: it’s usable but not in use right now. You’ll often see both on the internet time servers.
For more detail, run:
chronyc trackingIf Reference ID shows GPS and Stratum shows 1, your Pi is running as a GPS time server. Last offset shows how far the clock was from GPS time at the last measurement. If GPS still has no * after ten minutes, head to Troubleshooting.
Step 6: Use the Pi as a Time Server on Your Network
To make sure other devices can always find the Pi, set up a DHCP reservation in your router so the Pi always gets the same IP address. The examples below use 192.168.1.10. If you’ve installed the ufw firewall on the Pi, allow the time service through, otherwise the requests won’t get in:
sudo ufw allow 123/udpOther Raspberry Pis
Your other Pis still run systemd-timesyncd. On each of them, create a small extra file:
sudo mkdir -p /etc/systemd/timesyncd.conf.d
sudo nano /etc/systemd/timesyncd.conf.d/60-gps-time-server.conf
Add these two lines with your time server’s address and save the file:
[Time]
NTP=192.168.1.10
Restart the service and check that it’s using your Pi as its server:
sudo systemctl restart systemd-timesyncd
timedatectl timesync-status
The Server line should show your time server’s address. On devices that run chrony, add the line server 192.168.1.10 iburst to a file in /etc/chrony/conf.d instead.
Windows PCs
Press Windows+R, type timedate.cpl and open the Internet Time tab. Click Change settings, enter the Pi’s IP address as the server, keep “Synchronize with an Internet time server” ticked and click Update now. After that, Windows only syncs every so often rather than continuously.
Routers, Switches and NAS Devices
Many routers, network switches and NAS devices have a field for a custom time server or NTP server in their settings. Enter the Pi’s IP address there.
Troubleshooting
| Problem | Solution |
|---|---|
| cgps stays on “NO FIX” | The antenna needs a clear view of the sky. Behind window glass, the first fix can take longer. |
| cgps shows no data at all | Check DEVICES in /etc/default/gpsd (/dev/ttyAMA0 on a Pi 5 or Pi 500) and make sure TX and RX are crossed over. The serial port must be enabled in raspi-config. |
/dev/pps0 is missing | The overlay didn’t load. Check the line in /boot/firmware/config.txt and reboot. dmesg | grep -i pps shows whether the kernel created the PPS device. |
| ppstest reports a timeout | The module only outputs PPS once it has a fix. If it does have a fix, the PPS wire is probably on the wrong pin, or the board doesn’t break out PPS at all. |
NMEA shows Reach 0 and no Last sample value in chronyc sources | gpsd isn’t providing the time. Run systemctl status gpsd to check that it’s running, make sure GPSD_OPTIONS contains -n, and check that the socket name in gps.conf matches the device name in DEVICES. Then restart chrony first and gpsd second. |
GPS never gets a * in chronyc sources | chrony only pairs PPS with NMEA if the two are no more than 0.4 seconds apart once the offset is applied. Let the Pi run once with internet access so its clock is right, then check the Last sample value for NMEA in chronyc sources (in seconds). Add it to the offset in the SOCK or SHM line of gps.conf. For example, an offset of 0.5 and a Last sample of −0.37 give a new offset of 0.13. Then restart chrony. |
Frequently Asked Questions
The time in the GPS module’s NMEA data is only accurate to within a few milliseconds, according to the chrony documentation, because it arrives over the serial port with a variable delay. The PPS signal marks the start of each second with an electrical pulse and is far more accurate.
It depends on the module, the Pi and your build, so there’s no single figure. To see how far your Pi’s clock currently is from GPS time, run chronyc tracking and look at the Last offset line.
Yes. GPS satellites broadcast their time independently of the internet. As long as the antenna has reception, the Pi sets its clock from it and passes the time on to your network.
Check the connector labels for PPS, 1PPS or TP. The Waveshare L76K module and the Adafruit Ultimate GPS HAT both break out PPS. Many GY-NEO6MV2 boards and NEO-M8N drone GPS modules don’t.
If you only need the Pi to have roughly the right time after booting, yes. A real-time clock like the DS3231 keeps running on a battery, but it drifts over time and eventually needs setting again. GPS keeps it accurate all along. Our guide to adding a real-time clock to the Raspberry Pi shows how to set one up.
Conclusion
With the time server running, your routers, NAS boxes and other Pis get their time from your own network instead of the internet. The GPS module still delivers location data too, and our Raspberry Pi GPS tracking project shows how to read it with Python.