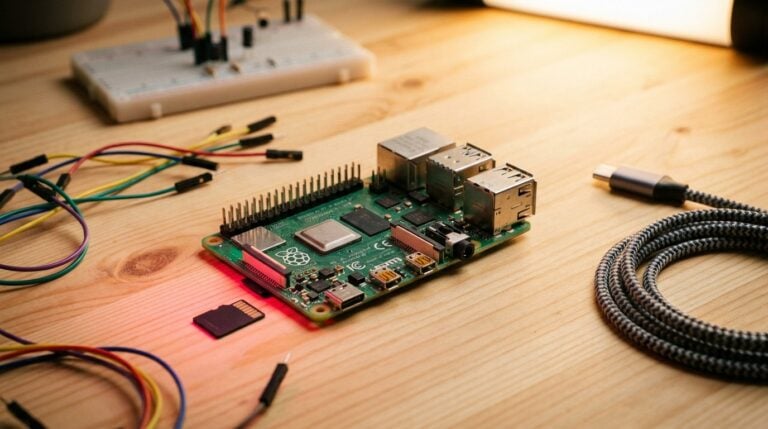
Raspberry Pi RTC DS3231 Setup – or Use the Pi 5’s Built-in Clock
Without internet access, your Raspberry Pi doesn’t know what time it is after power-up: it has no clock that keeps running while it’s switched off. Raspberry Pi OS (more precisely, the systemd-timesyncd time service) regularly saves the last known time and starts from it, but after every break the Pi is behind by roughly as long as it was off. The fix is a real time clock (RTC). This guide covers the Raspberry Pi RTC DS3231 setup for the Pi 4 and older models, and the built-in clock of the Pi 5.
Raspberry Pi 5: Don’t buy a module – the real time clock is built in. You only plug a rechargeable battery into the J5 (BAT) connector and enable charging with one line in
config.txt. Without a battery, the clock forgets the time as soon as power is lost.Pi 4, Pi 3, Zero 2 W and older: Connect a DS3231 module to 3.3 V (pin 1), SDA/SCL (pins 3 and 5) and GND (pin 6), add one line
dtoverlay=i2c-rtc,ds3231 to config.txt and set the clock once. From then on, the Pi reads the time from the module at every boot.DS1307: Only if you already own one – it needs 5 V and a small modification.
Which model do you have?
The right approach depends only on which Raspberry Pi you are using:
- Raspberry Pi 5: The RTC is already on the board. Continue with Raspberry Pi 5: using the built-in real time clock.
- Raspberry Pi 4, 3, Zero 2 W and older: These models have no real time clock. Jump to DS3231 or DS1307?
Raspberry Pi 5: using the built-in real time clock
The Raspberry Pi 5 has an RTC on the board. It runs as long as the Pi has power and sets the system time at boot. You don’t need to set it: once the Pi is online and has picked up network time, the kernel writes the time to the clock by itself roughly every eleven minutes. To keep counting while the Pi is off, the clock needs its own power source, which is what the two-pin J5 (BAT) connector is for. With the components facing up and the logo the right way round, J5 sits towards the near left corner, to the right of the USB-C power connector, according to the official documentation.
Which battery goes on J5?
Raspberry Pi sells an official rechargeable lithium manganese coin cell with a pre-fitted two-pin JST-SH plug and an adhesive pad. According to the documentation, it keeps the clock running for several months while the Pi is unplugged. Raspberry Pi explicitly advises against two things:
- No primary lithium coin cell such as a CR2032 (non-rechargeable): the Pi 5 clock draws more current than a typical RTC module, so such a cell would run flat quickly.
- No lithium-ion cell – the documentation warns against it explicitly.
What you need for the Pi 5: just the official RTC battery for the Raspberry Pi 5 (a rechargeable lithium manganese coin cell with a JST-SH plug), available from Raspberry Pi resellers.
Connecting the battery and enabling charging
- Shut the Pi down with
sudo shutdown -h nowand unplug the power supply. - Plug the battery’s connector into J5 and stick the battery to a free spot with its adhesive pad, for example inside the case.
- Start the Pi and check whether the clock sees the cell:
grep . /sys/class/rtc/rtc0/battery_voltage /sys/class/rtc/rtc0/charging_voltage*Example output from a Pi 5 with a cell connected and charging still off. The values are in microvolts: battery_voltage is the cell voltage (about 3.1 V here), and charging_voltage:0 means charging is off, which is the factory default. The documentation gives no value for the case without a cell. If battery_voltage isn’t in the range of a coin cell (around 3 V), check that the plug is seated properly in J5.
/sys/class/rtc/rtc0/battery_voltage:3090595
/sys/class/rtc/rtc0/charging_voltage:0
/sys/class/rtc/rtc0/charging_voltage_max:4400000
/sys/class/rtc/rtc0/charging_voltage_min:1300000- Only with the rechargeable battery: enable charging. Open the boot configuration with
sudo nano /boot/firmware/config.txt, add the following line at the very end, save with Ctrl+O and Enter, exit nano with Ctrl+X and reboot withsudo reboot. If you use a non-rechargeable cell against this advice, never enable charging.
dtparam=rtc_bbat_vchg=3000000- Run the
grepcommand from above again.charging_voltageshould now show the configured value3000000– according to the documentation, that confirms charging is active.
timedatectl shows whether the clock is running. The RTC time line is the time of the real time clock. It is always kept in UTC, which is why it differs from Local time on a Pi in Germany by two hours in summer and one hour in winter. Example output:
               Local time: Mo 2026-10-12 10:18:35 CEST
           Universal time: Mo 2026-10-12 08:18:35 UTC
                 RTC time: Mo 2026-10-12 08:18:35
                Time zone: Europe/Berlin (CEST, +0200)
System clock synchronized: yes
              NTP service: active
          RTC in local TZ: no
The built-in clock also supports a wake alarm: the Pi drops into a low-power state and powers back on at the time you set, which is handy for a time-lapse camera. The settings required are in the official documentation linked above.
Adding a DS3231 to a Pi 5?
An extra DS3231 module usually adds nothing on a Pi 5. If you connect one anyway, keep the following in mind – derived from the kernel configuration and documentation: the built-in clock is rtc0, so an external module would typically become rtc1. The Pi still takes its boot time from rtc0, and hwclock (installation: see Setting the clock for the first time) only talks to the module with -f /dev/rtc1. According to the overlay documentation, dtparam=rtc=off disables the built-in clock.
DS3231 or DS1307?
For every model without a built-in clock, there are ready-made RTC modules with a coin cell holder. The two most common chips are the DS3231 and the older DS1307:
| DS3231 | DS1307 | |
|---|---|---|
| Supply voltage | 2.3 to 5.5 V – runs on the Pi’s 3.3 V | 4.5 to 5.5 V – needs 5 V |
| Oscillator | crystal inside the chip, temperature-compensated | external watch crystal on the module |
| Accuracy | ±2 ppm at 0 to 40 °C, roughly one minute of drift per year | depends on crystal and temperature, the datasheet gives no fixed figure |
| I2C address | 0x68 | 0x68 |
| config.txt entry | dtoverlay=i2c-rtc,ds3231 | dtoverlay=i2c-rtc,ds1307 |
We recommend the DS3231: it runs directly on 3.3 V, is more accurate and costs barely more as a module. One detail when buying: many low-cost modules carry the DS3231M variant with a MEMS resonator instead of the DS3231SN with its crystal. Analog Devices specifies it at ±5 ppm, so it can drift by about two and a half minutes per year. The marking on the chip tells you which one you have. Either is fine for keeping a Raspberry Pi’s clock.
What you need
- DS3231 RTC module (3-pack)* – the common blue board with a coin cell holder on the back
- CR2032 coin cell* if your module doesn’t come with one – the next section explains why CR2032 rather than LIR2032. For a DS1307 you already own, you need an LIR2032 rechargeable cell instead (see the DS1307 section).
- 4 female-to-female jumper wires*
- a Raspberry Pi without a built-in clock, for example a Raspberry Pi 4* (or a Pi 3 or Zero 2 W)
- Optional: soldering iron* – only needed to modify a DS1307
Coin cell in the DS3231 module: CR2032, not LIR2032
The common blue DS3231 modules (often marked ZS-042) include a simple charging circuit for the coin cell: a resistor and a diode between the supply voltage and the battery holder. It is meant for an LIR2032 rechargeable cell but doesn’t charge it properly. onetransistor.eu worked through the schematic, with this result:
- On 3.3 V, practically no charging current flows. A regular CR2032 is safe – and the right choice, because an LIR2032 wouldn’t be charged on 3.3 V either.
- On 5 V, an LIR2032 gets overcharged and a CR2032 receives charging current it isn’t designed for. There’s no reason to do that on a Raspberry Pi. If you use the module with a 5 V board such as an Arduino Uno, desolder the diode (1N4148) or the 200 Ω resistor of the charging circuit.
Wiring the DS3231 to the Raspberry Pi
The module talks to the Pi over I2C, a two-wire bus for sensors and add-on chips (see how to enable SPI and I2C). Shut the Pi down, unplug it and connect the four pins with jumper wires:
| Raspberry Pi | DS3231 module |
|---|---|
| Pin 1 (3.3 V) | VCC |
| Pin 3 (GPIO 2, SDA) | SDA |
| Pin 5 (GPIO 3, SCL) | SCL |
| Pin 6 (GND) | GND |
Our interactive GPIO pinout shows where each pin is. Leave the module’s other pins (32K, SQW) unconnected. Finally, insert the CR2032 into the holder on the back of the module with the marked positive side facing up.
Why 3.3 V and not 5 V? The Raspberry Pi’s GPIO pins only tolerate 3.3 V. SDA and SCL need pull-up resistors that pull the lines up to the supply voltage when idle. The Pi already has such resistors on GPIO 2 and 3, and many modules add their own. With the module on 3.3 V, its resistors also sit at 3.3 V, so nothing can put 5 V on the GPIOs.
Already have a DS1307?
A DS1307 module you already own (usually sold as “Tiny RTC”) works too, but needs two changes. First, the chip needs at least 4.5 V, so VCC goes to pin 2 (5 V). Second, the two pull-up resistors R2 and R3 on the module then pull SDA and SCL up to 5 V as well – too much for the GPIOs. Desolder R2 and R3; the Pi’s own pull-ups on GPIO 2 and 3 take over. Connect SDA, SCL and GND as in the table above, and use ds1307 instead of ds3231 in config.txt later. Unlike the DS3231, the DS1307 takes an LIR2032 rechargeable cell: Tiny RTC modules are designed for it and usually come fitted with one; a non-rechargeable CR2032 doesn’t belong there because of the charging circuit.


Adding the overlay to config.txt
For Raspberry Pi OS to register the module as a clock at boot, it needs an entry in the boot configuration (a so-called device tree overlay). Power the Pi back on and open the file:
sudo nano /boot/firmware/config.txtAdd this line at the very end of the file (for a DS1307: dtoverlay=i2c-rtc,ds1307). On current images, the last line before it is [all]; everything below it applies to every Pi model.
dtoverlay=i2c-rtc,ds3231Save with Ctrl+O and Enter, exit nano with Ctrl+X and reboot:
sudo rebootYou don’t need to enable the I2C bus in raspi-config for this; the overlay does that itself. After the reboot, the kernel loads the driver and registers the module as a clock. You only need raspi-config if you have to use the i2cdetect tool in the next section.
Checking that the module is detected
After the reboot, these commands show whether a clock is registered:
ls /dev/rtc*
cat /sys/class/rtc/rtc0/name
If /dev/rtc0 exists and the second command names the rtc-ds1307 driver (it also handles the DS3231), everything is fine and you can move on to setting the clock.
If no clock appears: check the I2C bus
If /dev/rtc0 is missing, the i2cdetect tool shows why. Unlike the driver, it needs device access to the I2C bus, which you enable once in raspi-config: run sudo raspi-config, choose 3 Interface Options → I5 I2C, confirm with Yes and leave with Finish (detailed guide). Then install the tools and print the overview:
sudo apt install i2c-tools
sudo i2cdetect -y 1
i2cdetect prints a table of all addresses. Your module sits at address 0x68, i.e. in row 60: under column 8, for example like this:
60: -- -- -- -- -- -- -- -- UU -- -- -- -- -- -- --- UU: the driver has claimed the module. Run
ls /dev/rtc*again to check whether a clock appears now, anddmesg | grep -i rtcto see whether the driver reports errors. - 68: the module answers, but no driver is using it. Open
config.txtagain: is the linedtoverlay=i2c-rtc,ds3231(ords1307) free of typos and in the place described in the overlay section? Reboot after every change. --: nothing answers at this address. Check the wiring, especially whether SDA and SCL are swapped and VCC is on pin 1.
Many modules also carry a small memory chip (EEPROM). It shows up as a second address in the table; that’s not an error and doesn’t matter for the clock.
Setting the clock for the first time
A new module doesn’t know the time yet. You write it once using the hwclock tool. Current Raspberry Pi OS doesn’t ship it by default; it’s part of the util-linux-extra package:
sudo apt install util-linux-extraOn a fresh module, a first sudo hwclock -r (read the clock) usually returns an error message or a nonsensical date. The chip remembers that its clock has never been set, and the driver then refuses to return a time. This goes away once you set the clock.
Option 1: with internet access
If the Pi is online right now, its system time is already correct. Check it with date, write it to the RTC and read it back:
date
sudo hwclock -w
sudo hwclock -r
hwclock -r prints the date and time in your local time including the UTC offset, e.g. 2026-10-12 14:30:05.123456+02:00. As long as the Pi stays online, you don’t need to repeat this: while network time is synchronized, the kernel keeps the clock updated by itself.
Option 2: without any internet
Without a network, you set the time by hand. This applies equally to the Pi 5’s built-in clock (rtc0); there too you need hwclock from the util-linux-extra package (see above). Check the time zone first: the RTC stores the time in UTC, without daylight saving time, and the local time you enter is converted using the time zone. If the Time zone line in the output of timedatectl is wrong, change it in raspi-config under 5 Localisation Options → L2 Timezone or directly (replace the example zone with yours):
sudo timedatectl set-timezone America/New_YorkThen briefly turn off automatic time synchronization, set the current local time (replace the example value with yours), write it to the RTC, read it back and turn synchronization back on:
sudo timedatectl set-ntp false
sudo timedatectl set-time "2026-10-12 14:30:00"
sudo hwclock -w
sudo hwclock -r
sudo timedatectl set-ntp true
Either way: from now on, the kernel sets the system time from the real time clock at every boot – the module, or the built-in clock on a Pi 5. You only need hwclock to check or adjust the clock.
Test: reboot without internet
You only know it works once the Pi boots without network time. How you test depends on how you access the Pi.
Over SSH (headless Pi): the local network has to stay up, or you can’t reach the Pi any more. Instead, turn off network time only – this setting survives the reboot – then shut the Pi down and unplug the power supply for at least 15 minutes, so a wrong time stands out clearly:
sudo timedatectl set-ntp false
sudo shutdown -h now
Power the Pi back on, log in over SSH and run timedatectl. Afterwards, turn network time back on with sudo timedatectl set-ntp true. Alternatively, block only the Pi’s internet access in your router; the local network stays reachable.
With a monitor and keyboard: here you can test with no network at all. Switch Wi-Fi off via the network icon in the taskbar before shutting down, then shut the Pi down, unplug the network cable and power, wait at least 15 minutes and start it again. Then run timedatectl in a terminal. Without a desktop (Raspberry Pi OS Lite), use the SSH method.
Either way, Local time should match your watch, even though System clock synchronized says no. If the time lags behind by roughly the time the Pi was off, it didn’t read the RTC at boot – see the next section.
Troubleshooting
hwclock: command not found: theutil-linux-extrapackage is missing; install it as shown above.i2cdetectshows nothing at 0x68: check the wires (SDA and SCL swapped?) and that the module is on 3.3 V. Ifi2cdetectreports an error about/dev/i2c-1, I2C isn’t enabled in raspi-config yet.- The time is wrong after a reboot: check that the coin cell is inserted the right way round and still has charge, and that the overlay line in
/boot/firmware/config.txtreads exactly as above. - The Pi 5 loses the time after power-off: check that the battery plug is seated properly in J5, that
battery_voltageshows a voltage around 3 V and, with the rechargeable battery, that charging is enabled (charging_voltageshows3000000). - Older installation with fake-hwclock: earlier Raspberry Pi OS versions also kept track of the time with the
fake-hwclockpackage. It sets the last saved time at boot – even if it is older than the time from the RTC. It can therefore overwrite the correct RTC time.dpkg -l fake-hwclockshows whether it is installed; remove it withsudo apt remove fake-hwclock. Current images no longer include it; systemd-timesyncd takes care of remembering the time there.
Frequently asked questions about the Raspberry Pi RTC
No. The Raspberry Pi 5 has a real time clock on the board. To keep it running without mains power, it only needs a battery on the J5 (BAT) connector.
Raspberry Pi recommends the official rechargeable lithium manganese coin cell with a JST-SH plug. The documentation advises against non-rechargeable cells such as the CR2032 because they would run flat quickly, and lithium-ion cells must not be used. Only enable charging via dtparam=rtc_bbat_vchg with a rechargeable cell.
On a Raspberry Pi at 3.3 V, use a regular CR2032. The charging circuit of typical modules barely charges at 3.3 V, so an LIR2032 wouldn’t be topped up. If you run the module on 5 V, desolder the charging circuit.
UU means a driver has claimed the address. After adding dtoverlay=i2c-rtc,ds3231, that is the result you want: the kernel has taken over the module as a clock.
No. Setting it once is enough. When the Pi is online and network time is synchronized, the kernel updates the real time clock automatically roughly every eleven minutes.
According to the datasheet, ±2 ppm at 0 to 40 °C, which is about one minute per year. Many low-cost modules carry the DS3231M variant, specified at ±5 ppm – either is good enough for a Raspberry Pi’s clock.
Going further: even more accurate time via GPS
An RTC keeps the time across power cuts, but it is still a clock that slowly drifts. If you need truly exact time offline, for example for logged measurements or as a time server on your local network, a GPS receiver delivers it straight from the satellites: Raspberry Pi GPS time server with PPS and chrony.