Shelly Pro 3EM Emulator: Huawei EMMA as Meter for AC Batteries
A Huawei solar system with an EMMA can be extended with a battery from another manufacturer without adding a second meter to the distribution board. A Shelly Pro 3EM emulator in Home Assistant passes the EMMA’s reading on to the battery.
The background: around noon a solar system usually produces more power than the house consumes. The surplus is exported for a few cents, and in the evening you buy power back at several times that price. An AC battery, meaning a battery with its own inverter that plugs into a wall socket, moves the surplus into the evening. To do that it has to know at all times what happens at the grid connection: when power flows out, it charges. When power is drawn, it delivers exactly enough to bring the import down to zero. This constant tracking is called zero export control, and it only works as well as the reading is fresh.
Manufacturers ask for a smart meter for this, usually a Shelly Pro 3EM in the distribution board or a reading head on the utility meter. The EMMA already measures the same value, but third-party batteries cannot talk to it. With three building blocks in Home Assistant you read grid power from the EMMA every two seconds and serve it the way a real Shelly would.
We have built and measured the chain (as of October 2026: Huawei EMMA-A02, Home Assistant OS 18.3 with Core 2026.9.4, Huawei Solar 2.1.5, modbus-proxy 1.1.0, uni-meter 1.7.0). A Maxxicharge V2+ regulates to zero through the emulated meter: in the first run, grid power averaged between −1 and +4 watts per minute, with single readings between about −50 and +50 watts. The battery’s output and input were capped at 1000 watts. Measurements with load steps and PV surplus will follow.
Update 13 October 2026: the emulated meter now also serves power and voltage per phase. The variant with a single total value remains in step 3.
The screenshots show a German interface; the labels in the text are the English ones.
How the pieces fit together
The EMMA measures power at the grid connection with its built-in energy sensor and exposes it over Modbus TCP. Three building blocks carry the value from there to the battery:
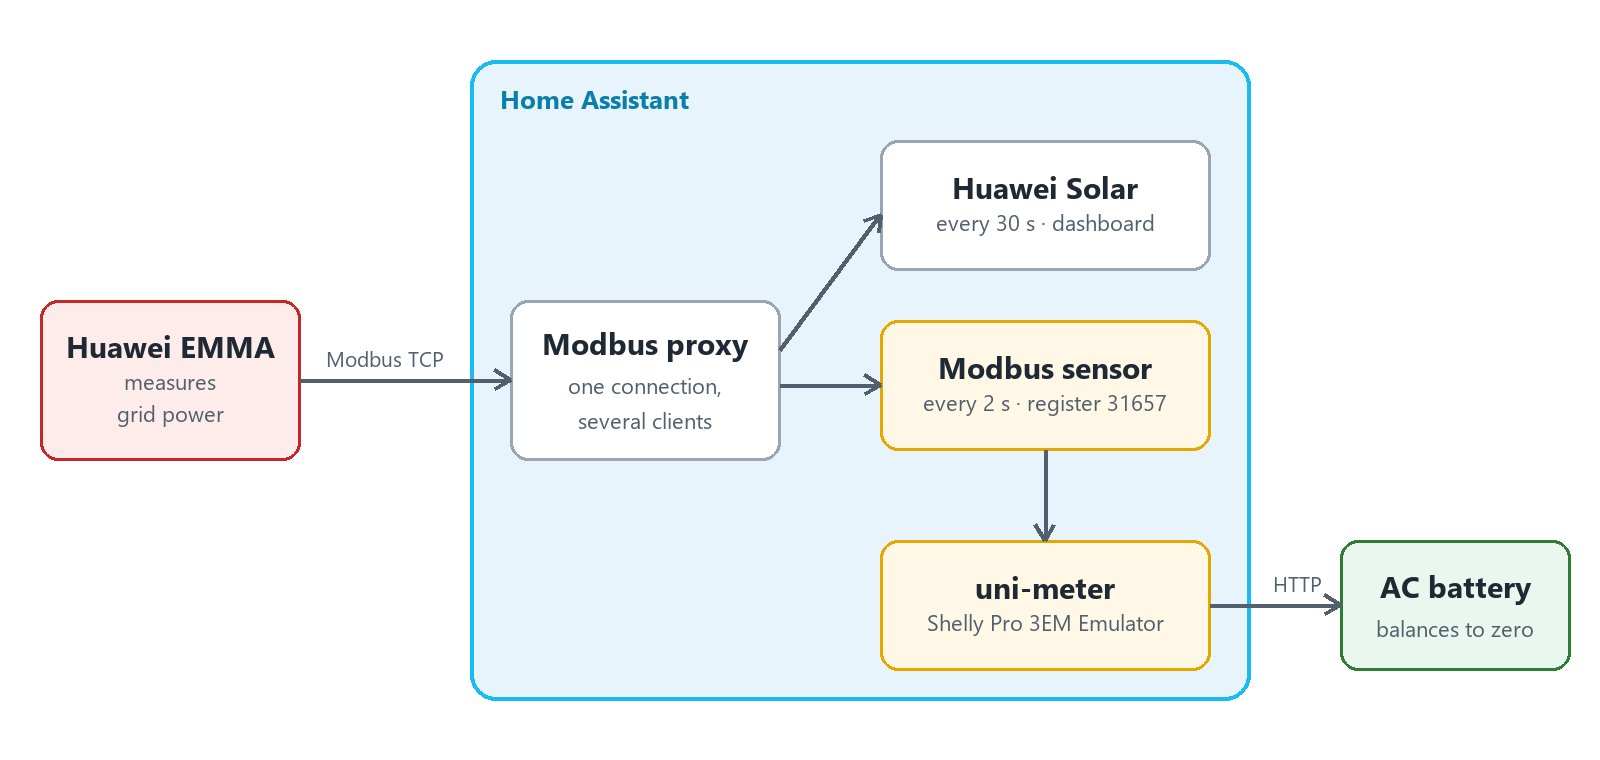
| Building block | Job | Why it is needed |
|---|---|---|
| Modbus proxy (app) | holds the connection to the EMMA and shares it between several clients | the Huawei integration and the fast sensor have to read at the same time |
| Modbus sensor (YAML) | reads grid power every two seconds, in total and per phase | the Huawei integration is too slow for control |
| uni-meter (app) | serves the sensor value in the format of a Shelly Pro 3EM | batteries do not understand Home Assistant sensors, but they do understand Shelly meters |
Why the Huawei integration is too slow as a smart meter
The Huawei Solar integration polls the EMMA every 30 seconds. The interval is fixed in the code and cannot be changed in the interface. That is fine for an energy dashboard, but not for zero export control: the battery would react to a value that is up to half a minute old.
For faster values the documentation of the integration recommends an automation with the “Update entity” action. That helps less than expected, because Home Assistant debounces such refresh requests with a cooldown of ten seconds, as you can see in the Home Assistant source code. A separate Modbus sensor that reads only the grid power register is not affected.
| Method | New value | For battery control |
|---|---|---|
| Huawei Solar, default | every 30 seconds | too slow |
| Huawei Solar with a refresh automation | about every 10 seconds | too slow |
| separate Modbus sensor | every 2 seconds | suitable |
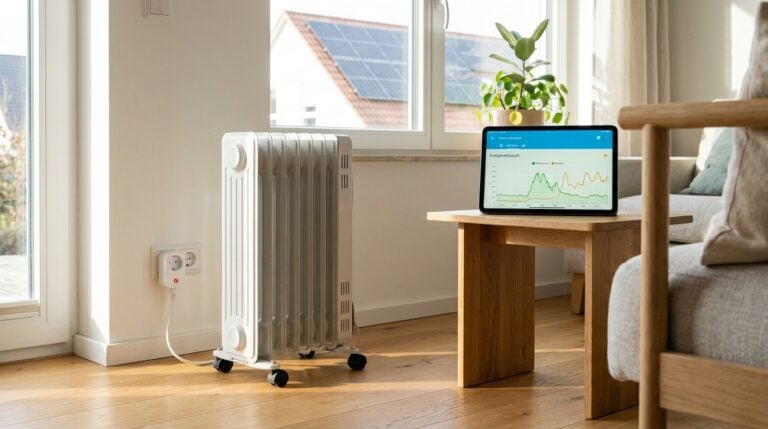
A load step shows how big the difference is: a heater on a smart plug raises grid power by about 740 watts. The Modbus sensor shows the step on its next poll, so within two seconds, while the sensor of the integration follows 20 to 30 seconds later. We measured one switch-on and one switch-off.
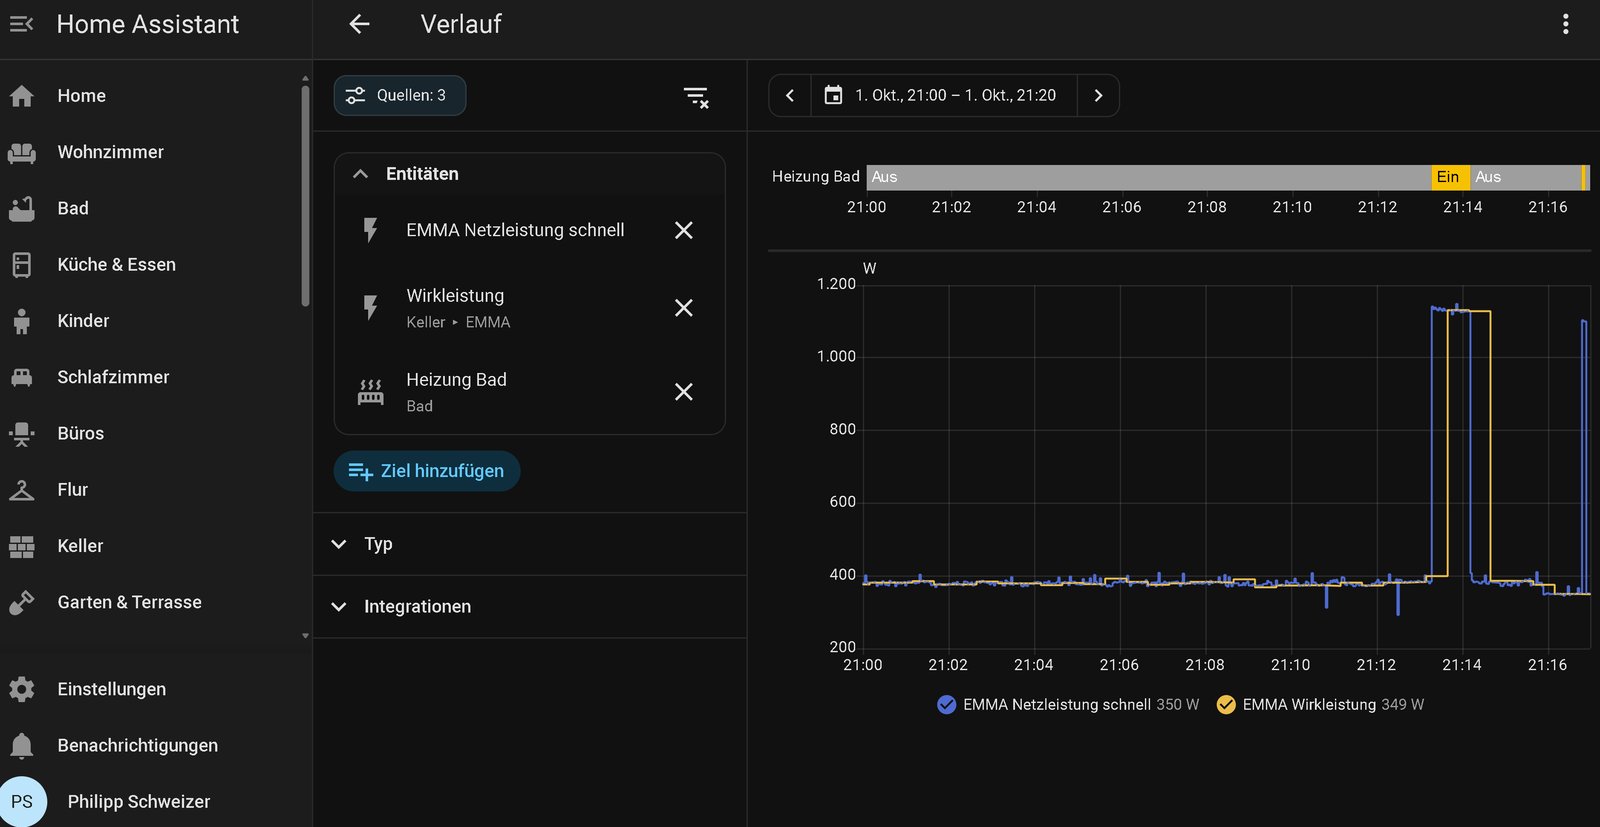
Both sensors end up at the same value, and the value jumps in a single step. So the EMMA itself does not seem to delay or smooth the measurement; the delay comes from the polling.
What you need
- Home Assistant OS with access to the app store (apps were called add-ons until recently)
- a Huawei system with an EMMA, connected through the Huawei Solar integration and with Modbus TCP enabled – the setup is covered in our guide Huawei SUN2000 with Home Assistant
- the “File editor” app for editing the configuration files
- fixed IP addresses for the EMMA and for Home Assistant, most easily through a DHCP reservation in your router
In the examples the EMMA has the address 192.168.178.88 and Home Assistant 192.168.178.189. Replace both with your own. Create a backup before you start.
Step 1: Put a Modbus proxy in front of the EMMA
According to the documentation of the integration, Huawei devices accept only one Modbus connection at a time. The ha-modbusproxy app holds that single connection and passes the requests of several clients through one after another. You will also need it as soon as an EV charging controller such as evcc is supposed to read along.
- Open Settings → Apps → App store, choose Repositories at the top right and add
https://github.com/Akulatraxas/ha-modbusproxy. - Install the “modbus-proxy” app. The first start can take a few minutes because the container is built locally.
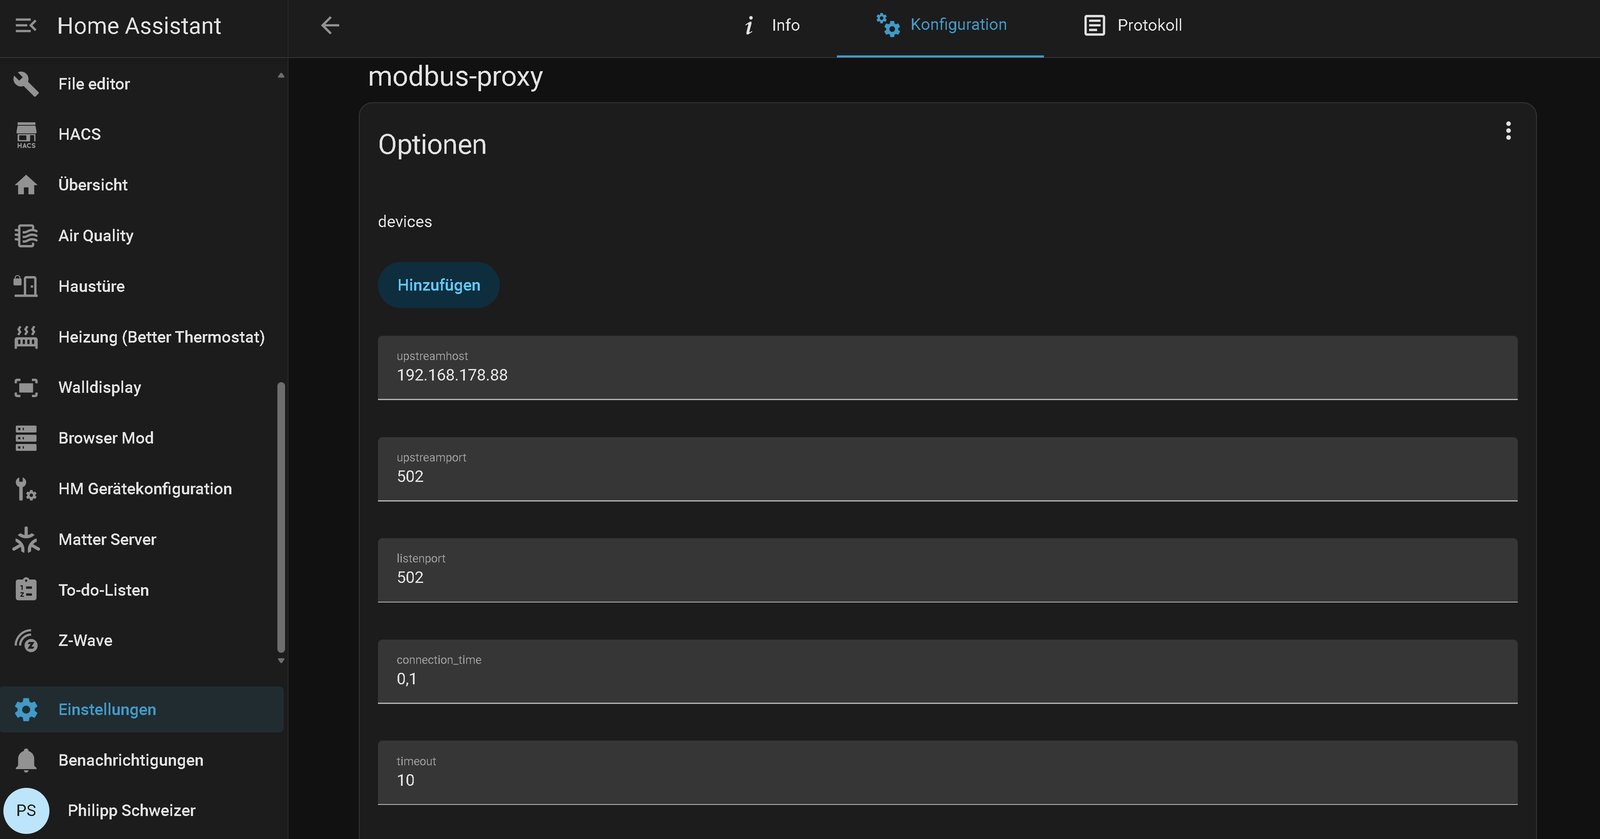
- On the Configuration tab, enter the IP address of the EMMA as “upstreamhost”. Leave “upstreamport” and “listenport” at 502.
- Enable “Start on boot” and “Watchdog”. Without the proxy, neither the integration nor the fast sensor will reach the EMMA later on.
Next, the Huawei integration gives up its direct connection and talks to the proxy instead. Keep to this order, because a disabled integration entry cannot be reconfigured:
- Disable the entry of the Huawei integration under Settings → Devices & services → Huawei Solar in the three-dot menu. This releases the connection to the EMMA.
- Start the proxy. The log shows “Ready to accept requests on 0:502”.
- In the three-dot menu, open System options, switch off “Enable polling for changes” and enable the entry again.
- Choose Reconfigure and enter the IP address of Home Assistant as host, port 502. The slave IDs stay as they are.
- Switch “Enable polling for changes” back on.
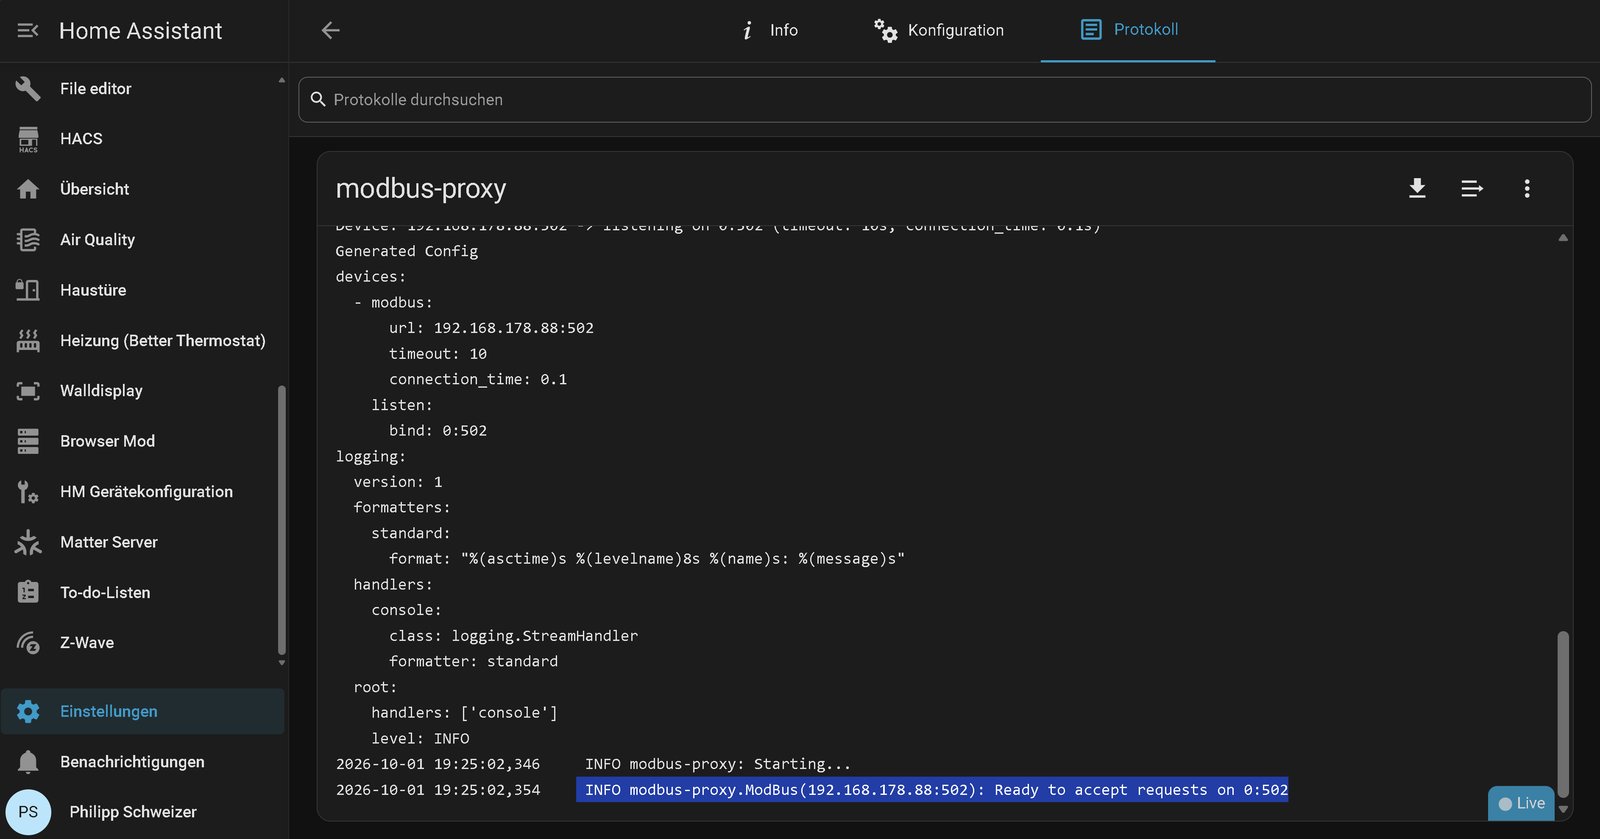
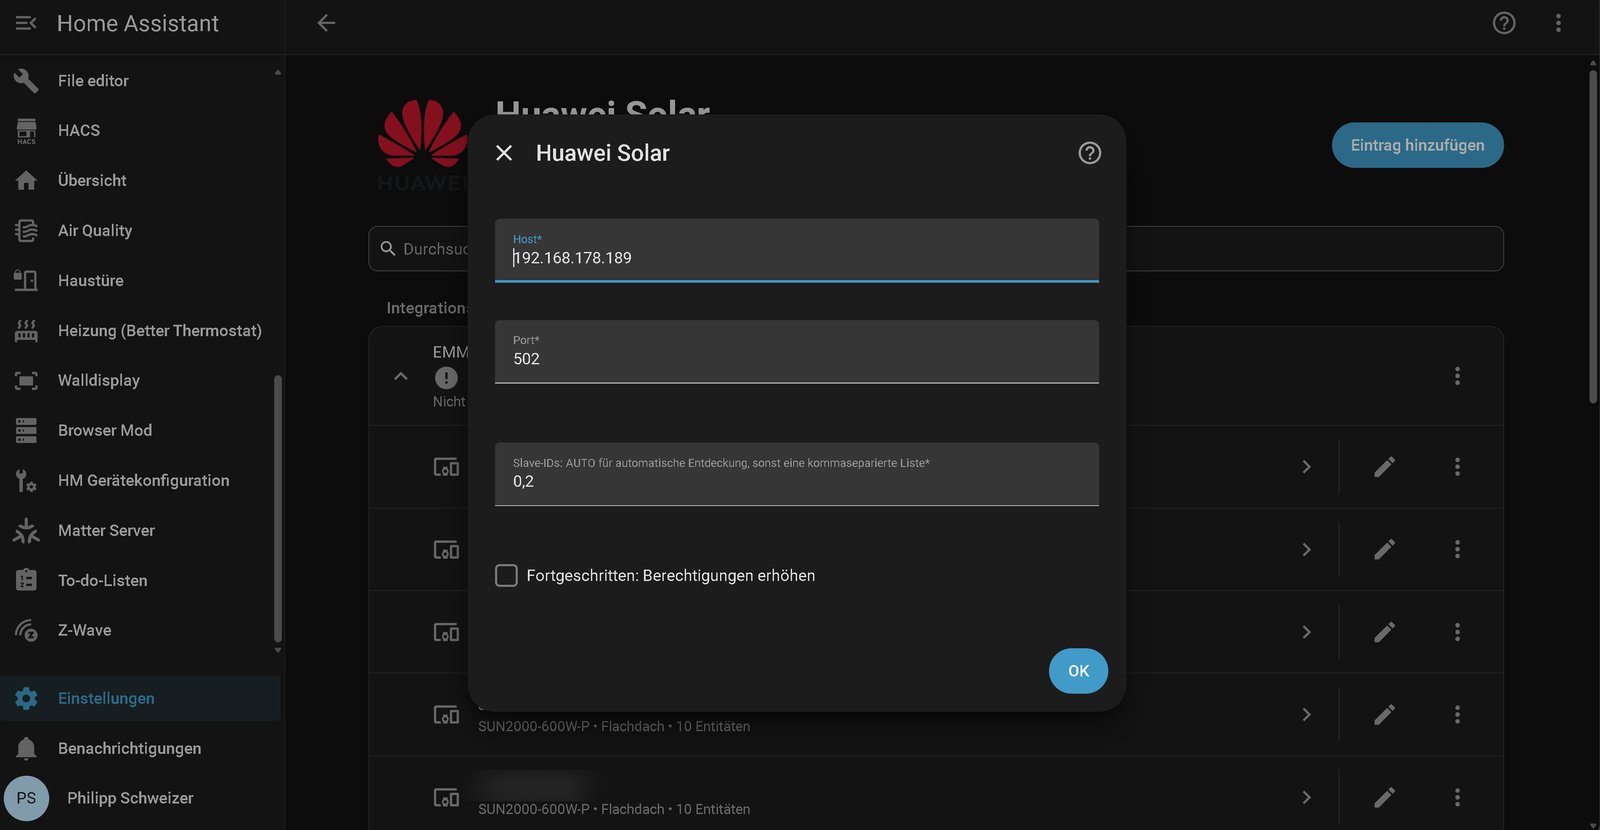
If the Huawei sensors deliver values again afterwards, the integration is running through the proxy. If not, stop the proxy and set the host in the integration back to the address of the EMMA.
Since Home Assistant 2026.9 integrations can share a Modbus connection. So far this only applies to integrations built on the new mechanism, such as Fronius and Sofar. Huawei Solar does not use it yet in version 2.1.5. Until then the proxy remains the way to connect several clients to one EMMA.
Step 2: Read grid power every two seconds
The fast sensor is created with Home Assistant’s built-in Modbus integration. It has no interface; the few lines go into configuration.yaml. Open the file in the File editor and add this at the end:
modbus:
  - name: emma_proxy
    type: tcp
    host: 192.168.178.189
    port: 502
    sensors:
      - name: "EMMA grid power fast"
        slave: 0
        address: 31657
        input_type: holding
        data_type: int32
        unit_of_measurement: W
        device_class: power
        state_class: measurement
        scan_interval: 2
      - name: "EMMA grid power L1"
        slave: 0
        address: 31665
        input_type: holding
        data_type: int32
        unit_of_measurement: W
        device_class: power
        state_class: measurement
        scan_interval: 2
      - name: "EMMA grid power L2"
        slave: 0
        address: 31667
        input_type: holding
        data_type: int32
        unit_of_measurement: W
        device_class: power
        state_class: measurement
        scan_interval: 2
      - name: "EMMA grid power L3"
        slave: 0
        address: 31669
        input_type: holding
        data_type: int32
        unit_of_measurement: W
        device_class: power
        state_class: measurement
        scan_interval: 2
      - name: "EMMA voltage L1"
        slave: 0
        address: 31639
        input_type: holding
        data_type: uint32
        scale: 0.01
        precision: 1
        unit_of_measurement: V
        device_class: voltage
        state_class: measurement
        scan_interval: 10
      - name: "EMMA voltage L2"
        slave: 0
        address: 31641
        input_type: holding
        data_type: uint32
        scale: 0.01
        precision: 1
        unit_of_measurement: V
        device_class: voltage
        state_class: measurement
        scan_interval: 10
      - name: "EMMA voltage L3"
        slave: 0
        address: 31643
        input_type: holding
        data_type: uint32
        scale: 0.01
        precision: 1
        unit_of_measurement: V
        device_class: voltage
        state_class: measurement
        scan_interval: 10
      - name: "EMMA grid import Wh"
        slave: 0
        address: 31687
        input_type: holding
        data_type: int64
        scale: 10
        precision: 0
        unit_of_measurement: Wh
        device_class: energy
        state_class: total_increasing
        scan_interval: 30
      - name: "EMMA grid export Wh"
        slave: 0
        address: 31679
        input_type: holding
        data_type: int64
        scale: 10
        precision: 0
        unit_of_measurement: Wh
        device_class: energy
        state_class: total_increasing
        scan_interval: 30
The host is the IP address of Home Assistant, because the sensor talks to the proxy and not directly to the EMMA. If your file already has a modbus: entry, append the block starting at - name: as another list item below it.
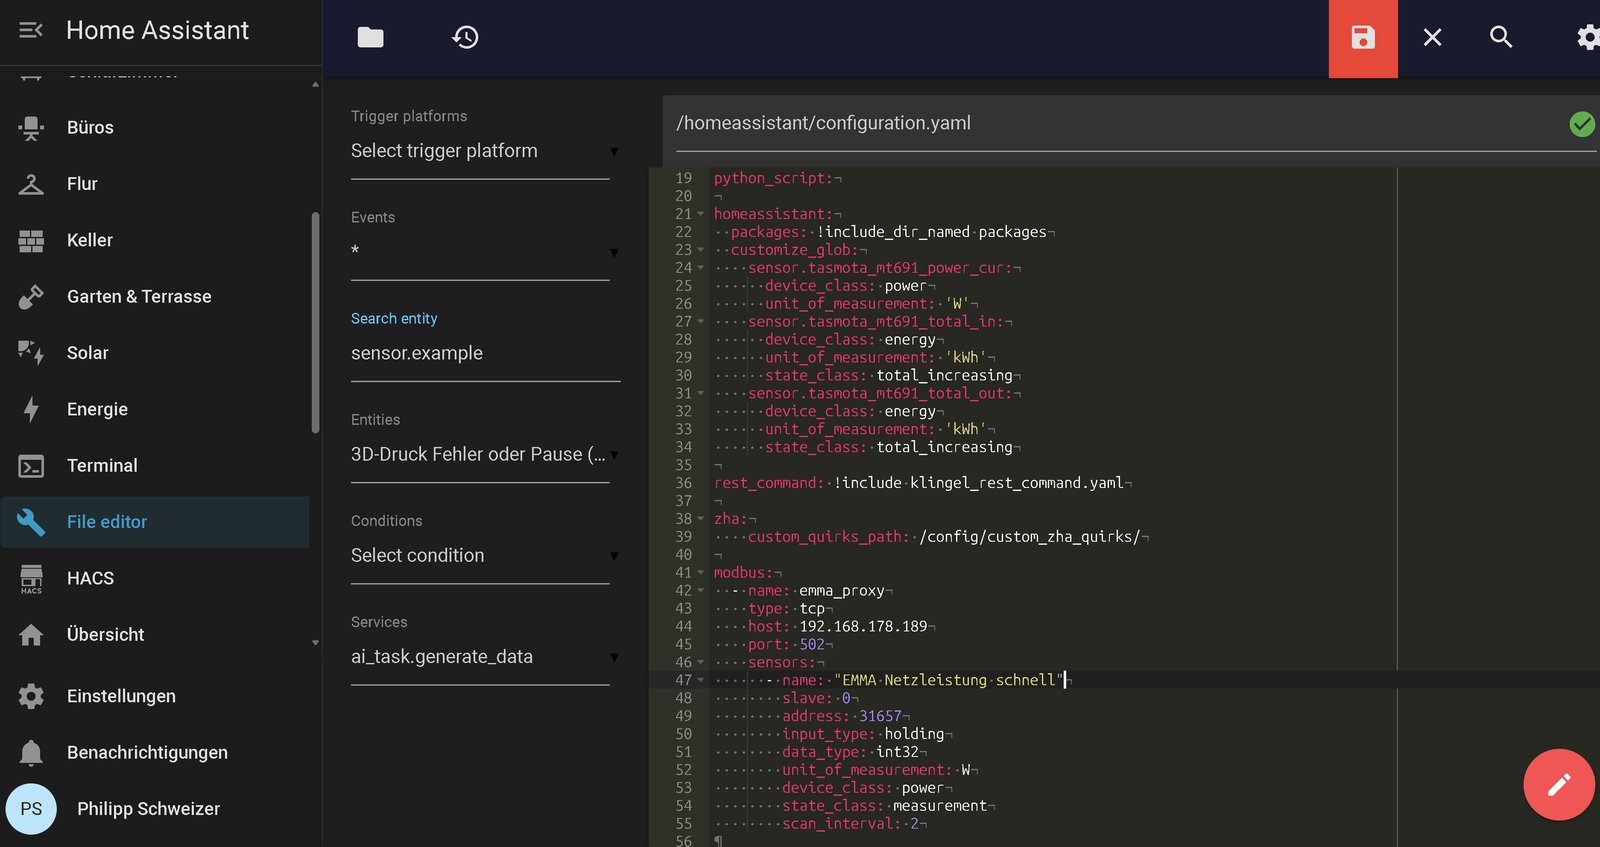
Register 31657 holds the active power of the EMMA’s built-in energy sensor in watts, as a 32-bit integer. The address comes from the EMMA template of evcc. If a separate Huawei meter does the measuring in your system instead of the built-in sensor, this register will probably not return a usable value.
The other registers come from the same template and return the measurement per phase, plus the voltages and the meter readings. For us, the three phase values added up to the total to the watt. If you only want to serve the total value in step 3, you need just the first sensor.
| Register | Content | Type |
|---|---|---|
| 31657 | grid power, total, in W | int32 |
| 31665, 31667, 31669 | grid power L1, L2, L3 in W | int32 |
| 31639, 31641, 31643 | voltage L1, L2, L3 in 0.01 V | uint32 |
| 31687 | total grid import in 0.01 kWh | int64 |
| 31679 | total grid export in 0.01 kWh | int64 |
scale: 10 converts the meter readings to watt-hours. A real Shelly reports its counters in this unit, and uni-meter passes the values on unchanged; the kWh sensors of the Huawei integration would therefore be a factor of 1000 too small. We did not find a grid frequency among the EMMA’s registers.
Check the file under Settings → Tools → YAML → Check configuration (formerly Developer tools) and restart Home Assistant. After that the entities sensor.emma_grid_power_fast and sensor.emma_grid_power_l1 to _l3, among others, exist. Grid import shows as a positive value, export as a negative one. A Shelly Pro 3EM uses the same signs.
On startup Home Assistant writes a warning to the log: a scan_interval below five seconds may cause stability issues. We did not notice any, not even with four power registers polled every two seconds. If you want to be careful, set the value to 5.
As a check, put the new sensor and the “Active power” sensor of the Huawei integration into the same history graph. Both must show the same value, the new one just far more often. The three phase sensors add up to the total.
Step 3: Set up the Shelly Pro 3EM emulator with uni-meter
uni-meter is a small program that serves meter values from many sources in the format of a Shelly Pro 3EM or an Everhome EcoTracker. Here the new sensor is the source. To let uni-meter read it, you need an access token.
Create an access token
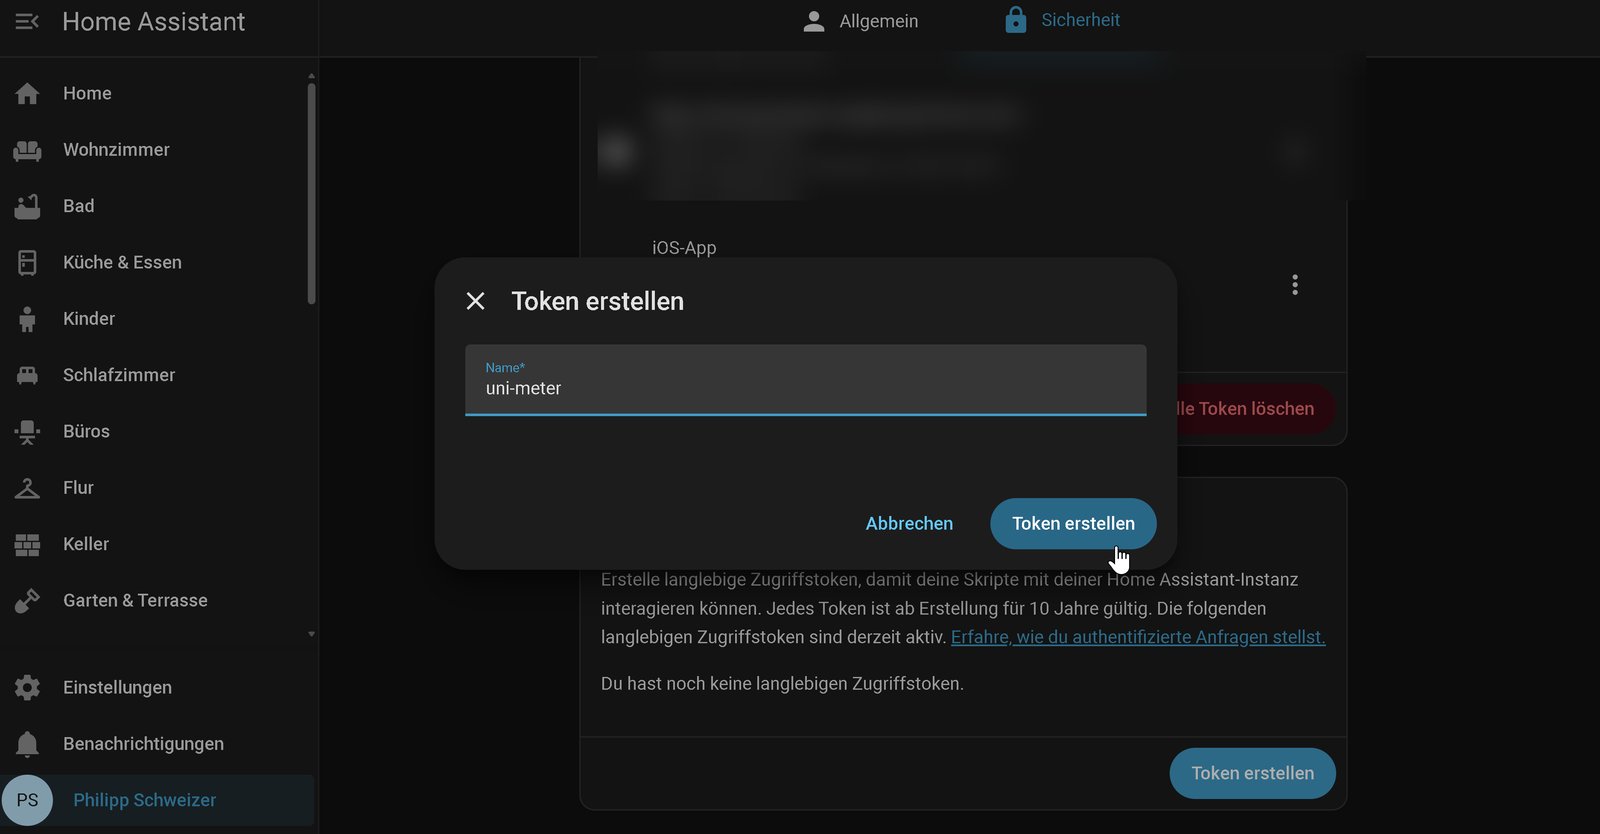
Click your user name at the bottom left, switch to the Security tab and create a long-lived access token named “uni-meter” at the very bottom. Copy the string right away, it is shown only once.
Install the app
Add the repository https://github.com/sdeigm/uni-meter in the app store and install “uni-meter”. Do not start the app yet, it still lacks its configuration file.
Create the configuration file
uni-meter expects the file uni-meter.conf in its own configuration folder. The File editor only shows that folder after you switch off Enforce Basepath in the configuration of the “File editor” app and restart the app.
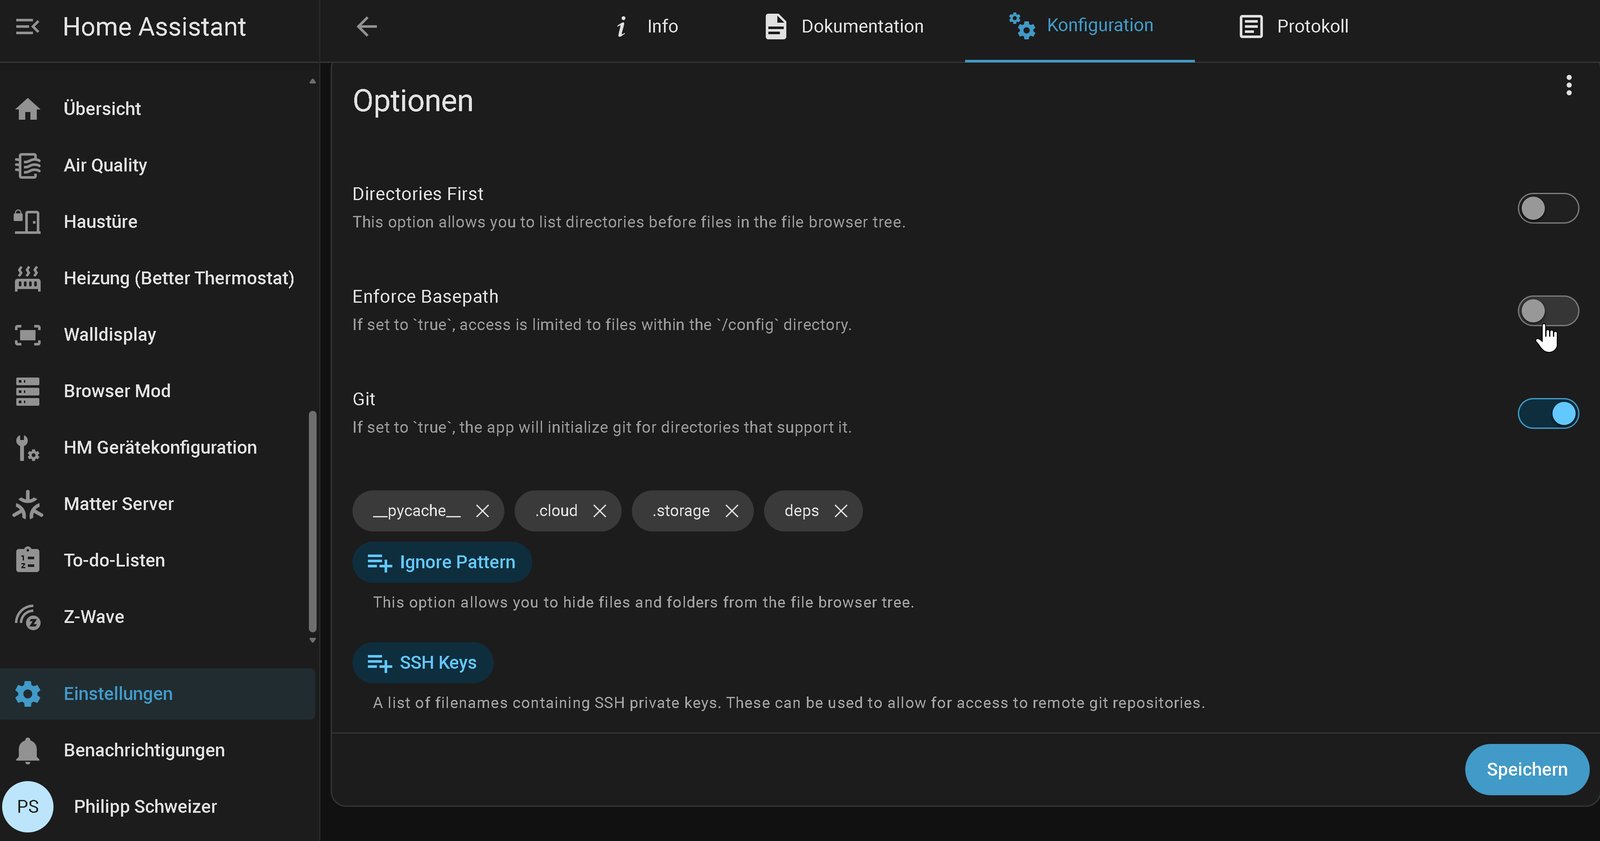
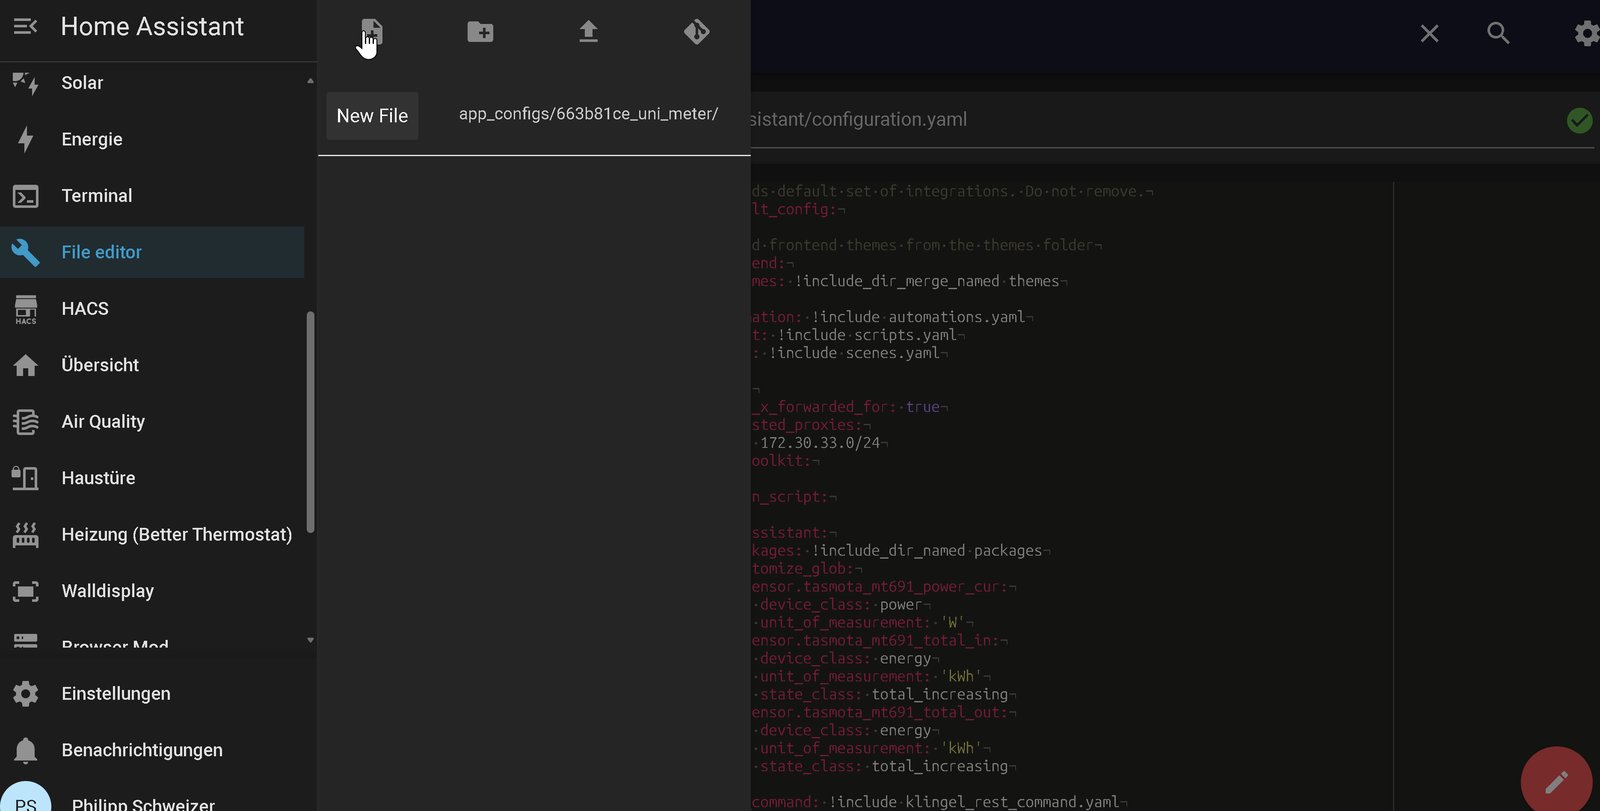
Then go up one level in the file tree of the File editor and change into app_configs/663b81ce_uni_meter/. On older installations the parent folder is still called addon_configs. Use “New File” to create uni-meter.conf there with this content. This version serves power and voltage per phase, just like a real Shelly Pro 3EM:
uni-meter {
  output = "uni-meter.output-devices.shelly-pro3em"

  input = "uni-meter.input-devices.home-assistant"

  output-devices {
    shelly-pro3em {
      port = 80
      forget-interval = 1m
    }
  }

  input-devices {
    home-assistant {
      url = "http://192.168.178.189:8123"
      access-token = "YOUR_TOKEN"

      power-phase-mode = "tri-phase"
      power-l1-sensor = "sensor.emma_grid_power_l1"
      power-l2-sensor = "sensor.emma_grid_power_l2"
      power-l3-sensor = "sensor.emma_grid_power_l3"
      voltage-l1-sensor = "sensor.emma_voltage_l1"
      voltage-l2-sensor = "sensor.emma_voltage_l2"
      voltage-l3-sensor = "sensor.emma_voltage_l3"

      energy-phase-mode = "mono-phase"
      energy-consumption-sensor = "sensor.emma_grid_import_wh"
      energy-production-sensor = "sensor.emma_grid_export_wh"

      polling-interval = 1s
    }
  }
}
Replace the IP address with the one of Home Assistant and YOUR_TOKEN with the access token. The token has to sit on one line between the quotation marks. If the sensor delivers no values for more than a minute, uni-meter stops answering and the battery falls back to its configured behaviour for a missing meter.
Why values per phase?
Some batteries determine by themselves which phase they are connected to after starting up: they briefly deliver or draw power and watch on which phase the meter reading moves. If the battery only gets evenly spread values, all three phases move the same way, and it cannot assign its phase.
Variant: a single total value
Not every source provides values per phase; a reading head on the utility meter, for example, usually only delivers the total. In that case replace the lines from power-phase-mode up to just before polling-interval with these two; for a different source, enter its sensor:
      power-phase-mode = "mono-phase"
      power-sensor = "sensor.emma_grid_power_fast"
With mono-phase uni-meter spreads the total power evenly across three phases. Batteries that only control on the sum get by with this; with a battery that detects its phase, check whether it finds it.
uni-meter binds port 80 directly on the Home Assistant host. According to the Home Assistant documentation, Home Assistant OS itself uses port 80 on new installations since Home Assistant 2026.8, and the app will not start there. If you reach Home Assistant without
:8123, you are affected. Two ways out: move Home Assistant back to 8123 as described in Home Assistant without :8123, or set a different port in uni-meter.conf, for example port = 8080. The second way only works if your battery accepts a meter address with a port. The Maxxicharge V2+ app does not. If Home Assistant stays on port 80, drop the :8123 from url.
Start and check
Start the app and enable start on boot and the watchdog. Then open this address in a browser:
http://192.168.178.189/rpc/EM.GetStatus?id=0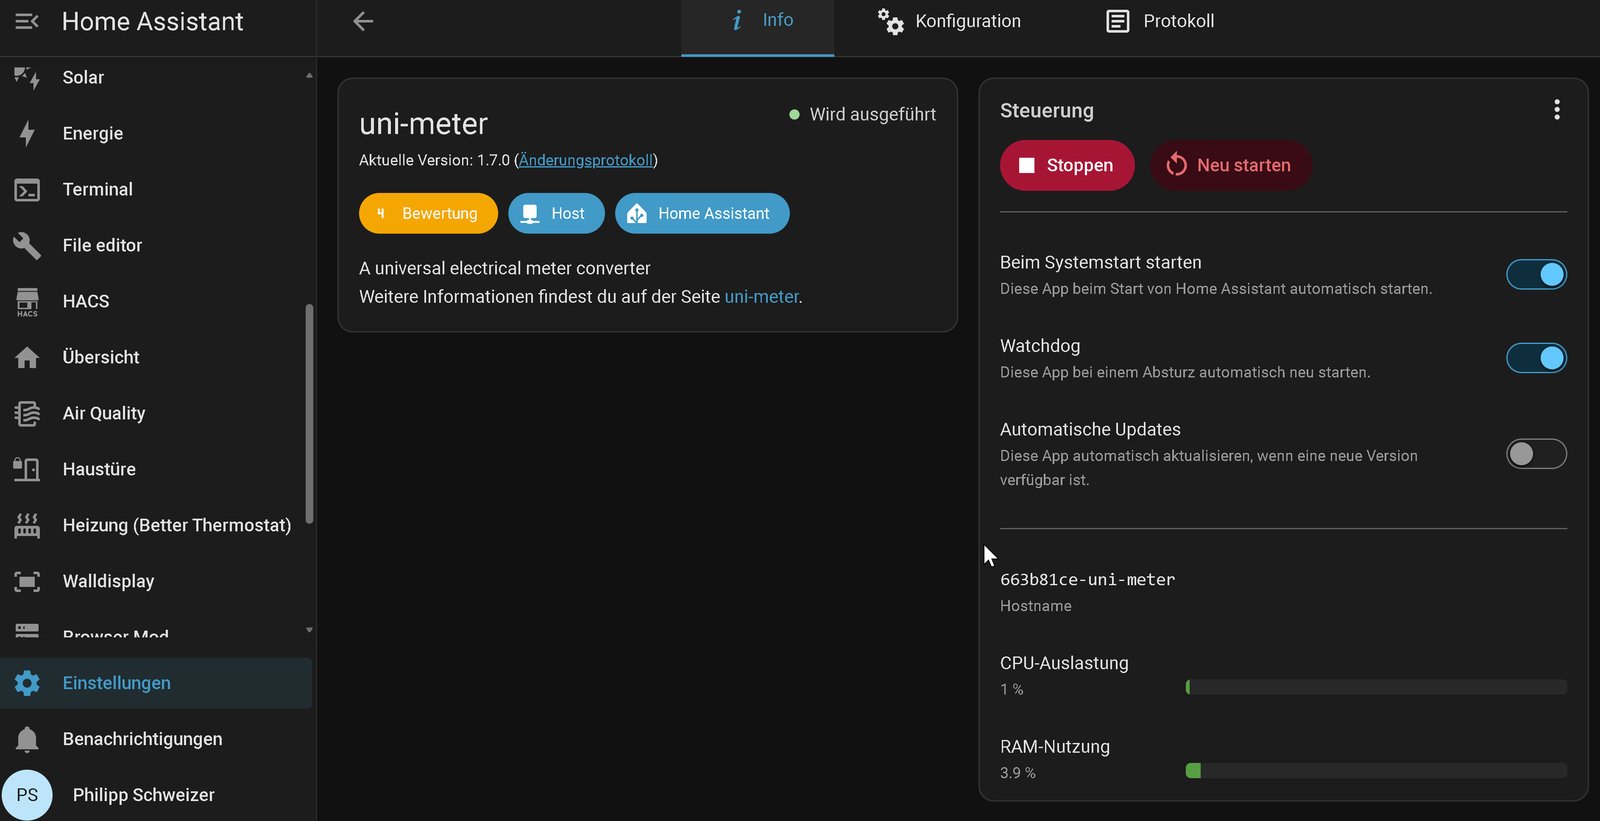
The response has the same format as that of a real Shelly Pro 3EM. We checked it against the example response in the Shelly documentation: all fields are present and the data types match.
{"id":0,"a_current":0.31,"a_voltage":232.70,"a_act_power":73.00, …
 "c_current":0.92,"c_voltage":231.10,"c_act_power":212.00, …
 "total_current":1.51,"total_act_power":351.00,"total_aprt_power":351.00}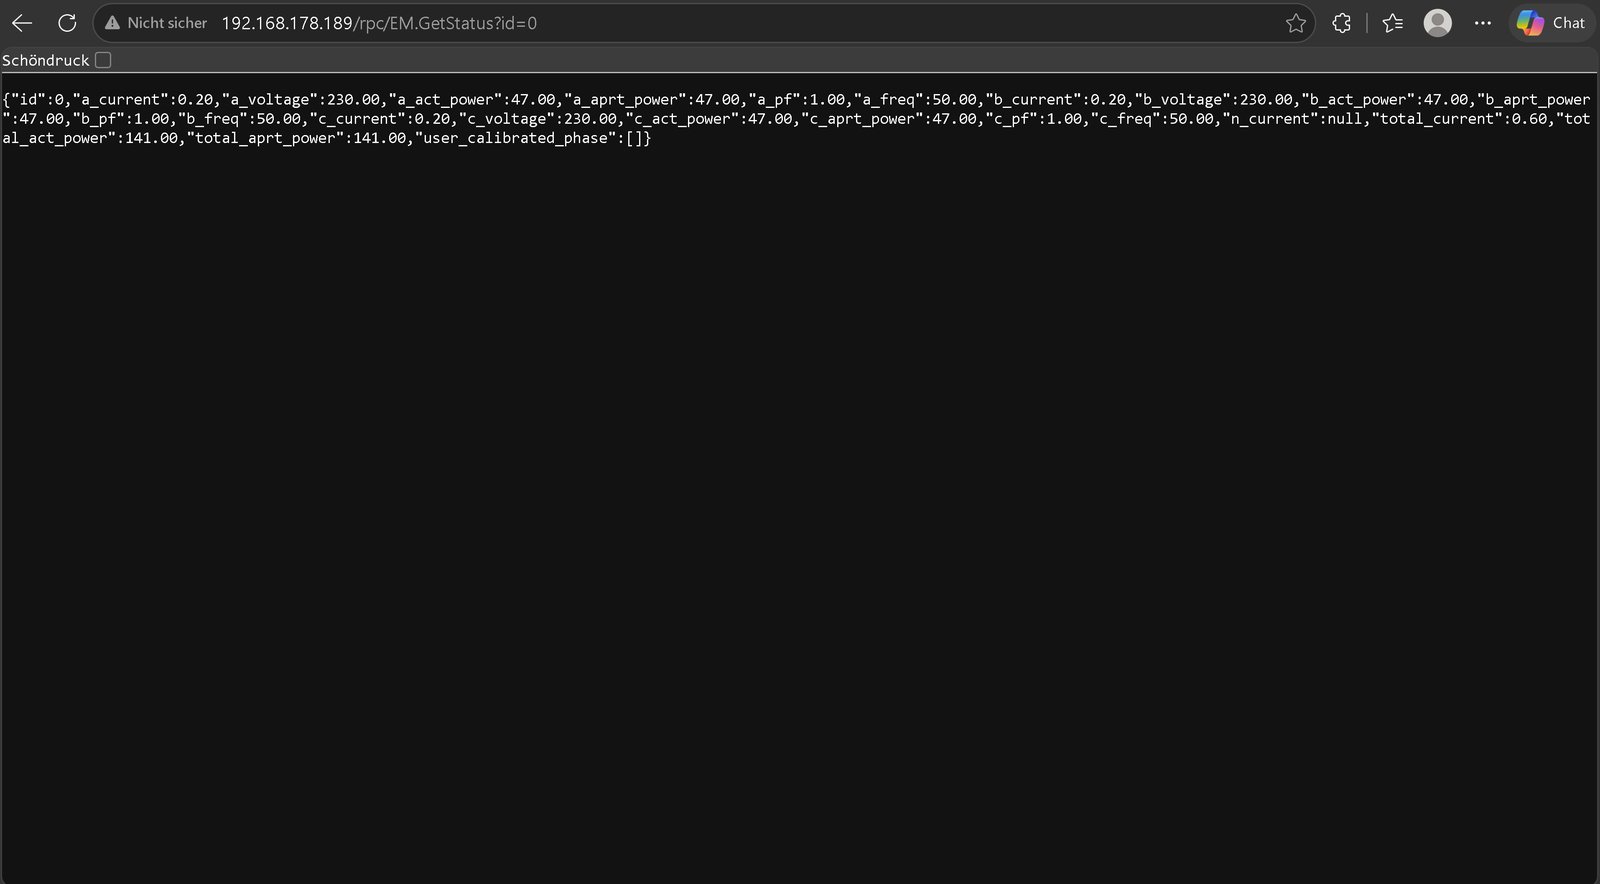
total_act_power is grid power in watts and should match the value of your sensor. Power and voltage come from the EMMA per phase, and uni-meter calculates the currents from them. Frequency (50 Hz) and power factor (1) are fixed values.
All three building blocks work without authentication. Through the proxy every device on your network can reach the Modbus interface of the EMMA, even if only Home Assistant was allowed there before. The emulated Shelly returns grid power to anyone who asks. The access token sits in plain text in the configuration file and carries the rights of the user who created it. So create a separate user without administrator rights for uni-meter and create the token there. Guests and untrusted devices belong on a separate network.
Connect the AC battery
In the battery’s app, choose “Shelly Pro 3EM” as the meter and, if asked, enter the IP address of Home Assistant. The uni-meter developers list these batteries as supported:
- Growatt NOAH 2000 and NEXA 2000
- Hoymiles MS-A2, HiBattery 1920 AC and 4020-X
- Indevolt SolidFlex 2000
- Jackery SolarVault 3
- Marstek B2500 and Venus
- Solakon ONE
Batteries that query their meter through the Shelly cloud will not work with this. Three settings depend on the device:
- Automatic discovery: some batteries, according to uni-meter the Hoymiles MS-A2 for example, look for the Shelly on the network via mDNS. For the app version this needs the additional pyscript integration, described in the uni-meter installation guide.
- Marstek: these batteries query the Shelly over UDP. Add the line
udp-port = 1010to theshelly-pro3emblock. - Oscillating around zero: if the battery regulates nervously,
min-sample-periodslows the output down. Details are in the documentation of the Shelly output.
Example: Maxxicharge V2+
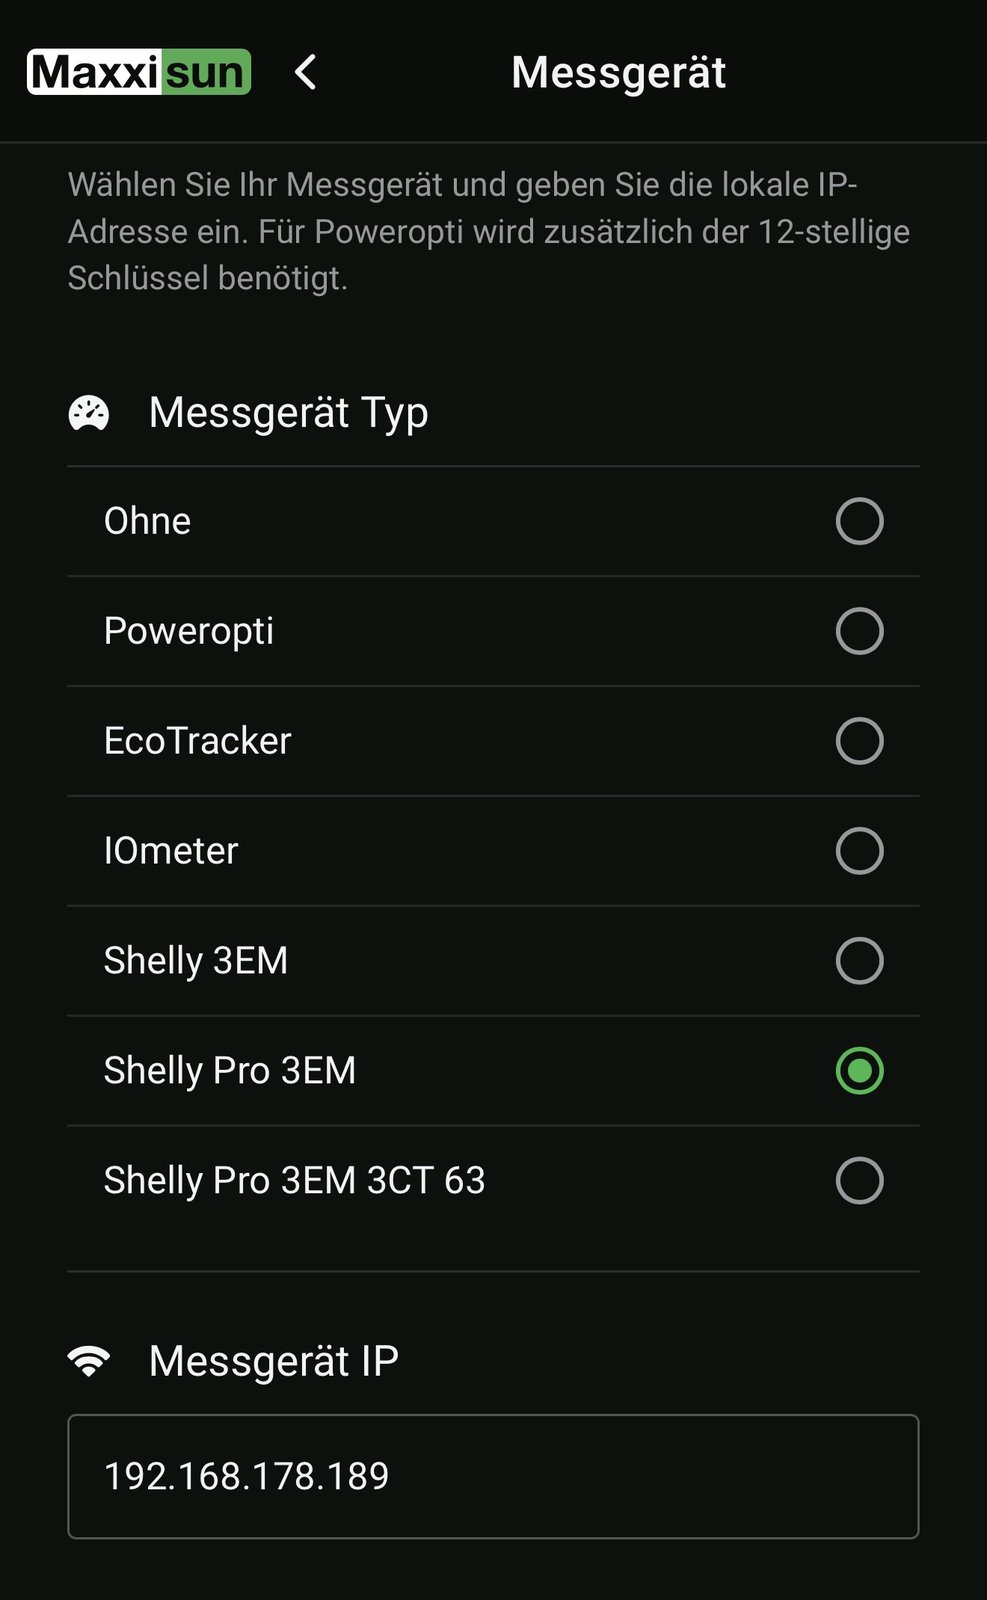
uni-meter does not list the Maxxicharge V2+, but it works anyway. When searching for a smart meter, the Maxxisun app does not find the emulated meter. Tap manual entry instead, pick Shelly Pro 3EM as the meter type and enter only the IP address of Home Assistant as the meter IP.
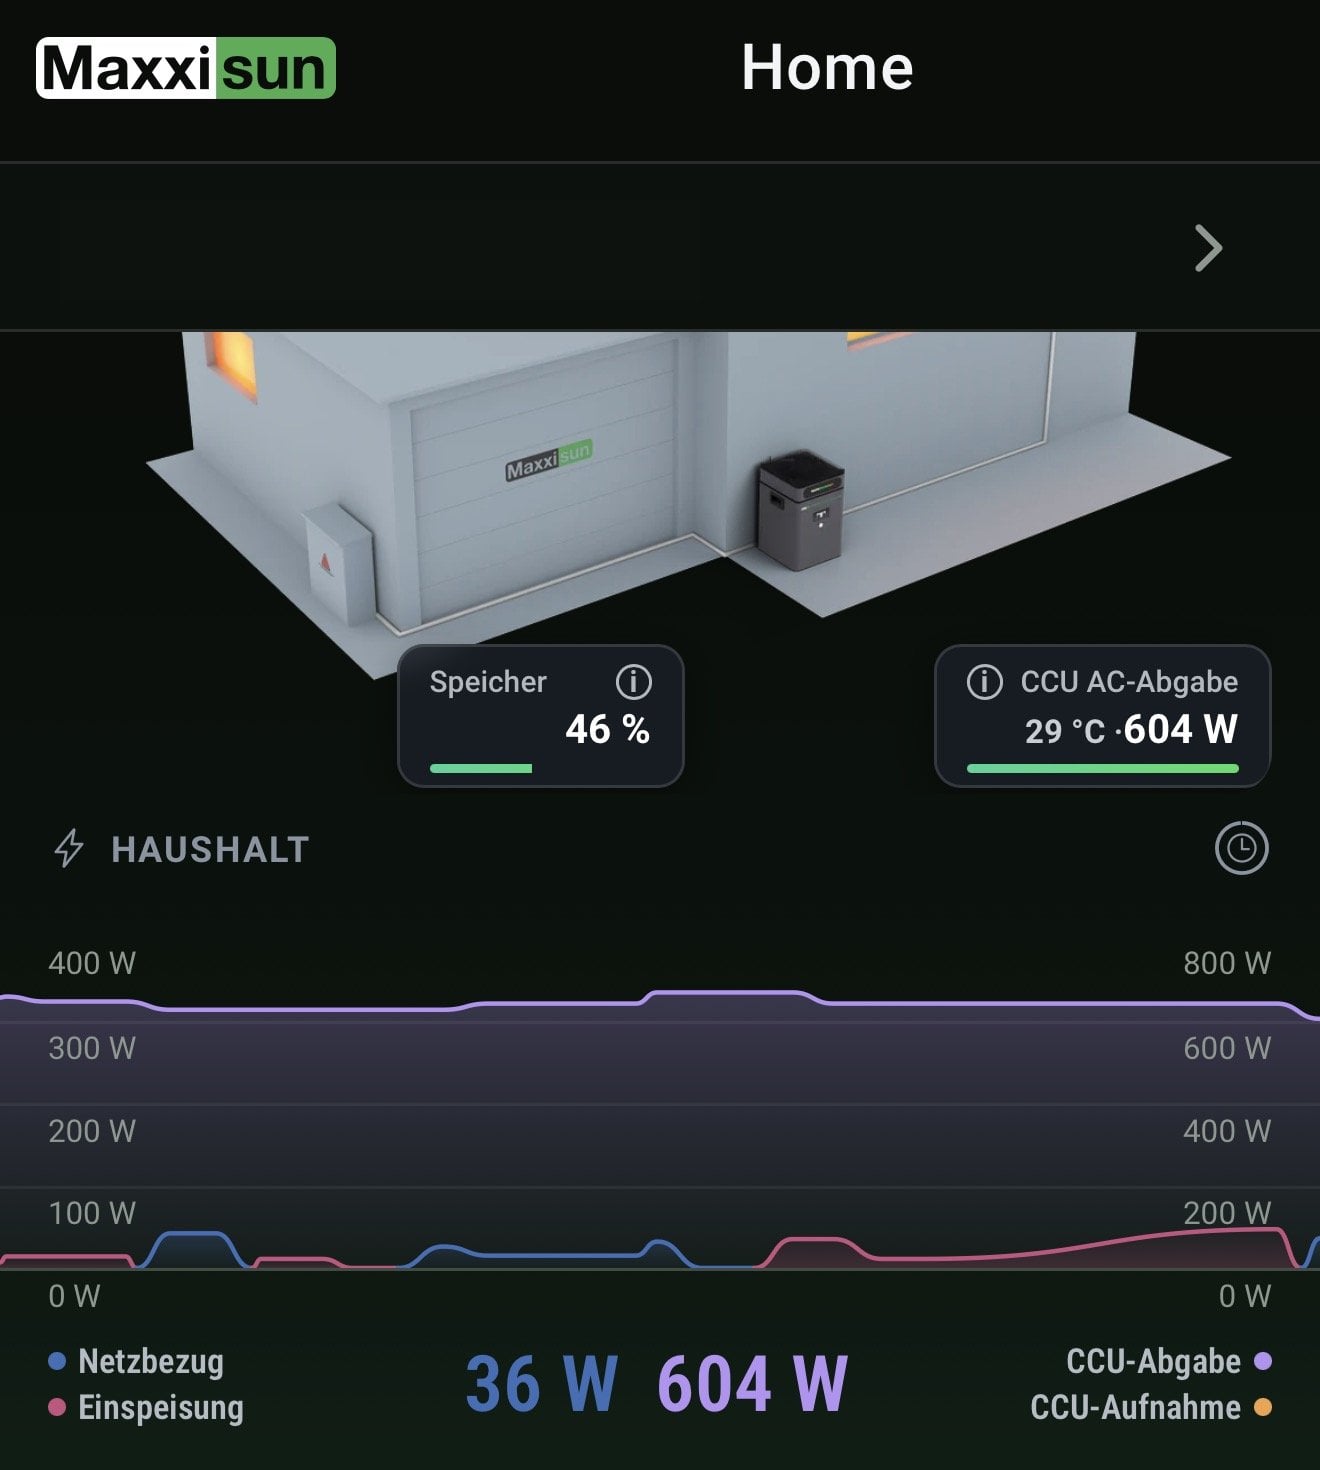
The app then shows the grid power from the EMMA. If the CCU still does not deliver power, check the inverter switch on its back: when it is off, the app measures but does not regulate.
The meter chain is software only. The battery itself may have to be registered with your grid operator or a national registry, and the rules for plug-in batteries differ from country to country. Check what applies where you live before you connect one.
Limits of this approach
- Home Assistant becomes part of the control loop. During a restart or update the battery receives no meter values and runs on its fallback power.
- Two seconds instead of real time. A Shelly Pro 3EM in the distribution board delivers new values in less than a second. With this chain the battery compensates short load peaks correspondingly later.
- Fixed values. Frequency and power factor are defaults, and uni-meter spreads the meter readings evenly across the three phases.
- Tested only with the EMMA’s built-in sensor. Systems with a separate Huawei meter probably need a different register.
- A single device. All readings come from one EMMA-A02. Other firmware versions may behave differently.
- Short runtime. In the first three days the chain ran without a gap. Once the connection to the EMMA dropped and the proxy re-established it immediately. We have no experience over weeks yet.
Alternative: a reading head on the utility meter
You can keep Home Assistant out of the control loop by placing an infrared reading head on the utility meter, for example an Everhome EcoTracker*. It sticks magnetically to the optical port of the meter and needs no wiring. Two conditions have to be met:
- The right meter: you need a digital meter with an optical port that reports both import and export. A meter that does not report export shows zero during surplus, and the battery has nothing to regulate against.
- Instantaneous power: many meters only output current power after it has been unlocked, in Germany with a PIN from the metering operator. Without it the meter reports energy totals only, and those are useless for control.
If you already run a reading head with Tasmota, you can enter its sensor as the source for uni-meter and skip the proxy and the Modbus sensor.
Frequently asked questions
Common plug-in AC batteries support only certain meters, usually the Shelly Pro 3EM, the Shelly 3EM and reading heads such as the EcoTracker. The Huawei EMMA is not among them. With Home Assistant and uni-meter, however, its reading can be served as a Shelly Pro 3EM.
Every 30 seconds. An automation with the “Update entity” action gets you to about ten seconds, because Home Assistant debounces such requests with a ten-second cooldown. Only a separate Modbus sensor is faster.
Register 31657 returns the active power of the built-in energy sensor in watts, as a holding register of type int32 under device ID 0. Grid import is positive, export negative.
According to the documentation of the integration, Huawei devices accept only one Modbus connection at a time. The proxy holds that one connection and serves the Huawei integration, the fast sensor and later other programs such as evcc through it.
Yes. uni-meter also runs as a Docker container or directly on a Raspberry Pi and can query the Huawei meter, a Tasmota reading head, MQTT and many other sources by itself.
Yes. uni-meter accepts any grid power sensor from Home Assistant as its source, so you simply swap the EMMA sensor for your own. It can also read Fronius, SMA, Kostal and Sungrow meters and several IR reading heads directly. The value needs to update every few seconds, though, or the battery will react too slowly.
Conclusion
The EMMA works as a smart meter for an AC battery if you query it directly, past the Huawei integration. The proxy, the Modbus sensor and uni-meter cost nothing but some time. In our first test a Maxxicharge V2+ regulates to zero with it. How it handles load steps and whether the chain stays stable for weeks will follow here. Have fun building it!