Raspberry Pi Pico 2 W: Getting Started with MicroPython & Thonny
The Raspberry Pi Pico is not a small Raspberry Pi but a microcontroller: no operating system and no desktop, but it boots in a fraction of a second, draws very little power and switches LEDs, relays and sensors directly from its pins. In this guide we take a Pico 2 W from the first plug-in all the way onto your Wi-Fi: flashing MicroPython, setting up Thonny, controlling the onboard LED, reading the internal temperature sensor and connecting to your home network.
We ran every step on 2 October 2026 on a brand-new Pico 2 W under Windows 11 with MicroPython 1.29.0 and Thonny 5.0. The code works the same on the Pico, Pico W and Pico 2; where a model behaves differently, we say so. Along the way we found two things most getting-started guides skip: a fresh board needs no button press for the first flash, and our board, bought in autumn 2026, still carries the RP2350 revision affected by erratum E9.
In short
Drag the MicroPython firmware onto the Pico’s drive, pick the “MicroPython (Raspberry Pi Pico)” interpreter in Thonny and save your program to the Pico as main.py. That’s all it takes for your code to run every time the board powers up.
- You’ll need: a Pico (a W model if you want Wi-Fi), a micro USB cable that carries data, and a computer running Thonny. The examples in this guide need no extra hardware.
- First flash: a brand-new Pico shows up as a drive without pressing any button. You only need BOOTSEL for later updates.
- Good to know: even a Pico 2 or Pico 2 W bought today may still have the RP2350 A2 with erratum E9. Wire buttons to GND and use the internal pull-up rather than the pull-down.
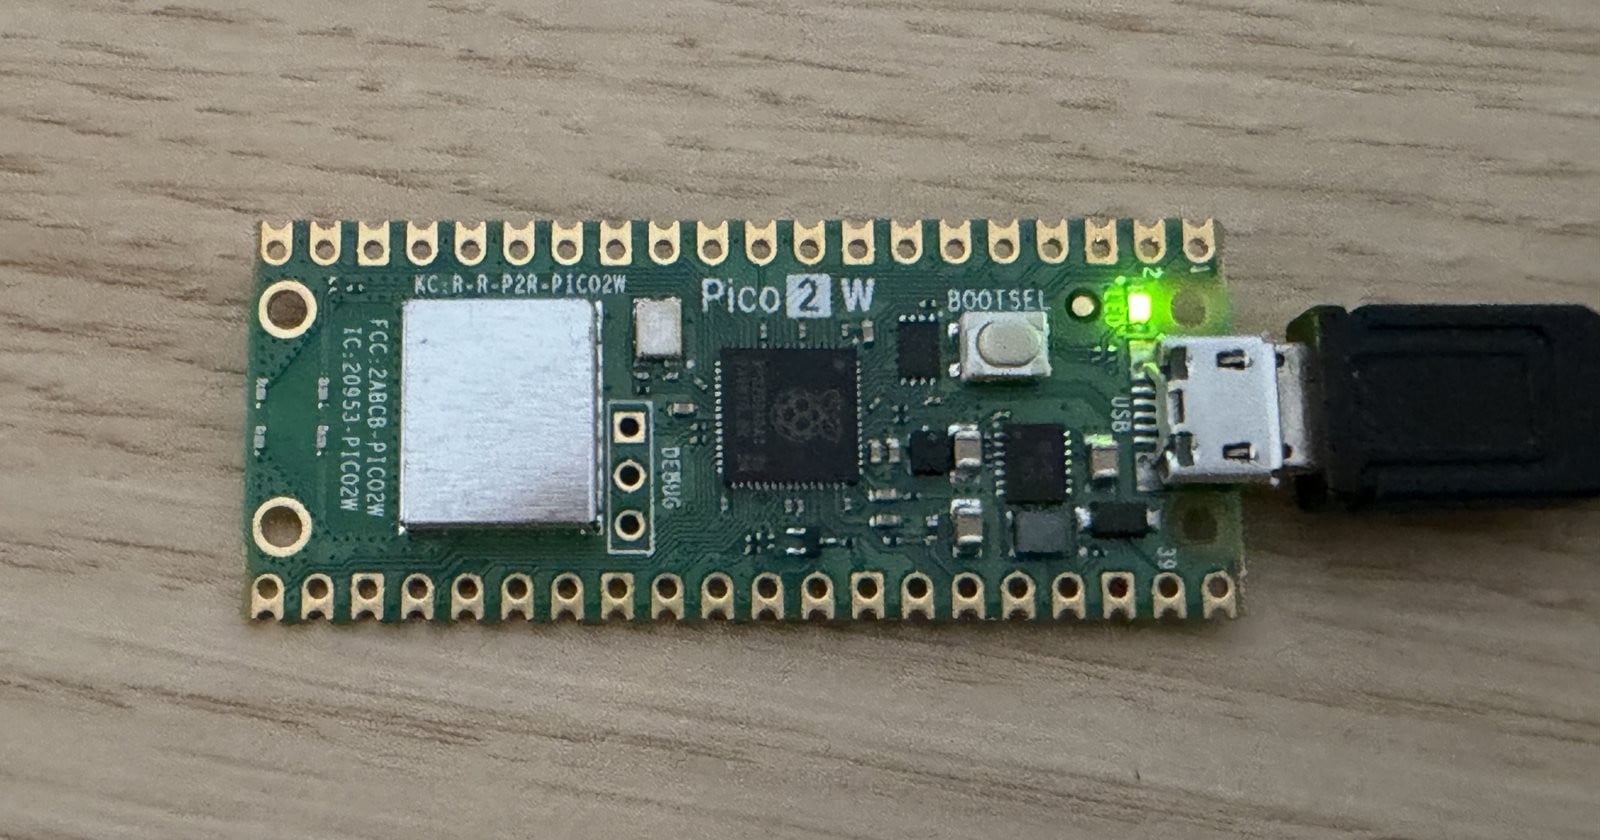
The Raspberry Pi Pico is a microcontroller board from Raspberry Pi, about the size of a stick of gum (51 × 21 mm). It runs exactly one program, written in MicroPython or C/C++, and offers 26 usable GPIO pins. There are currently four models: Pico and Pico W with the RP2040, Pico 2 and Pico 2 W with the newer RP2350. The W models add Wi-Fi and Bluetooth.
Pico vs. Raspberry Pi: what is the difference?
A Raspberry Pi 5 is a full computer running Linux with dozens of programs at once. The Pico has no video output, no operating system and no file system in the usual sense. It runs a single program as soon as it gets power and reacts to events on its pins within microseconds. There is no shutdown either: you can pull the plug at any time.
That makes the Pico a good fit for anything that measures, switches and reports: sensor nodes sending readings over Wi-Fi, buttons and displays, LED strips, motor control or small USB devices. If you need a server, a camera with image processing or a media player, a Raspberry Pi is the right tool. Our Raspberry Pi vs. Arduino vs. ESP32 comparison covers this in detail. The two also work well together: the Pi collects data as a server, several Picos deliver it.
Which Pico should you buy?
All four models share the same pin header and dimensions, so a project usually moves from one model to another without rewiring. The differences are in the chip and the radio:
| Pico | Pico W | Pico 2 | Pico 2 W | |
|---|---|---|---|---|
| Chip | RP2040 | RP2040 | RP2350 | RP2350 |
| CPU | 2 × Cortex-M0+, 133 MHz | 2 × Cortex-M0+, 133 MHz | 2 × Cortex-M33 or 2 × RISC-V, 150 MHz | 2 × Cortex-M33 or 2 × RISC-V, 150 MHz |
| RAM | 264 KB | 264 KB | 520 KB | 520 KB |
| Flash | 2 MB | 2 MB | 4 MB | 4 MB |
| Wi-Fi/Bluetooth | – | 2.4 GHz / Bluetooth 5.2 | – | 2.4 GHz / Bluetooth 5.2 |
| MicroPython firmware | RPI_PICO | RPI_PICO_W | RPI_PICO2 | RPI_PICO2_W |
For getting started we recommend the Raspberry Pi Pico 2 W*: twice the RAM and flash of the Pico W, more processing power and Wi-Fi on board, for only a couple of dollars more than the Pico 2 without wireless*. You will want Wi-Fi as soon as the Pico should send readings to Home Assistant or a server. The variants with an “H” in the name, such as the Pico 2 WH*, come with pre-soldered headers and plug straight into a breadboard. What is inside the RP2350 and how switching between Arm and RISC-V cores works is explained in our Raspberry Pi Pico 2 and RISC-V guide.
What you need
- A Raspberry Pi Pico, a Raspberry Pi Pico 2 W* for this guide. The Wi-Fi examples require a W model. If you want to plug into a breadboard without soldering, get the Pico 2 WH with headers*.
- A micro-USB cable that carries data, such as the deleyCON micro-USB cable*. Many cables bundled for charging only have the power wires, and the Pico will not show up on your PC at all.
- A computer running Windows, macOS or Linux. A Raspberry Pi with a desktop works just as well.
- Nothing else for the examples here, since the LED and temperature sensor are on the board. For your own circuits later: a breadboard set with wires, LEDs and resistors such as the ELEGOO Electronic Fun Kit*, plus a push button.
Step 1: Flash MicroPython onto the Pico
A new Pico is empty. To run Python code, it first needs the MicroPython firmware. No drivers or special software are required, because in BOOTSEL mode the Pico appears as a USB drive.
- Download the latest stable firmware for your model from micropython.org; for the Pico 2 W that is
RPI_PICO2_W-…-v1.29.0.uf2. Skip the “preview” builds, they are development versions. The firmware names for the other models are in the table above. - Plug the Pico into your computer. A brand-new Pico starts in BOOTSEL mode automatically because its flash holds no firmware yet. If something is already installed, hold down the white BOOTSEL button, plug in the cable and only then release the button.
- A new drive named RP2350 appears (RPI-RP2 on the Pico and Pico W). It contains two files,
INDEX.HTMandINFO_UF2.TXT. The file date of 5 September 2008 is normal, it is hard-coded in the boot ROM. - Drag the
.uf2file onto the drive. After a few seconds the drive disappears, the Pico restarts and MicroPython is running.
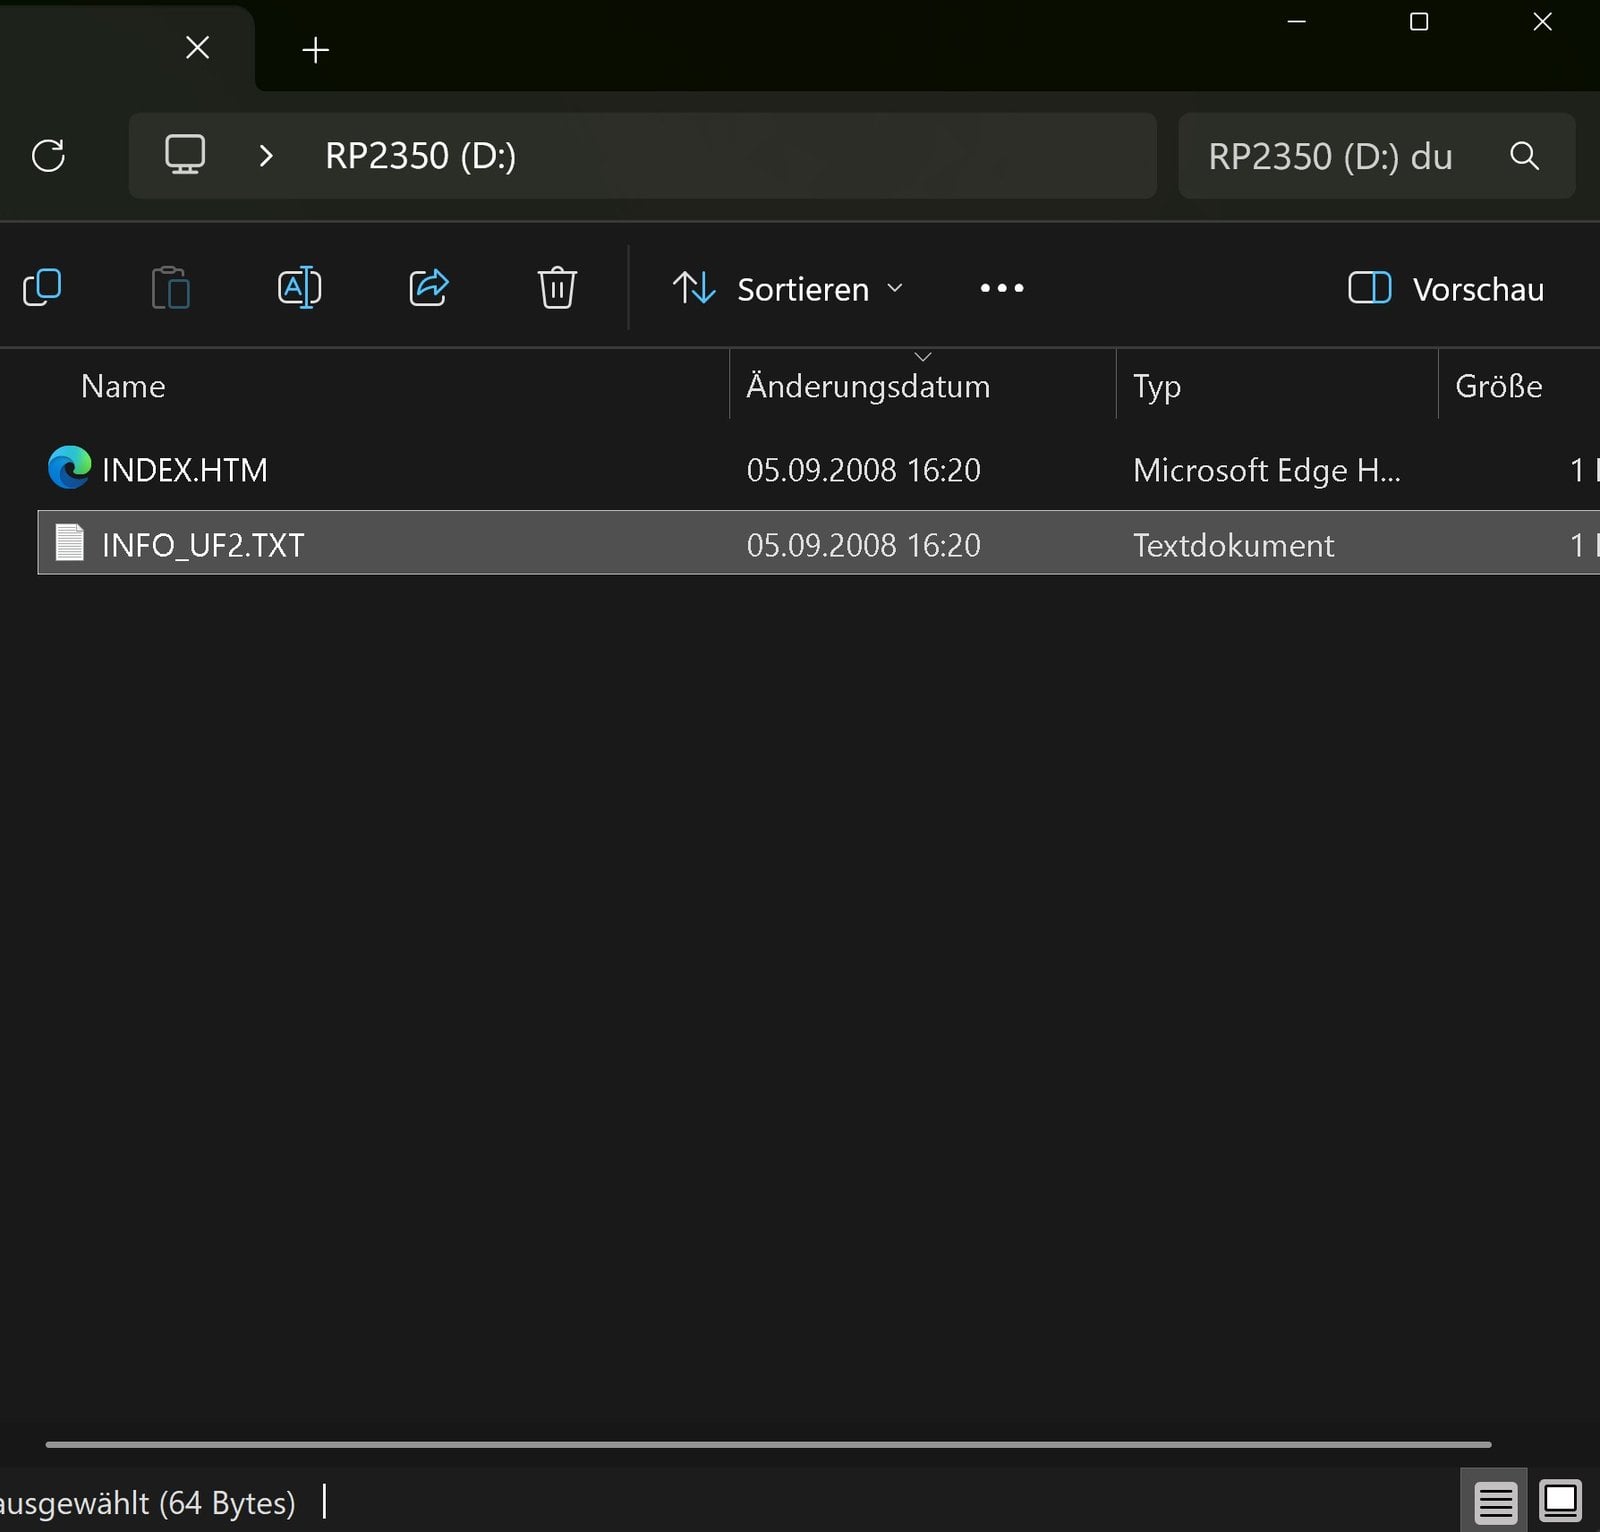
On Windows 11 we did not have to install any driver, neither for the drive nor for the serial connection in the next step. You only need the BOOTSEL button again when you want to update MicroPython or reset the Pico.
Step 2: Install Thonny and connect
Thonny is a free Python editor with built-in support for MicroPython boards: write code, run it on the Pico with one click and copy files onto the board. Download Thonny for your operating system and install it. On Raspberry Pi OS with desktop, Thonny is already installed.
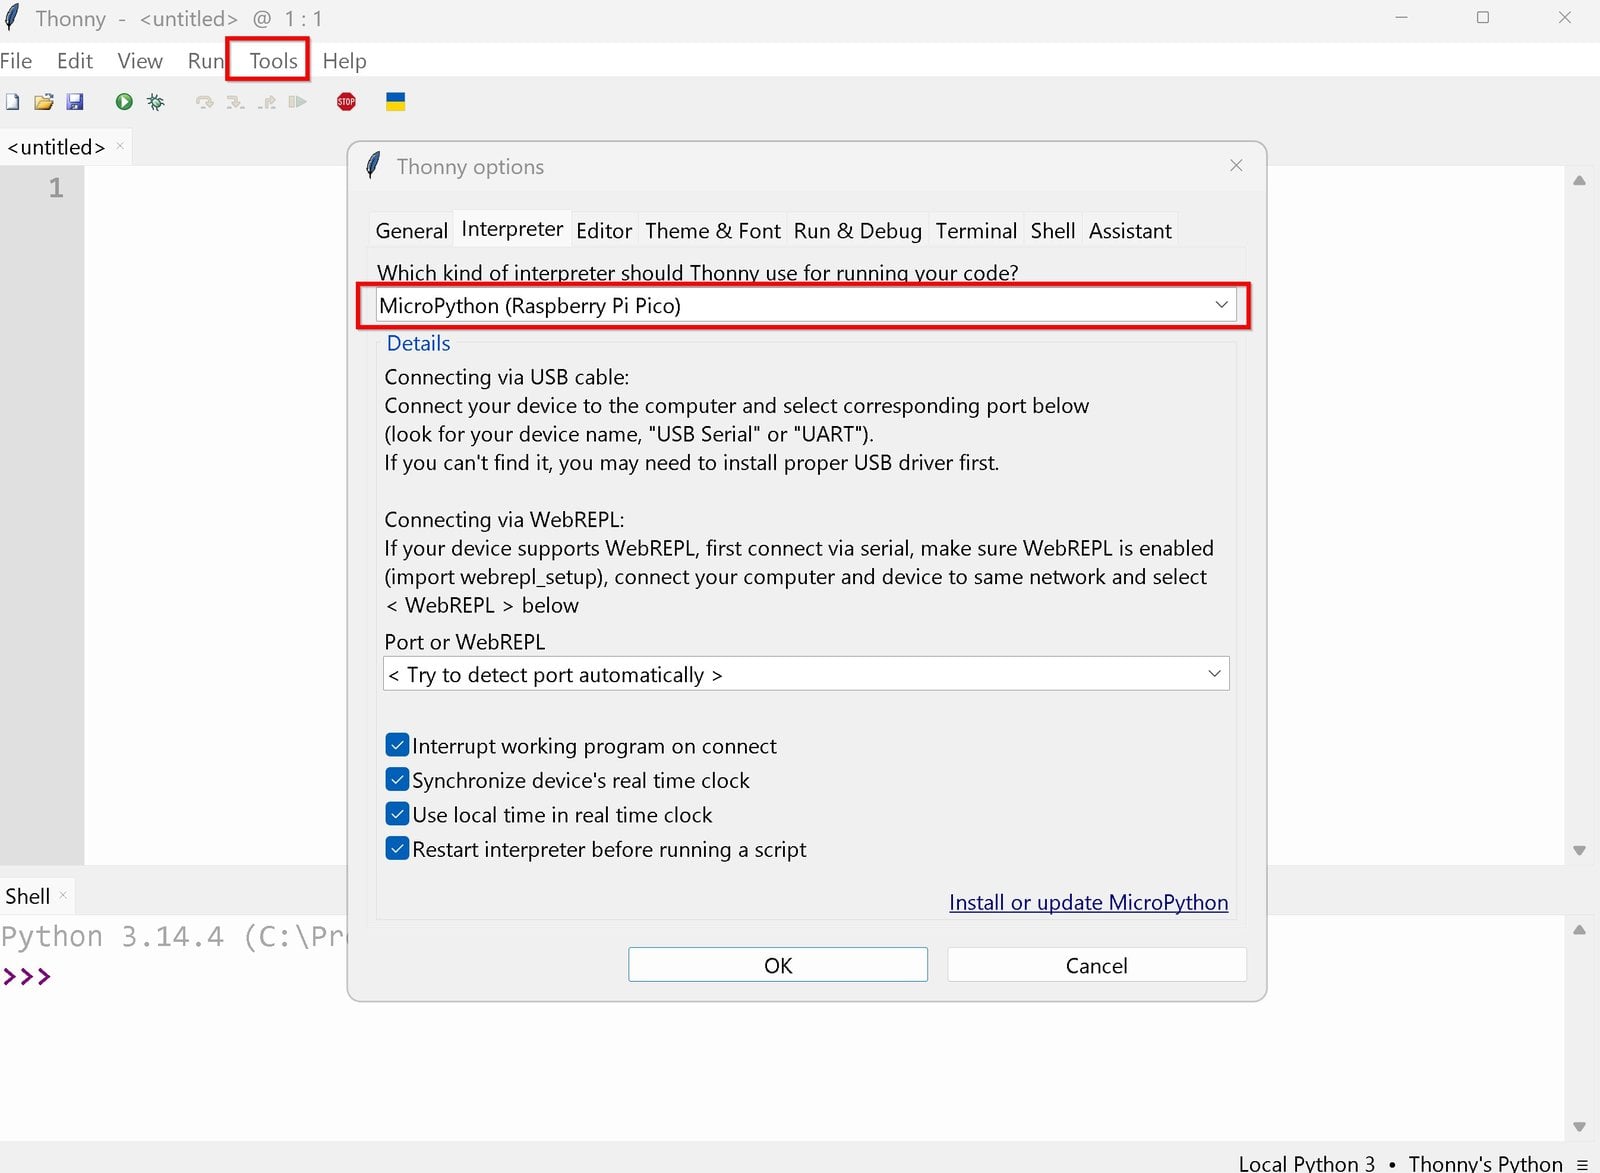
- In Thonny, open Tools → Options and switch to the Interpreter tab.
- Select MicroPython (Raspberry Pi Pico). Leave the port at Try to detect port automatically and confirm with OK.
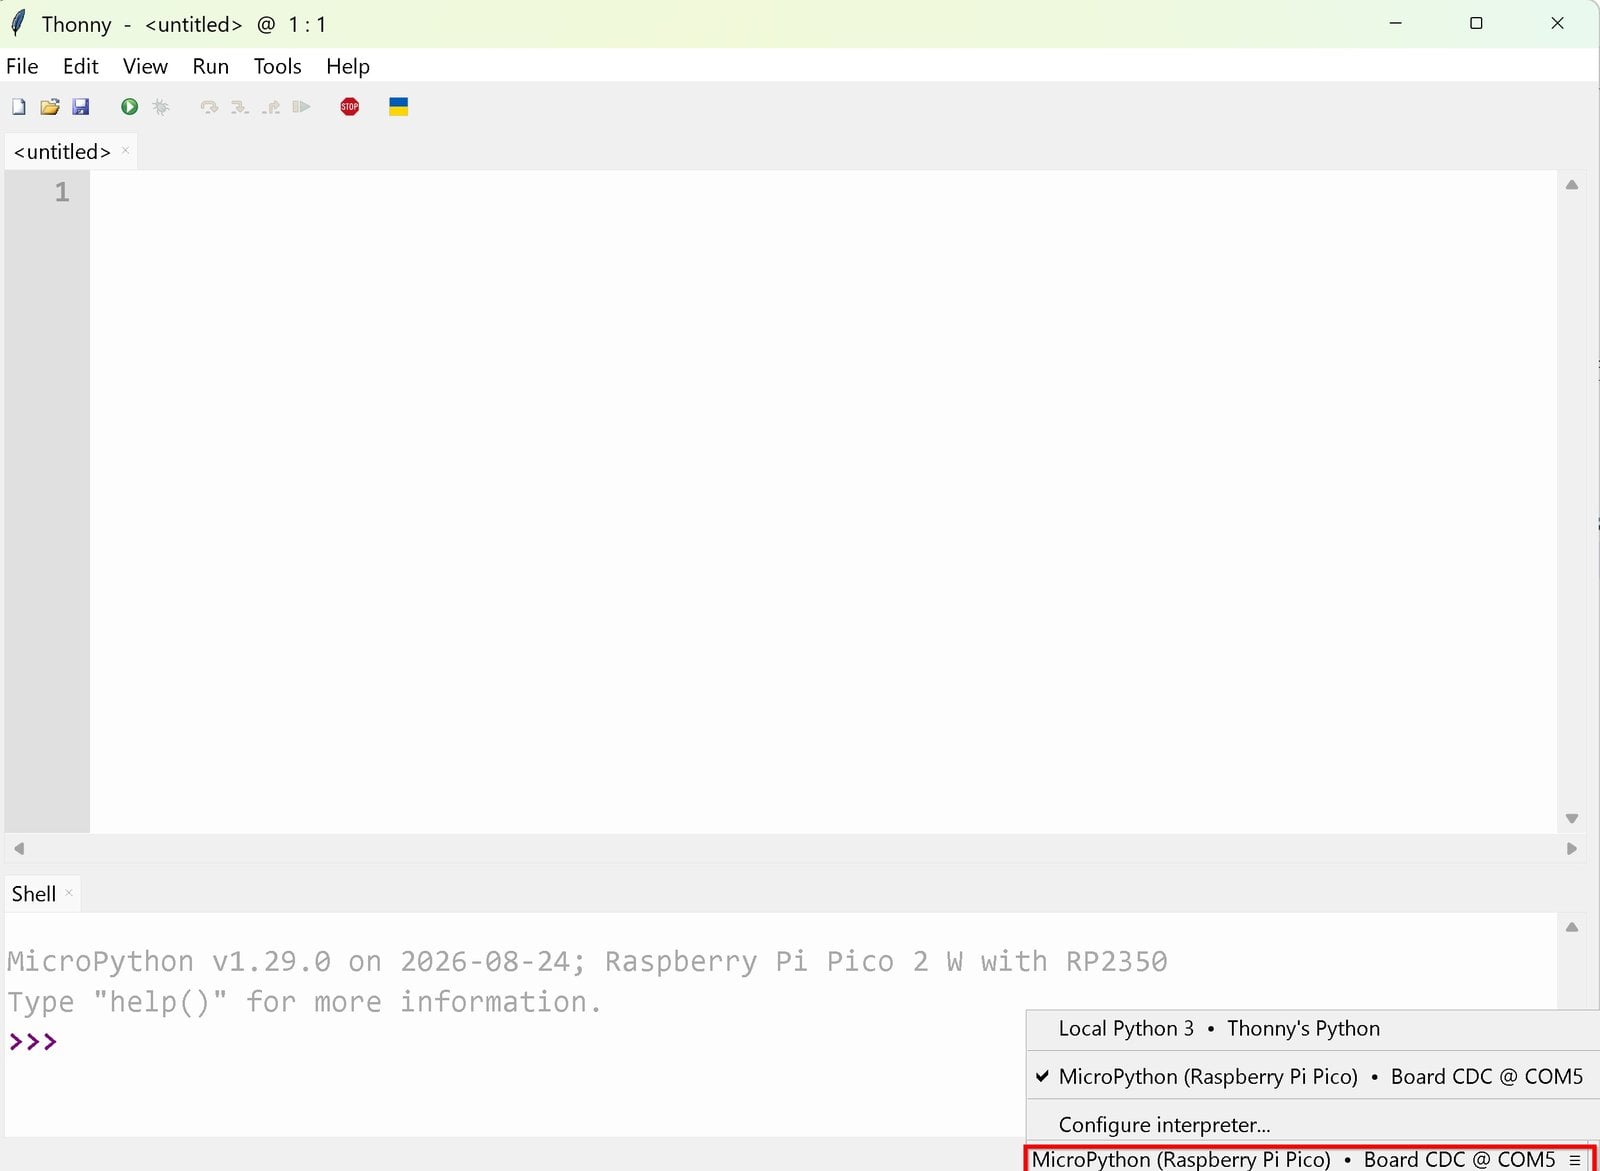
The shell at the bottom now shows MicroPython with its version and board, in our case MicroPython v1.29.0 on 2026-08-24; Raspberry Pi Pico 2 W with RP2350. The bottom right corner shows the active interpreter and port; on Windows that is a COM port such as Board CDC @ COM5.
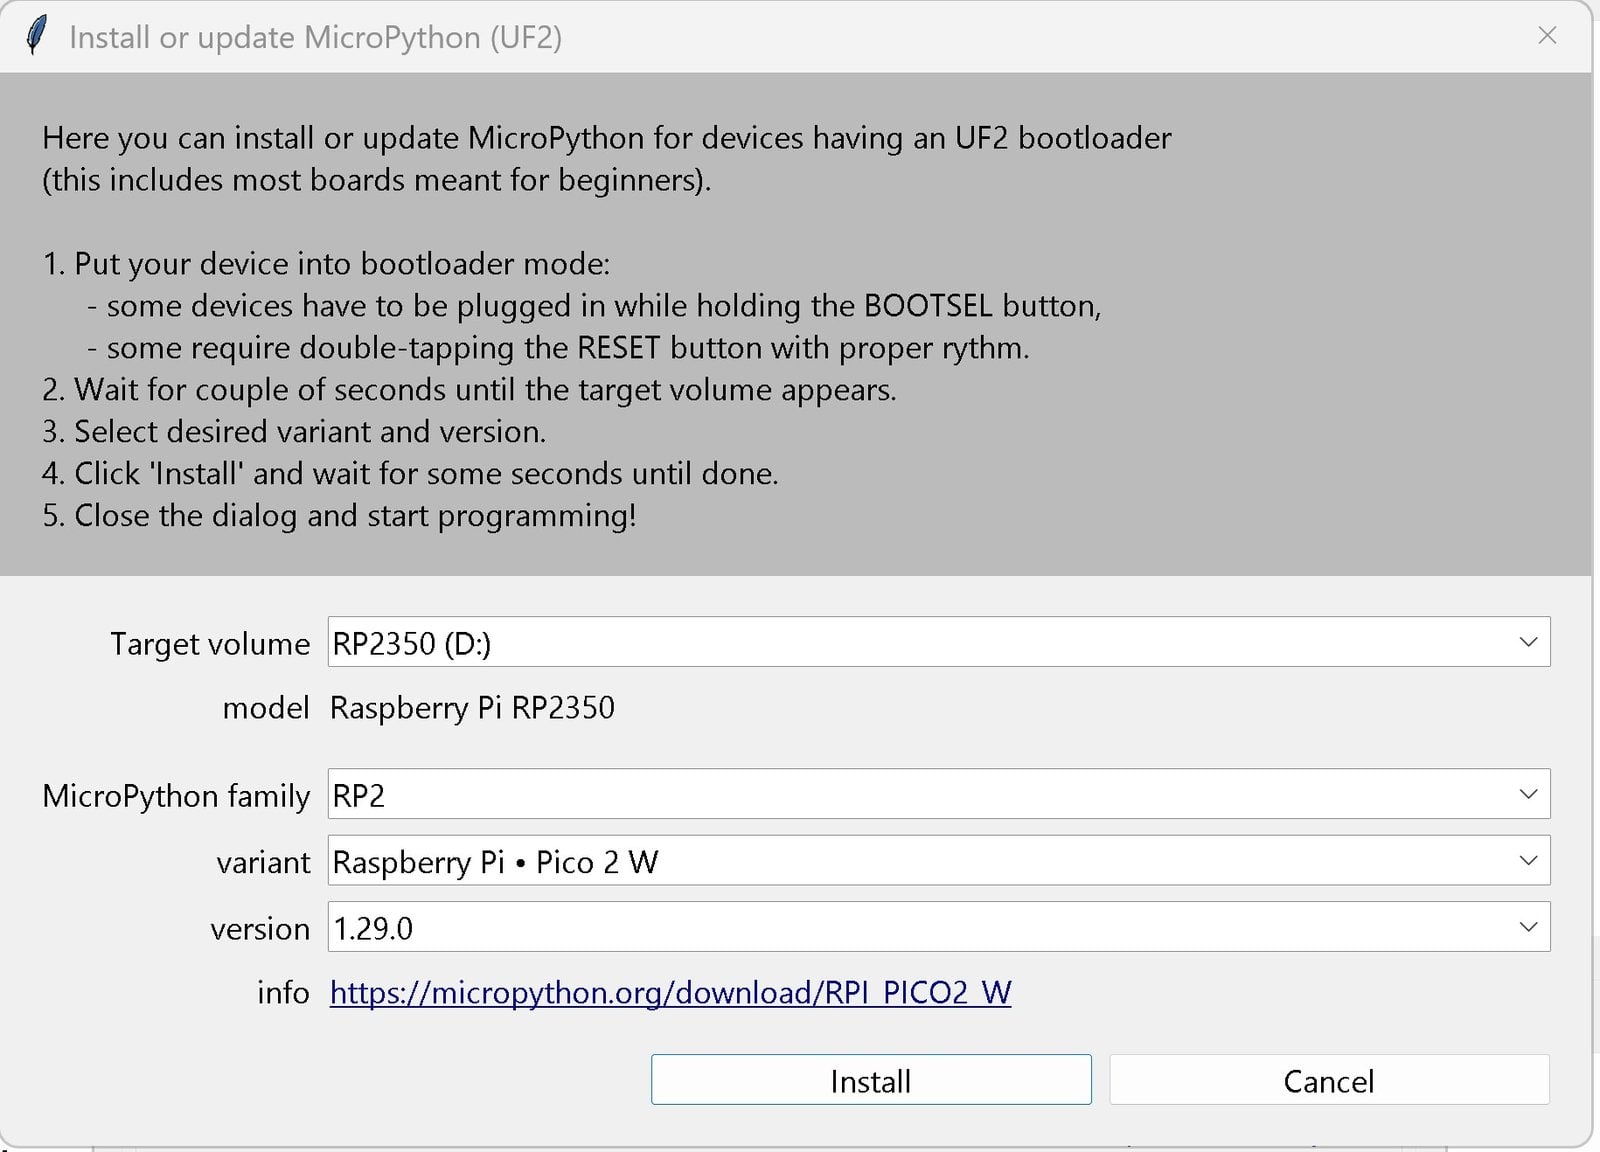
The same options dialog has a link called Install or update MicroPython. Through it, Thonny installs the firmware for you without a manual download. Plug in the Pico in BOOTSEL mode and Thonny fills in the drive under Target volume. Choose RP2 as the MicroPython family, your model as the variant (for example Raspberry Pi • Pico 2 W) and the latest version, then click Install. This is a convenient alternative to step 1, especially for later updates.
To test the connection, type these three lines into the editor and click the green Run button:
import sys, os
print(sys.implementation)
print(os.uname())
The output lists the version, board and firmware build. The MPY: soft reboot line is not an error: Thonny restarts the interpreter before every run so nothing is left over from the previous program.
MPY: soft reboot
(name='micropython', version=(1, 29, 0, ''), _machine='Raspberry Pi Pico 2 W with RP2350', _mpy=7942, _build='RPI_PICO2_W', _thread='unsafe')
(sysname='rp2', nodename='rp2', release='1.29.0', version='v1.29.0 on 2026-08-24 (GNU 16.1.0 MinSizeRel)', machine='Raspberry Pi Pico 2 W with RP2350')
Step 3: Blink the onboard LED
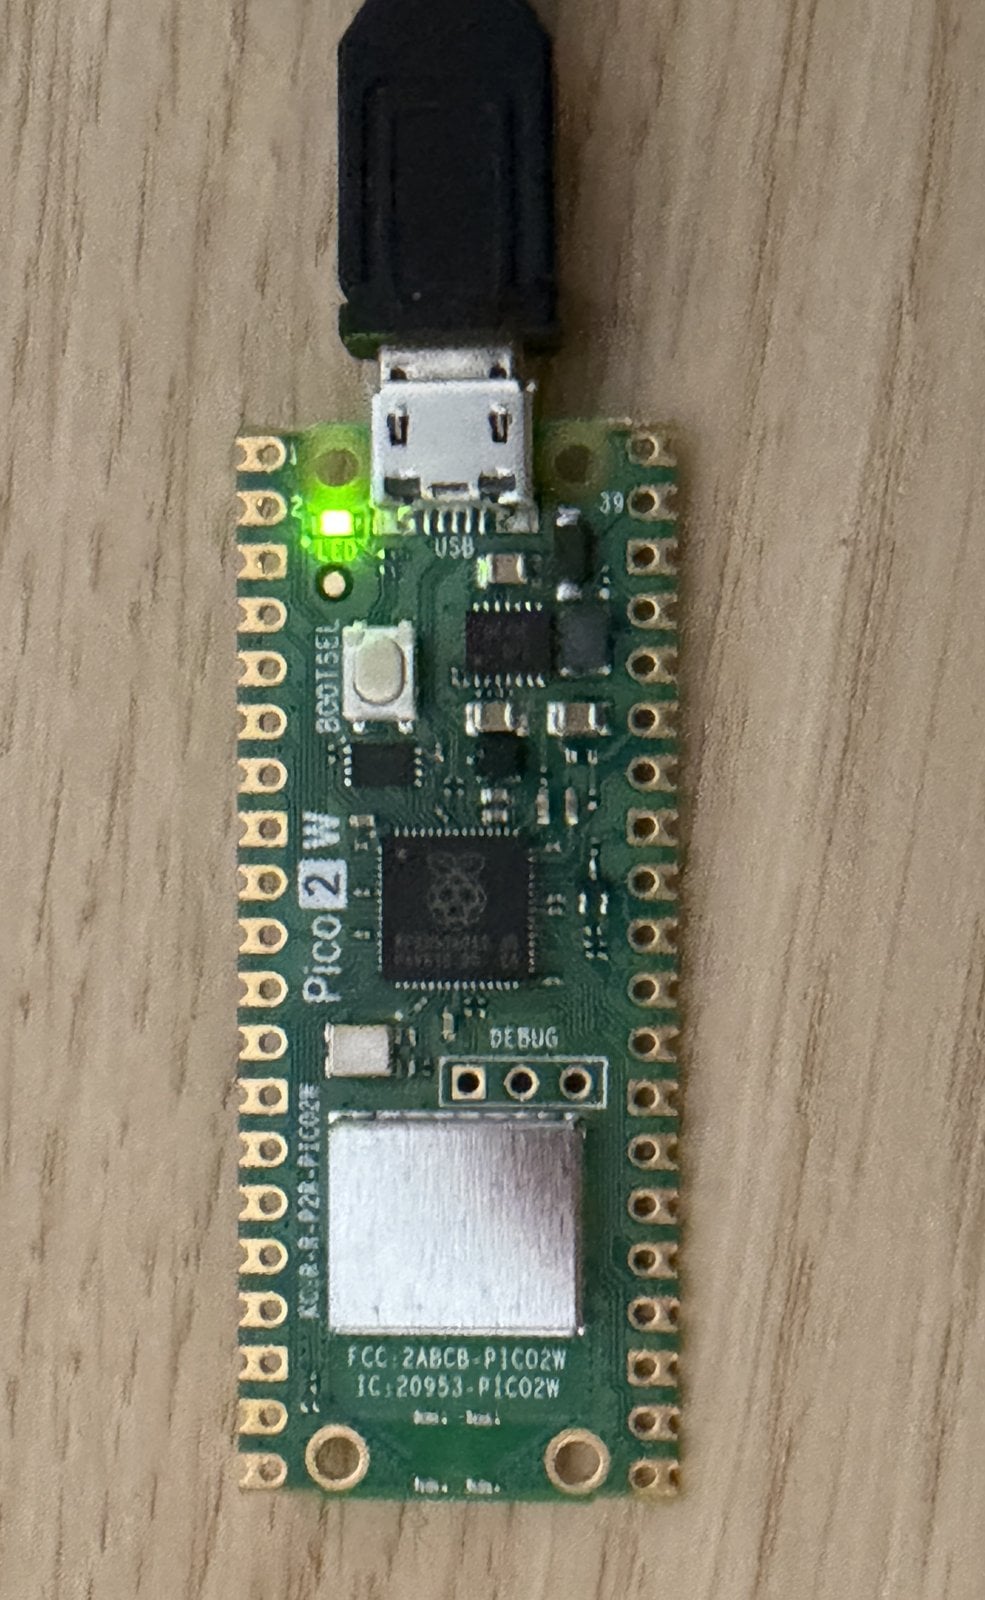
The “Hello World” of microcontrollers is a blinking LED. The Pico has a green LED right next to the USB port:
from machine import Pin
import time

led = Pin("LED", Pin.OUT)
while True:
    led.toggle()
    time.sleep(0.5)
Pin("LED") works on all four models. On the Pico and Pico 2 the LED is wired to GPIO 25, on the W models it hangs off the wireless chip instead. Older tutorials using Pin(25) therefore leave the LED of a Pico W or Pico 2 W dark. Stop the program with the red Stop button in Thonny.
Run your program at startup: main.py
As long as you only run code with the Run button, it lives in RAM and is gone once you unplug the board. To start the program every time the Pico powers up, save it via File → Save as, choose Raspberry Pi Pico instead of “This computer” in the dialog that follows, and name it main.py. MicroPython runs this file automatically after every boot. From then on the Pico also works from a USB power supply or power bank, without a computer.
If a main.py with an endless loop is running, Thonny interrupts it automatically when connecting, as long as Interrupt working program on connect is ticked in the interpreter options. To remove the file, open View → Files, right-click it in the Pico section and delete it.
Step 4: Read the internal temperature sensor
Both the RP2040 and the RP2350 contain a temperature sensor, read through the analog-to-digital converter (ADC) on channel 4. The voltage-to-degrees formula comes from the RP2350 datasheet:
from machine import ADC

sensor = ADC(4)
voltage = sensor.read_u16() * 3.3 / 65535
temperature = 27 - (voltage - 0.706) / 0.001721
print(f"{temperature:.1f} °C")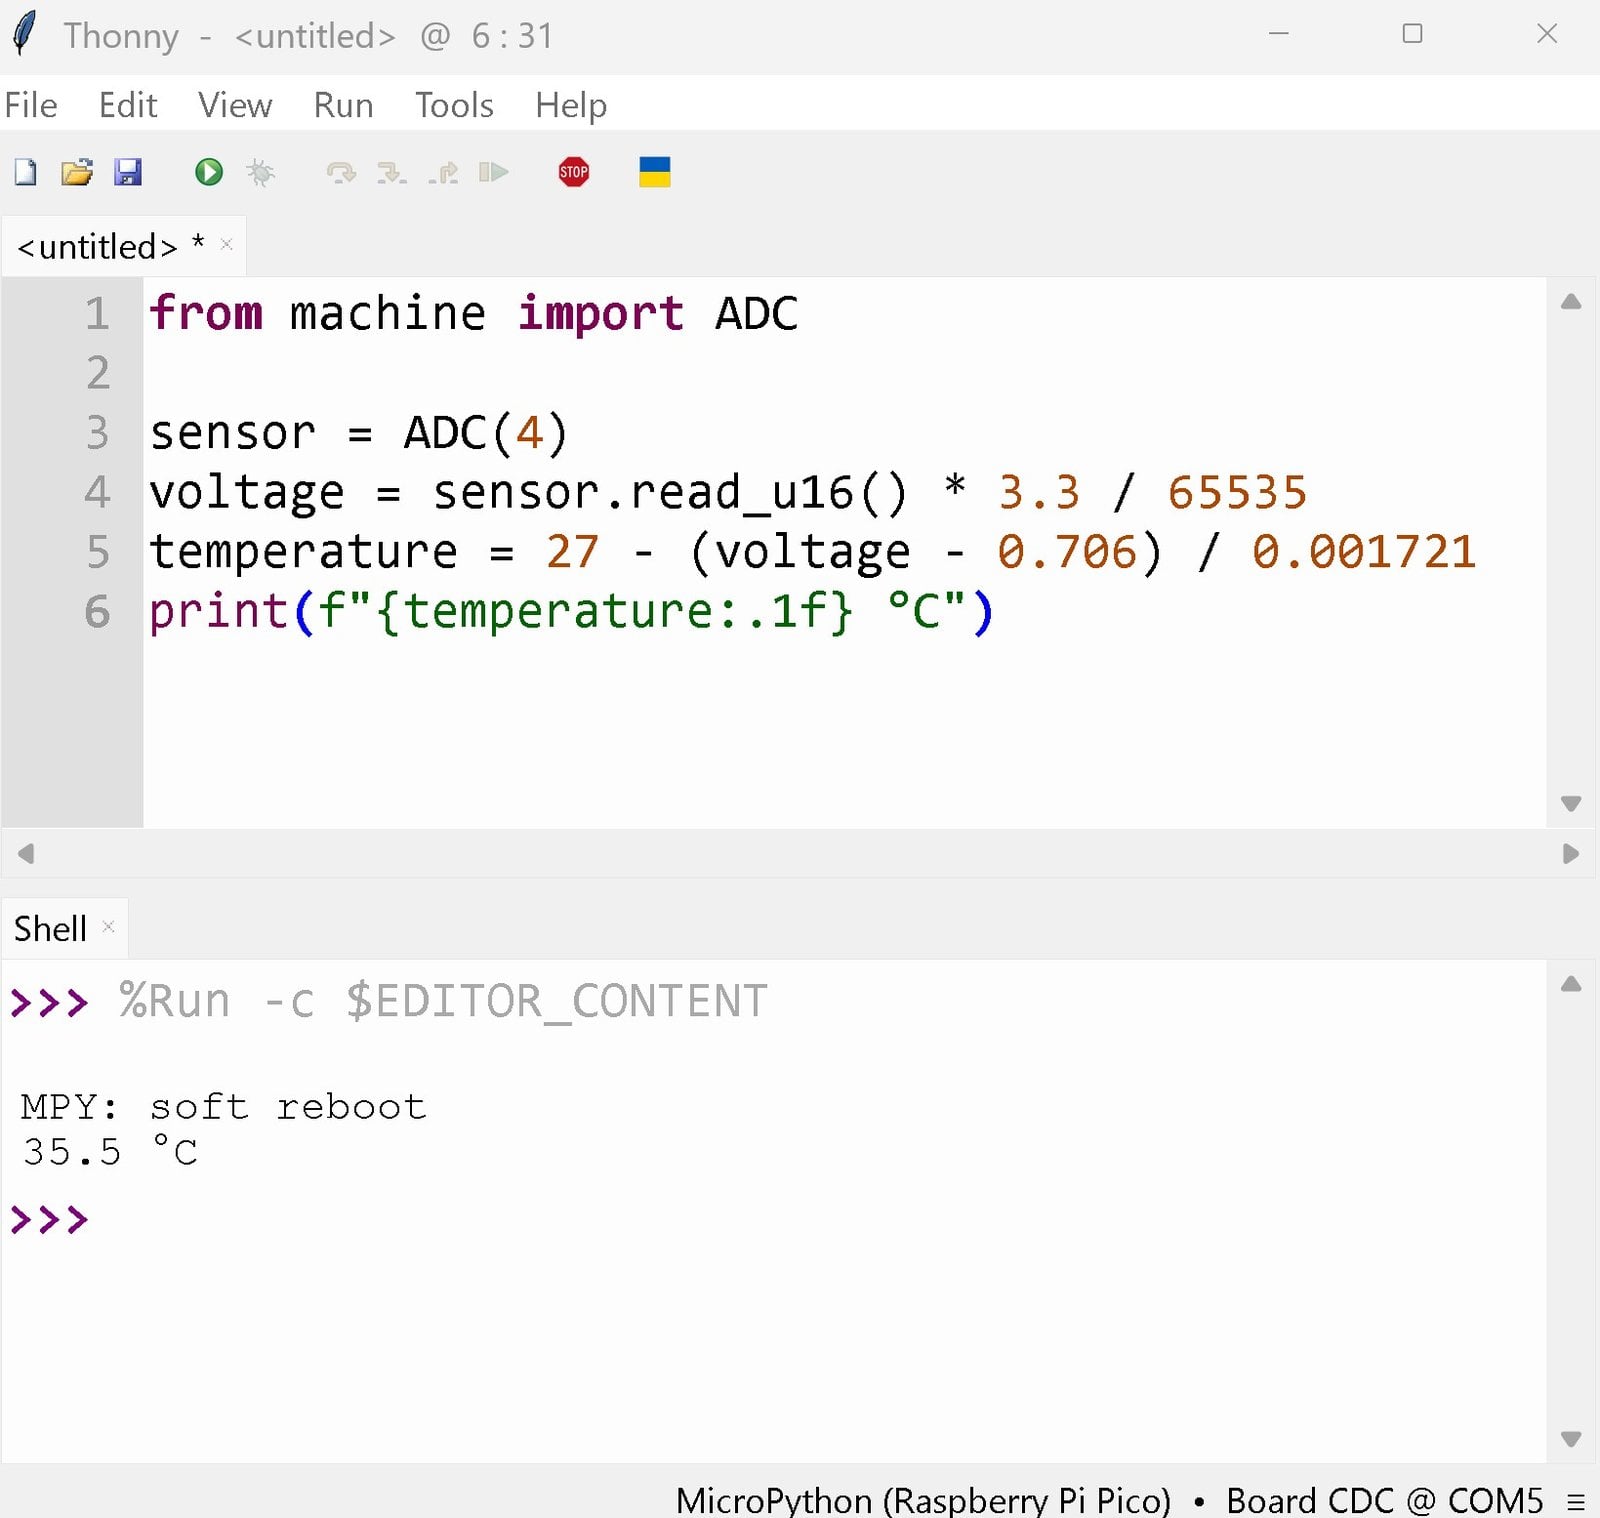
Our Pico 2 W reported 35.5 °C (95.9 °F) at a room temperature of about 22.5 °C (72.5 °F), roughly 13 °C too high. That was a single reading on a board that had already been running for a while, but deviations of this size are not unusual for this sensor. It measures the temperature inside the chip, which warms itself up during operation. On top of that, the formula assumes exactly 3.3 V as the reference voltage. The Pico’s ADC has no reference of its own and uses its filtered supply instead, which according to the Pico 2 datasheet sits around 30 mV below the supply rail because of the filter resistor. An error of just 1 mV shifts the result by more than half a degree Celsius.
The sensor is still good enough for trends, for example to see whether the chip gets too warm inside an enclosure. If you want a usable absolute value, average several readings and calibrate once against a thermometer:
from machine import ADC
import time

OFFSET = -13.0  # thermometer reading minus Pico reading, measure once per board

sensor = ADC(4)
total = 0
for _ in range(20):
    total += sensor.read_u16()
    time.sleep_ms(10)
voltage = total / 20 * 3.3 / 65535
temperature = 27 - (voltage - 0.706) / 0.001721 + OFFSET
print(f"{temperature:.1f} °C")
Determine OFFSET for your own board; the −13 only applies to ours. For room temperature you need an external sensor on the pins anyway, such as a BME280* via I²C. Our interactive Pico pinout shows which pins you can use for it.
Step 5: Connect the Pico W and Pico 2 W to Wi-Fi
The W models include an Infineon wireless chip that MicroPython drives through the network module. Enter your network name and password:
import network, time

wlan = network.WLAN(network.STA_IF)
wlan.active(True)
wlan.connect("YOUR_SSID", "YOUR_PASSWORD")
for _ in range(20):
    if wlan.isconnected():
        break
    time.sleep(0.5)
print("connected:", wlan.isconnected(), wlan.ifconfig())
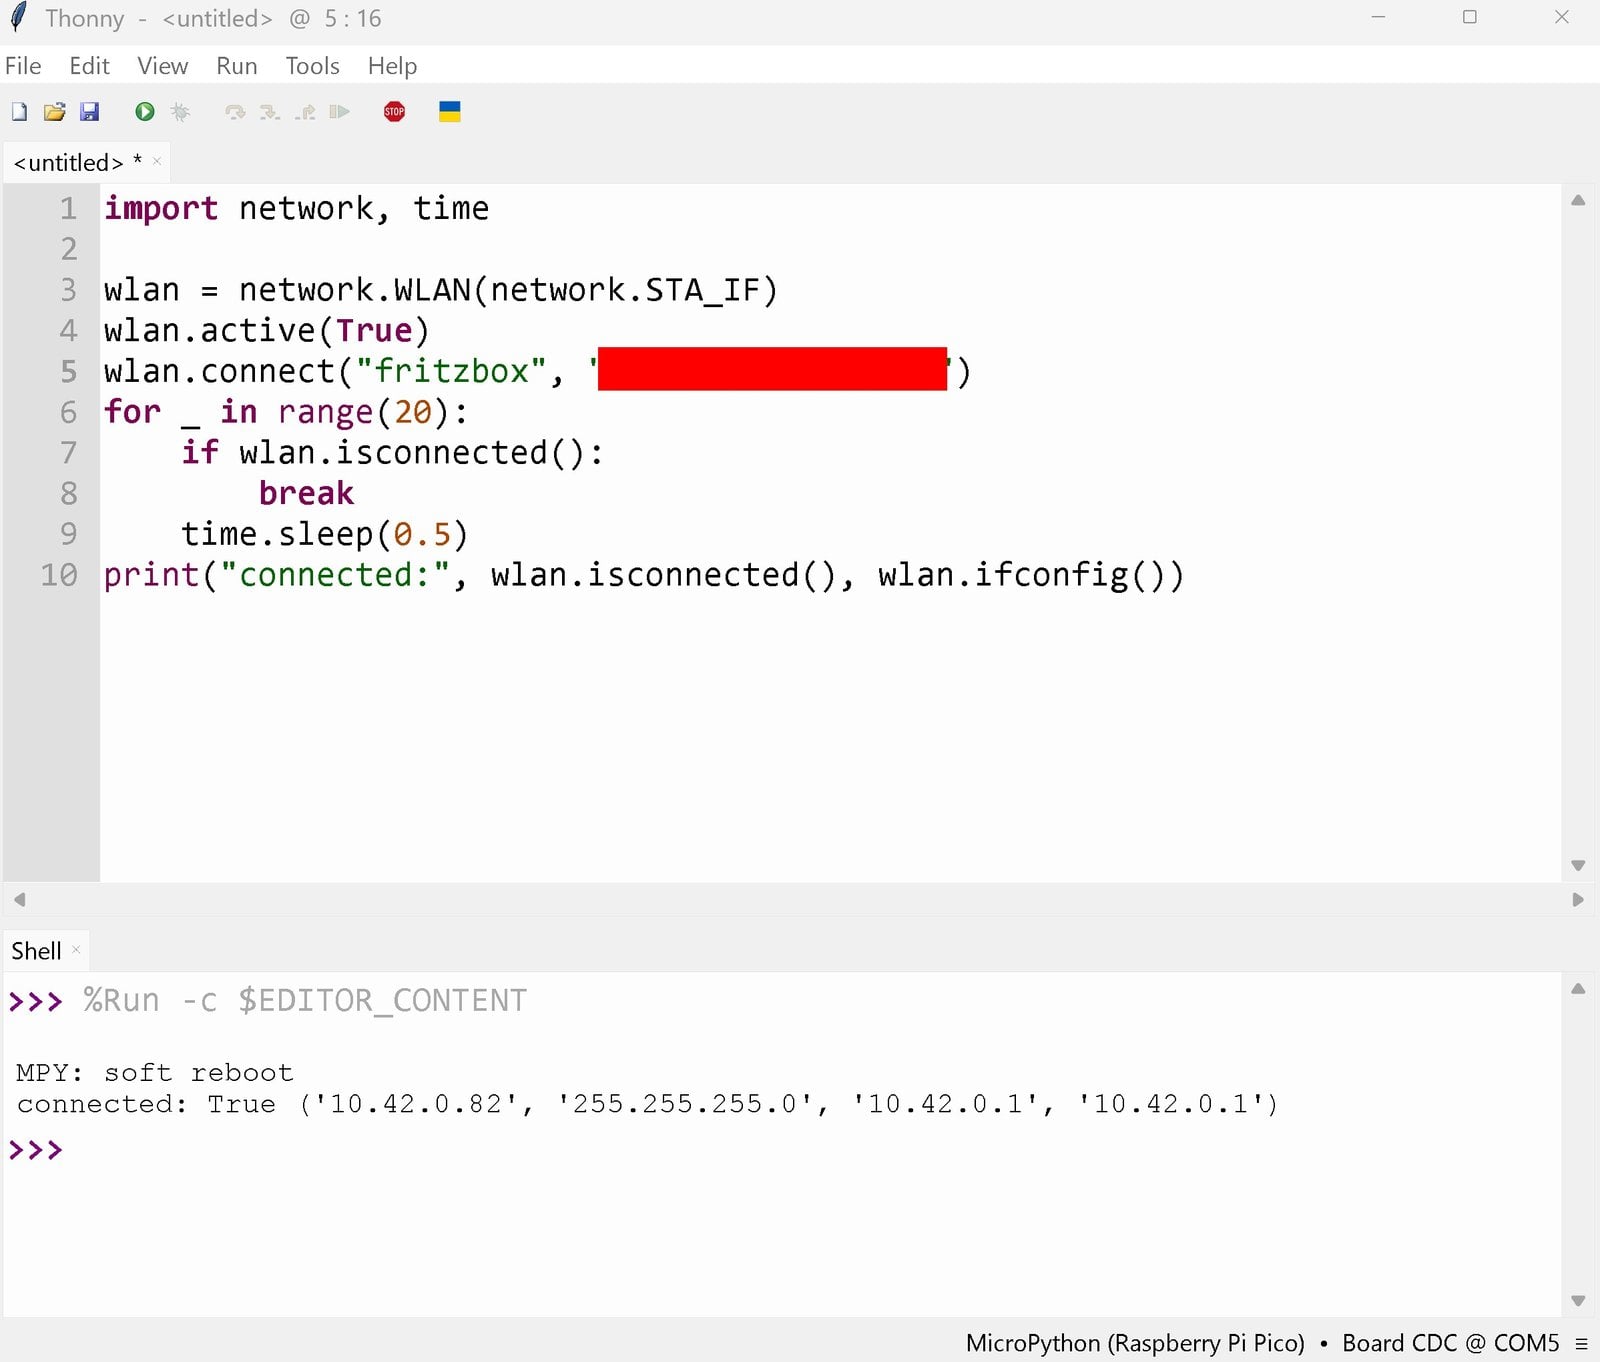
The loop waits up to ten seconds for the connection. Our Pico 2 W was online after three to four seconds and then printed its IP address, netmask, gateway and DNS server:
If you see connected: False, check the network name and password first. The Pico only uses the 2.4 GHz band. Routers that combine 2.4 and 5 GHz under one name are normally fine, but a 5 GHz-only network is invisible to the Pico. Once the code goes into a main.py, keep your credentials in a separate file such as secrets.py on the Pico and import them, so the password does not end up in a screenshot or forum post by accident.
Pico 2 gotcha: erratum E9 and internal pull-downs
The first production revision of the RP2350, stepping A2, has a documented hardware bug listed in the RP2350 datasheet as erratum RP2350-E9. When a GPIO is configured as an input and its voltage sits in the undefined range between low and high, a leakage current of typically around 120 µA flows out of the pin and holds it at about 2.2 V. The internal pull-down resistor is too weak to overcome it. As a result, a button that connects the pin to 3.3 V and relies on the internal pull-down can report “pressed” permanently after the first press.
The bug is fixed from stepping A3/A4 onwards. Our Pico 2 W, bought in autumn 2026, still has an A2 chip, recognisable by the marking RP2350A0A2 on the package. You can also check in software. The script only applies to the Pico 2 and Pico 2 W; the RP2040 on the older models is not affected:
import machine, sys

if "RP2350" in sys.implementation._machine:
    rev = machine.mem32[0x40000000] >> 28
    version = (rev & 3) | ((rev & 8) >> 1)
    if version == 2:
        print("RP2350 A2: affected by erratum E9")
    else:
        print("RP2350 A3/A4: not affected")
else:
    print("RP2040: erratum E9 does not apply")
The check mirrors the rp2350_chip_version() function from the official Pico SDK. On our board the revision field reads 2, i.e. A2. The workaround is to wire buttons to GND and use the internal pull-up, which is not affected by the bug. The pin then reads 1 at rest and 0 when pressed:
from machine import Pin
import time

led = Pin("LED", Pin.OUT)
button = Pin(14, Pin.IN, Pin.PULL_UP)  # button between GP14 (pin 19) and GND (pin 18)

while True:
    led.value(button.value() == 0)
    time.sleep_ms(20)
If your circuit really needs a pull-down, add an external resistor of 8.2 kΩ or less to GND; according to the datasheet that overcomes the leakage. The details above come from the RP2350 datasheet.
Reset the Pico or update MicroPython
Updating MicroPython works like the first installation: hold BOOTSEL, plug in, then drag the new .uf2 file onto the drive or use Install or update MicroPython in Thonny. Your files such as main.py normally survive the update.
To wipe the Pico completely, for example because a broken main.py crashes it right away or you want to pass the board on, use the official erase file flash_nuke.uf2. It is now a universal file for both RP2040 and RP2350. Dragged onto the drive in BOOTSEL mode, it erases the entire flash. On our Pico 2 W the empty drive reappeared immediately afterwards, and you start again at step 1. You cannot damage BOOTSEL mode itself, it lives in the chip’s ROM.
Troubleshooting
- No drive appears: In most cases the cable is charge-only. Try one that is known to carry data. If the Pico already has firmware, BOOTSEL must be held while plugging in.
- Thonny cannot find the Pico: Check in the bottom right corner that the MicroPython interpreter is selected. If another program holds the COM port, such as a second Thonny window or the Arduino IDE serial monitor, close it and click Stop in Thonny.
- Thonny reports “Connection lost — EOF”: This happens when the Pico restarts or switches to BOOTSEL mode while Thonny is connected. Once MicroPython is running again, reconnect with the Stop button.
- The drive disappears after copying: That is expected. The Pico restarts with the new firmware and is then reachable as a serial device instead of a drive.
- The LED stays off: If your code says
Pin(25), replace it withPin("LED"). Also check that you flashed the firmware for the right model: the Pico 2 firmware without W does not know the wireless chip that drives the Pico 2 W’s LED.
Where to go from here
With firmware, editor, autostart and Wi-Fi in place, you have everything most Pico projects need. Next, take a look at the pin layout: our Pico pinout shows for every model which pins handle I²C, SPI, UART, PWM and ADC, and which pins MicroPython uses by default. That is where your sensors, displays and buttons go. If the Pico should report its values to Home Assistant, you can do that without writing code using the Raspberry Pi Pico with ESPHome. For all MicroPython commands on the Pico, see the MicroPython quick reference for the RP2.
Have fun experimenting!
Raspberry Pi Pico FAQ
No. The Pico is a microcontroller with 264 or 520 KB of RAM that runs a single program written in MicroPython, C/C++ or via the Arduino IDE. For Linux, a desktop or server software you need a Raspberry Pi such as the Pi 5 or Zero 2 W.
Both have Wi-Fi, Bluetooth and the same pinout. The Pico 2 W uses the newer RP2350 with 150 MHz, 520 KB of RAM and 4 MB of flash, the Pico W the RP2040 with 133 MHz, 264 KB and 2 MB. MicroPython code written for the Pico W usually runs unchanged on the Pico 2 W.
Not on a brand-new Pico. Without firmware in its flash it starts as a USB drive automatically. If MicroPython or another program is already installed, hold BOOTSEL while plugging it in.
Yes. In the Arduino IDE boards manager, install the Raspberry Pi Pico/RP2040/RP2350 package by Earle Philhower, which supports all four models including Wi-Fi. You can switch back to MicroPython at any time by flashing the MicroPython firmware again.
Not on the Pico and Pico W, their GPIOs only tolerate 3.3 V. On the Pico 2 and Pico 2 W the digital pins are 5 V tolerant, but only while the board itself is powered, and the ADC pins GP26 to GP28 are not tolerant at all. A level shifter or voltage divider is the safer choice on every model.