Presence Sensor in Home Assistant: the Smart Home Office Desk
If you work from home on an irregular schedule, you know the problem with time-based heating: the office warms up on Monday with nobody in it, and on Thursday you sit down at nine in a room at 18 °C (64 °F). A presence sensor in Home Assistant solves that properly, because it does not report whether something moved but whether somebody is at the desk, even after twenty minutes of quiet typing. That is exactly where every classic motion sensor fails.
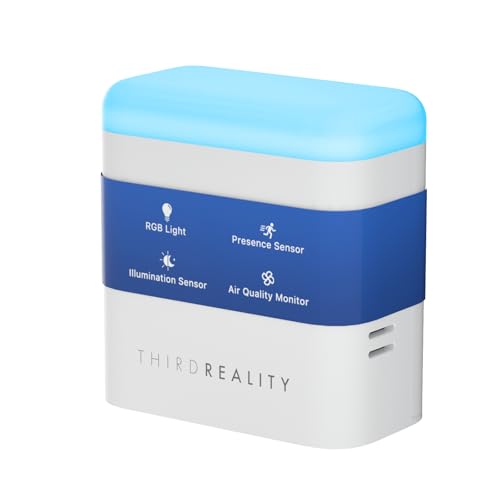
I put the ThirdReality Smart Presence Sensor R3 on my desk: a Zigbee device with a 60 GHz radar that also carries an RGB light, a light sensor and an air quality sensor. This one USB-C device drives four automations: a desk light that follows presence, heating to 22 °C (72 °F) as soon as someone sits down, a ventilation alert when the air goes stale, and a button for “do not disturb”. On top, Home Assistant counts how long you have been at the desk today.
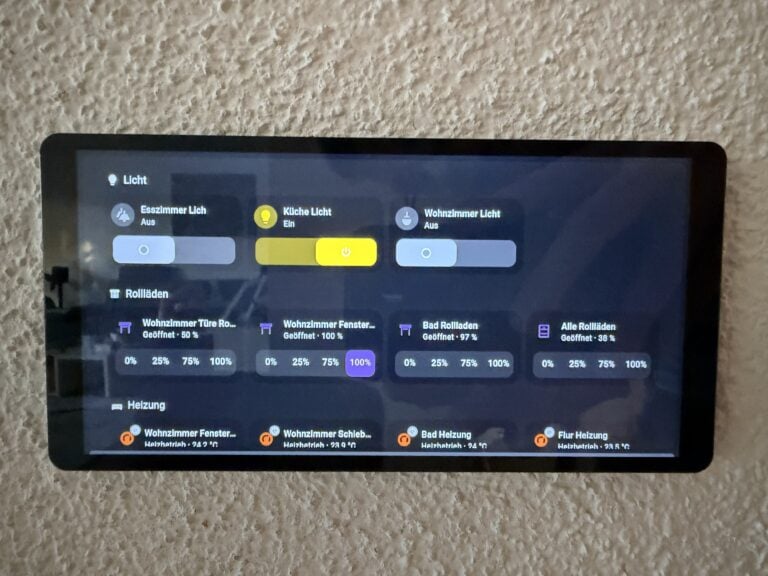
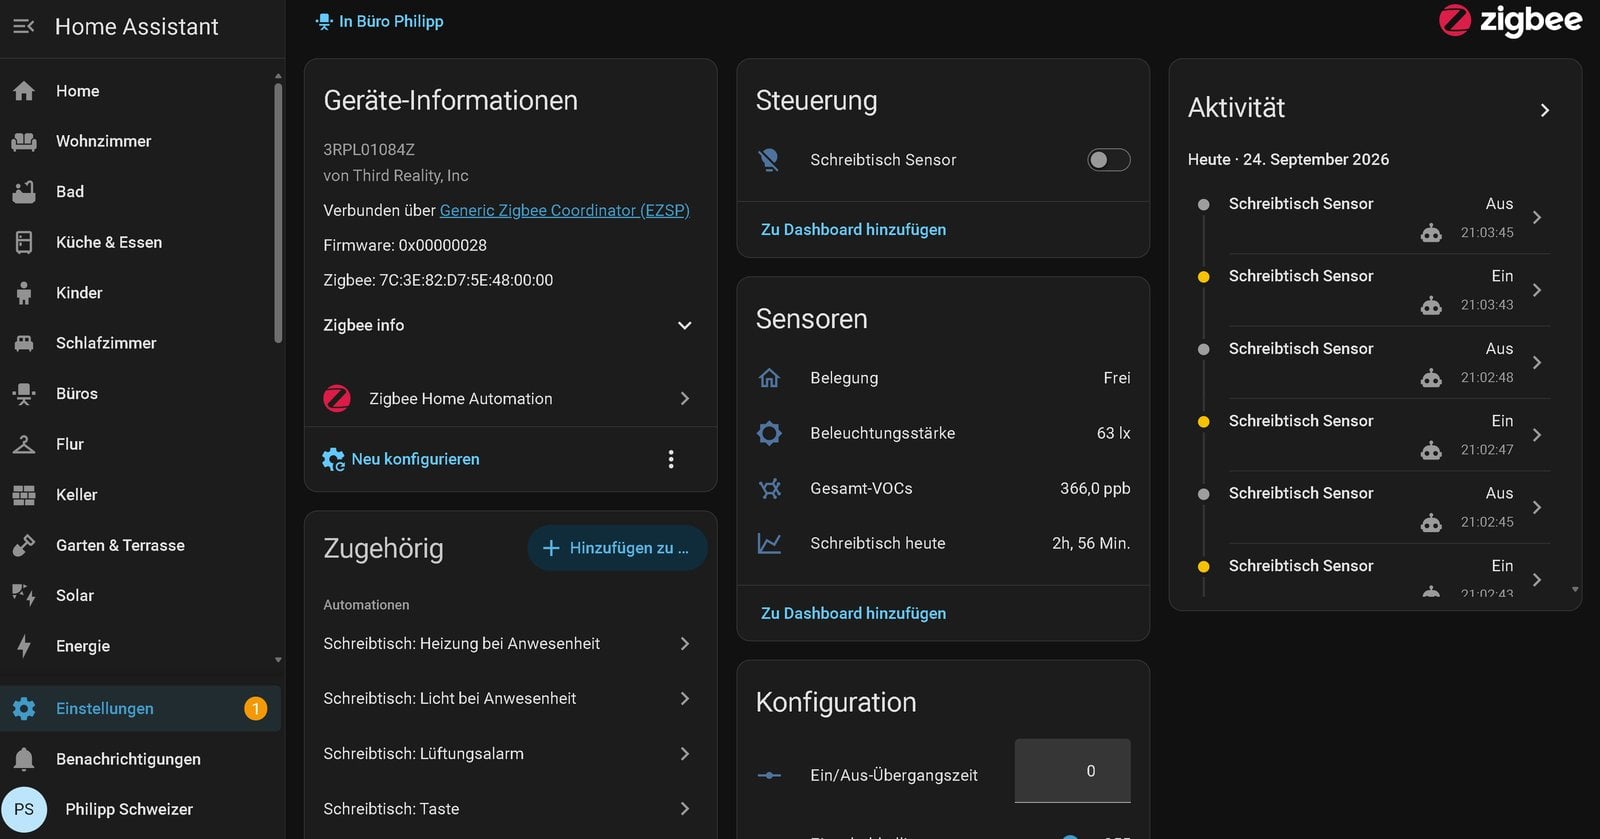
Full disclosure: ThirdReality sent me the R3 and the Zigbee button free of charge as review samples. The manufacturer had no say in the content; every reading and automation here comes from my own setup in the office. Everything was tested on 24 September 2026 with Home Assistant 2026.9 and ZHA, and the screenshots show my German Home Assistant interface; the field names are translated in the text.
The ThirdReality R3 is a Zigbee presence sensor that packs a 60 GHz radar, an RGB light, a light sensor and a TVOC sensor into one USB-C device. This guide builds four Home Assistant automations on it for a home-office desk: light on presence and darkness, heating from 18 to 22 °C after three minutes at the desk, a ventilation alert with your own threshold, and a focus button that turns the light red. All four come as ready-to-paste YAML, plus a counter for your daily desk time.
Presence sensor instead of motion sensor: why radar at the desk
A PIR sensor is useless at a desk: someone reading or typing does not move as far as it is concerned, so after a minute the light goes off and the heating drops. The R3’s 60 GHz radar kept detecting me without a single dropout, 26 minutes in the longest stretch while I sat next to it and typed; the occupancy sensor stayed “on” the whole time at the factory sensitivity level 3. Everything else builds on that property.
A motion sensor (PIR) reacts to a moving heat source and clears a few seconds after the movement stops. A presence sensor with mmWave radar transmits a radio signal and evaluates the reflection; it picks up tiny movements such as breathing or typing and therefore keeps a seated person as “present” indefinitely. The frequency (24 or 60 GHz) determines how finely those micro-movements are resolved.
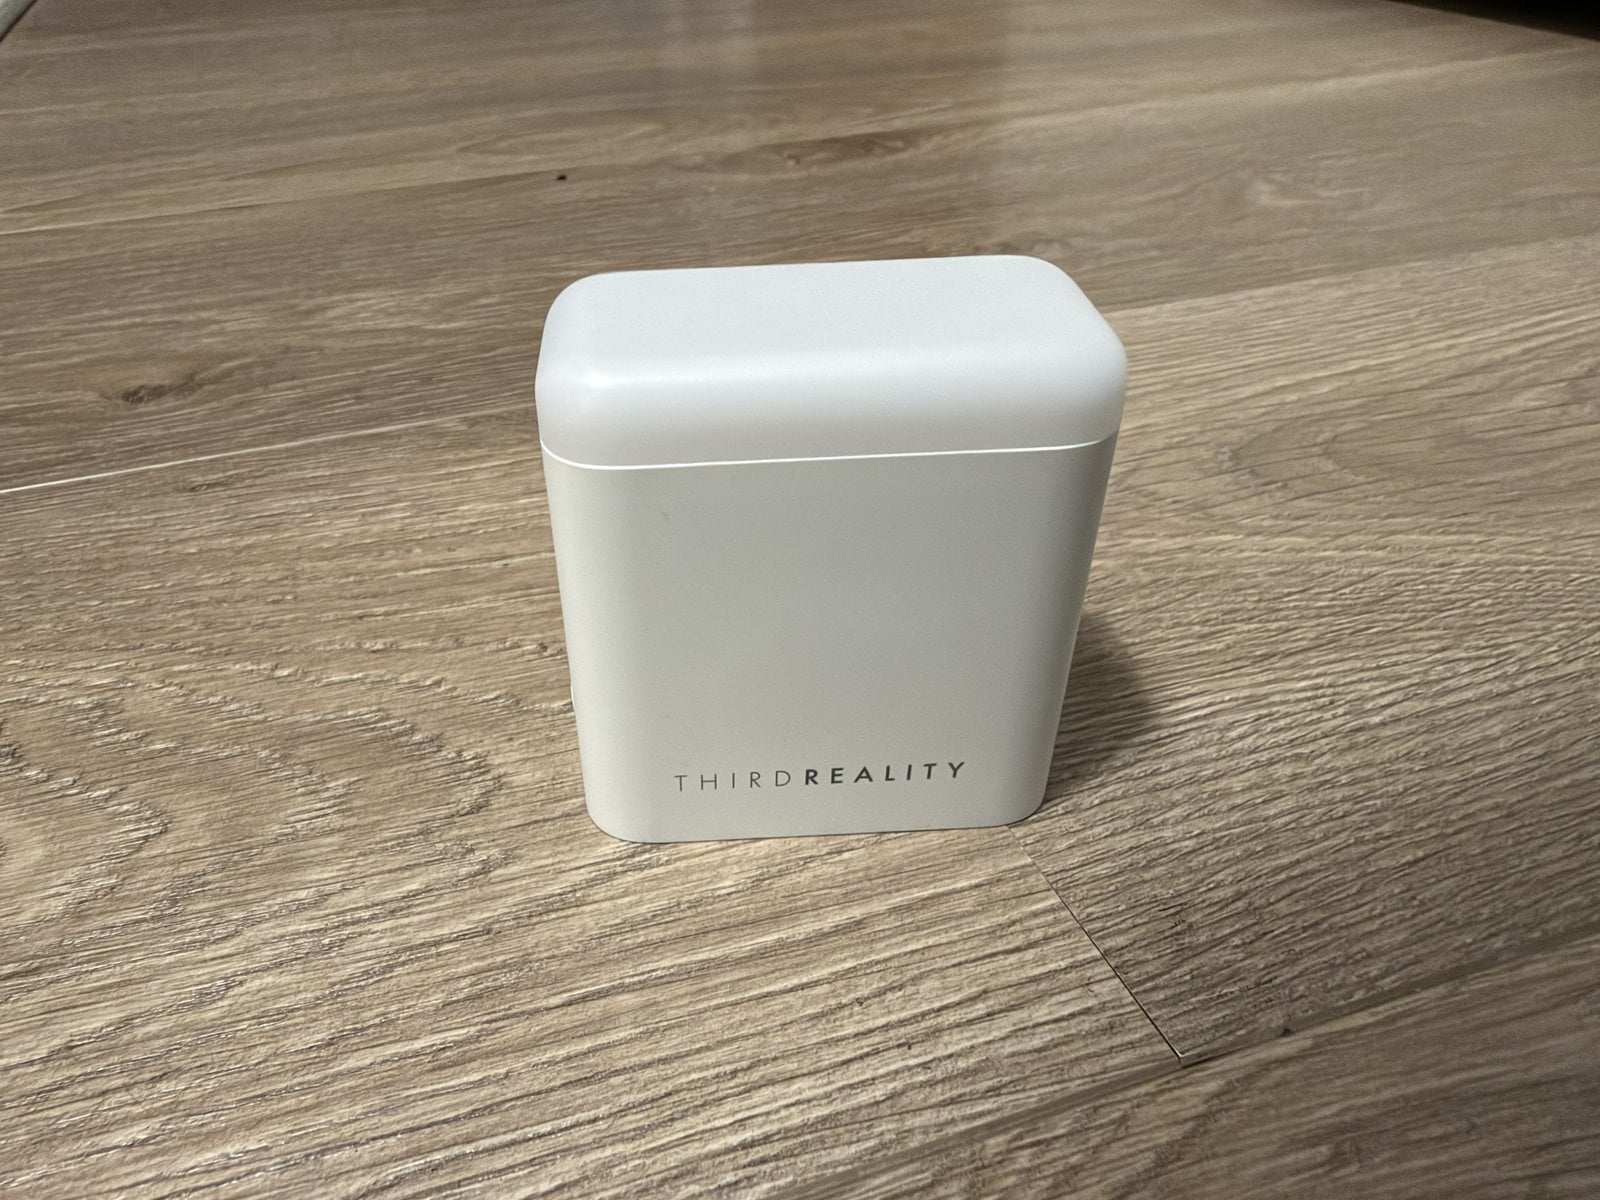
The R3 is more than a radar, though. ThirdReality packs four functions into one compact housing that is powered over USB-C and acts as a router in the Zigbee network:
| Function | What Home Assistant gets | What we use it for |
|---|---|---|
| 60 GHz presence radar | occupancy on/off, sensitivity 1–6 (= range 1–6 m) | light, heating, desk time |
| RGB light | light with colour, colour temperature 2000–6500 K, brightness | desk light, focus red, confirmation flash |
| Light sensor | illuminance in lux | light only when it is dark |
| TVOC sensor | total VOCs in ppb, adjustable alert threshold | ventilation alert |
A battery-powered presence sensor would be the wrong choice at a desk: radar draws power continuously, and a desk has a USB port or a power strip anyway. Measured at the wall socket, the R3 drew 0.8 W without and 1.4 W with the light on, power adapter included. That is roughly seven to twelve kilowatt-hours a year. For other sensor types that work with Home Assistant, see our Zigbee sensors overview.
What you need
- The ThirdReality Smart Presence Sensor R3*.
- The ThirdReality Zigbee Smart Button* for the focus button. Light, heating and the ventilation alert work without it; the button is the convenience part.
- A Zigbee coordinator on Home Assistant, such as the SONOFF ZBDongle-E*, or a FRITZ!Smart Gateway. Our Zigbee coordinator guide covers the setup.
- For the heating automation, a thermostat that shows up in Home Assistant as a climate entity. Mine is a Homematic IP radiator thermostat controlled through Better Thermostat, common in Europe where each radiator has its own valve; a smart thermostat on a central HVAC system works the same way, as long as it exposes a target temperature.
- A USB-C cable and a free spot on the desk facing the chair.
Setting up the R3
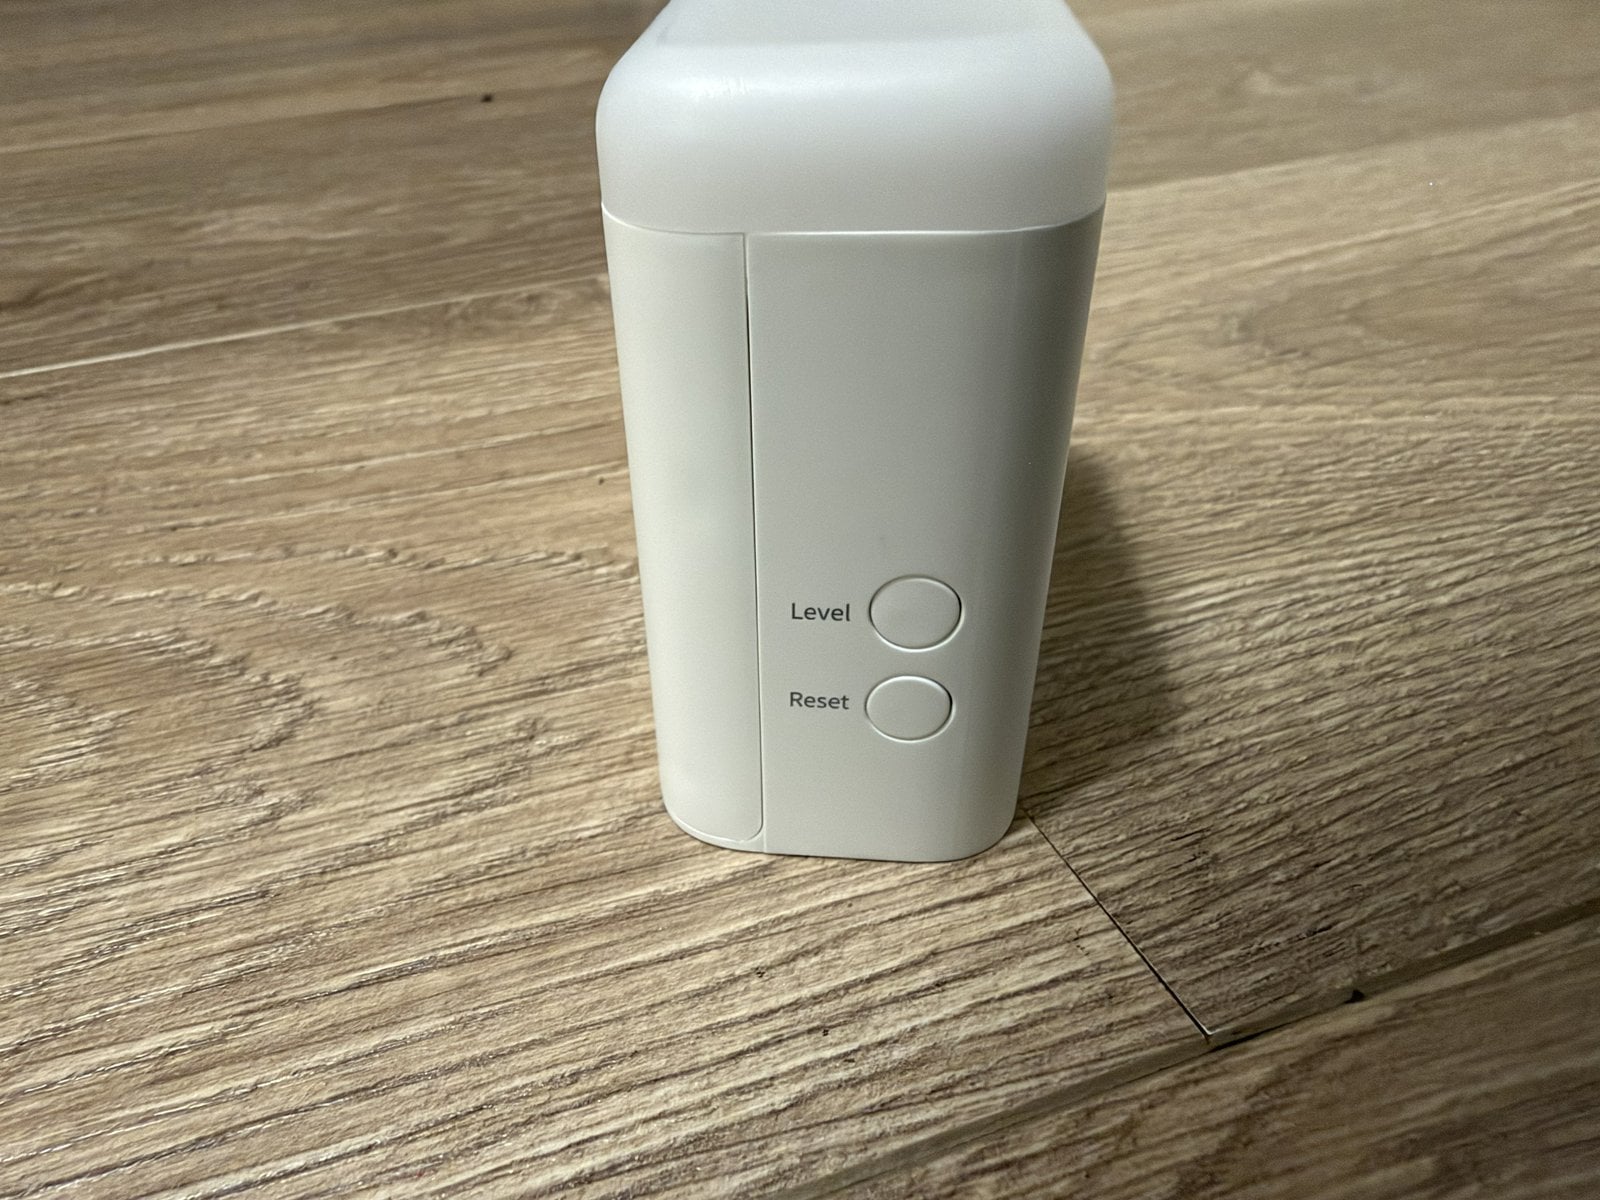
With USB power connected, the sensor goes straight into pairing mode. In Home Assistant open Settings → Connectivity → Zigbee and select Add device in the bottom right corner, and the R3 appears within seconds. If you miss the three-minute window, hold the Reset button on the device for more than five seconds; that restores the factory settings, and the sensor starts pairing mode again. Zigbee2MQTT works the same way with Permit join; both the R3 and the button are in its supported devices list.
Before pairing, the R3 behaves like a night light: on presence it switches its light on by itself, and the colour shows air quality. After pairing, presence no longer switches the light; from then on your automations decide. That is intended, and it is why the light stays dark right after you add it.
Placement and range
The R3 stands on the desk and detects forwards, so its front faces the chair. ThirdReality advises against metal nearby and against two radars pointing at each other. The sensitivity from 1 to 6 is not a fine adjustment but the range in metres: level 3 from the factory means three metres (about 10 feet). For a desk where the sensor sits a metre from the chair, level 3 or 4 is plenty (mine is set to 4); if you do not want the sensor to see the hallway through an open door, go down a level rather than up. Set it with the Level button on the device or directly in Home Assistant through the presence sensitivity field.
The configuration fields
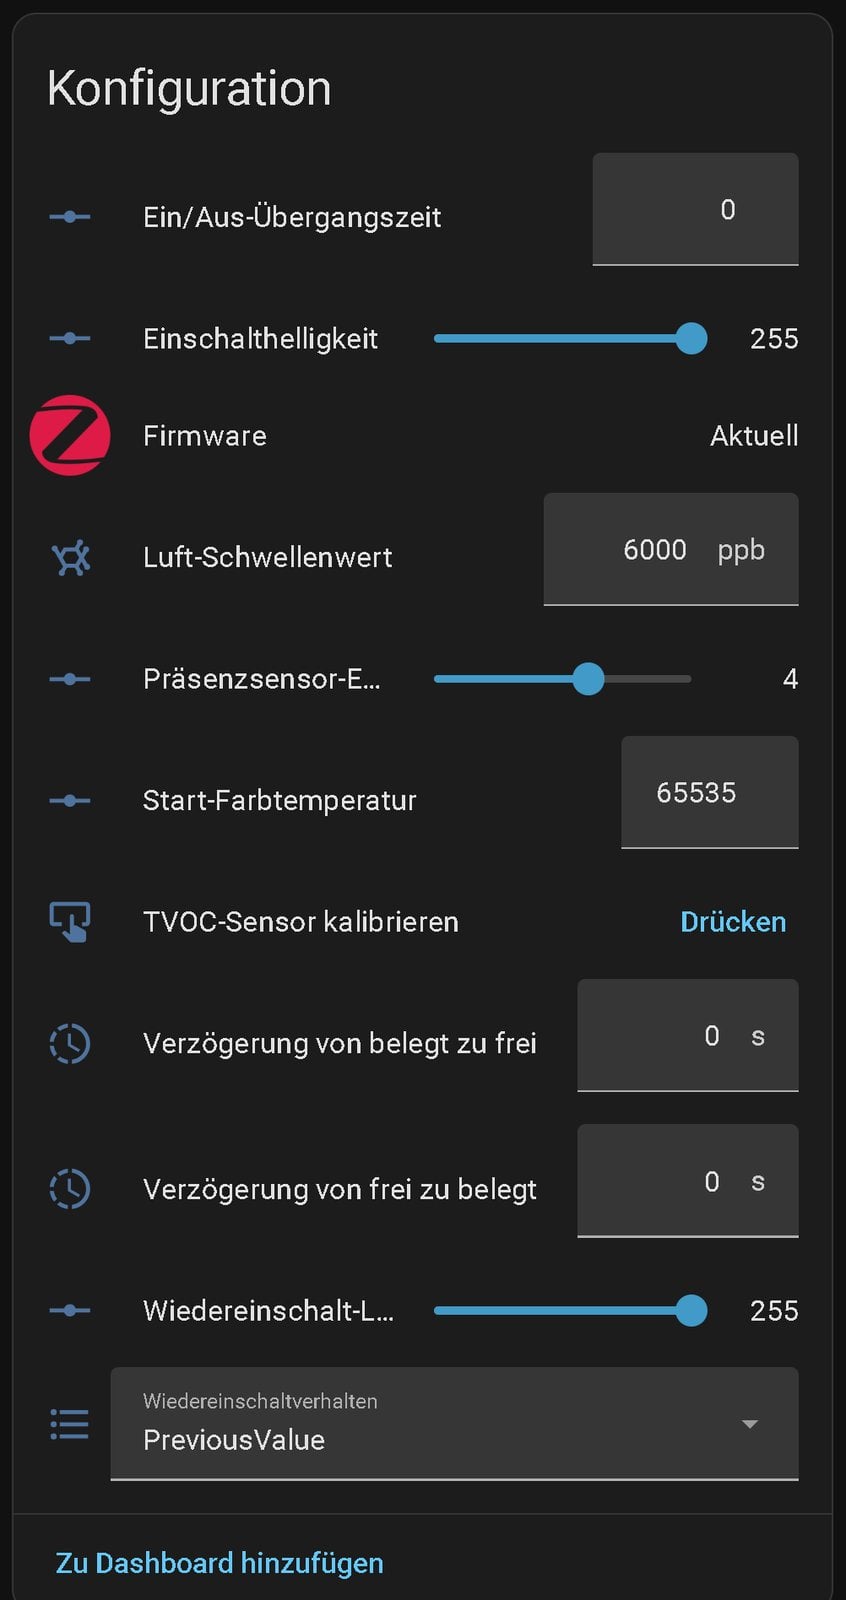
Besides the three sensors and the light, Home Assistant creates a whole configuration card. Most fields can stay at their factory values; the important ones are in the table, and the only one you really need to touch is the sensitivity:
| Field | Meaning | Recommendation |
|---|---|---|
| Presence sensitivity (1–6) | range of the radar in metres | 3–4 at a desk |
| Occupied-to-unoccupied delay (s) | how long the sensor keeps reporting “occupied” after the last detection | 0; the automations handle the run-on time |
| Unoccupied-to-occupied delay (s) | how long someone must be present before the sensor reports “occupied” | 0 |
| Air threshold (ppb) | TVOC value above which the light blinks red, 3000 to 50000 | 49999, otherwise it blinks every evening (see ventilation alert) |
| Start-up brightness, start-up colour temperature | state of the light on a plain “turn on” command | irrelevant; the automations pass brightness and colour |
| Start-up behaviour | state of the light after a power cut | “Previous value” (factory) is fine; “off” if the light should stay dark after an outage |
| Calibrate TVOC sensor | starts calibration of the air sensor | only if values are obviously wrong |
For the control logic you need three helpers (Settings → Devices & services → Helpers → Create helper): two of type Toggle, Desk focus for “do not disturb” and Desk automation pause, which suspends all desk automations, for example when the light should stay on during a video call no matter what the sensor reports; plus one of type Number, Desk ventilation threshold (500 to 20000, step 100, unit ppb) for the ventilation alert. While the pause is on, the “clear” branches do not switch anything off either; that is intended, which is why a small extra automation lifts the pause every morning.
Automation 1: desk light on presence
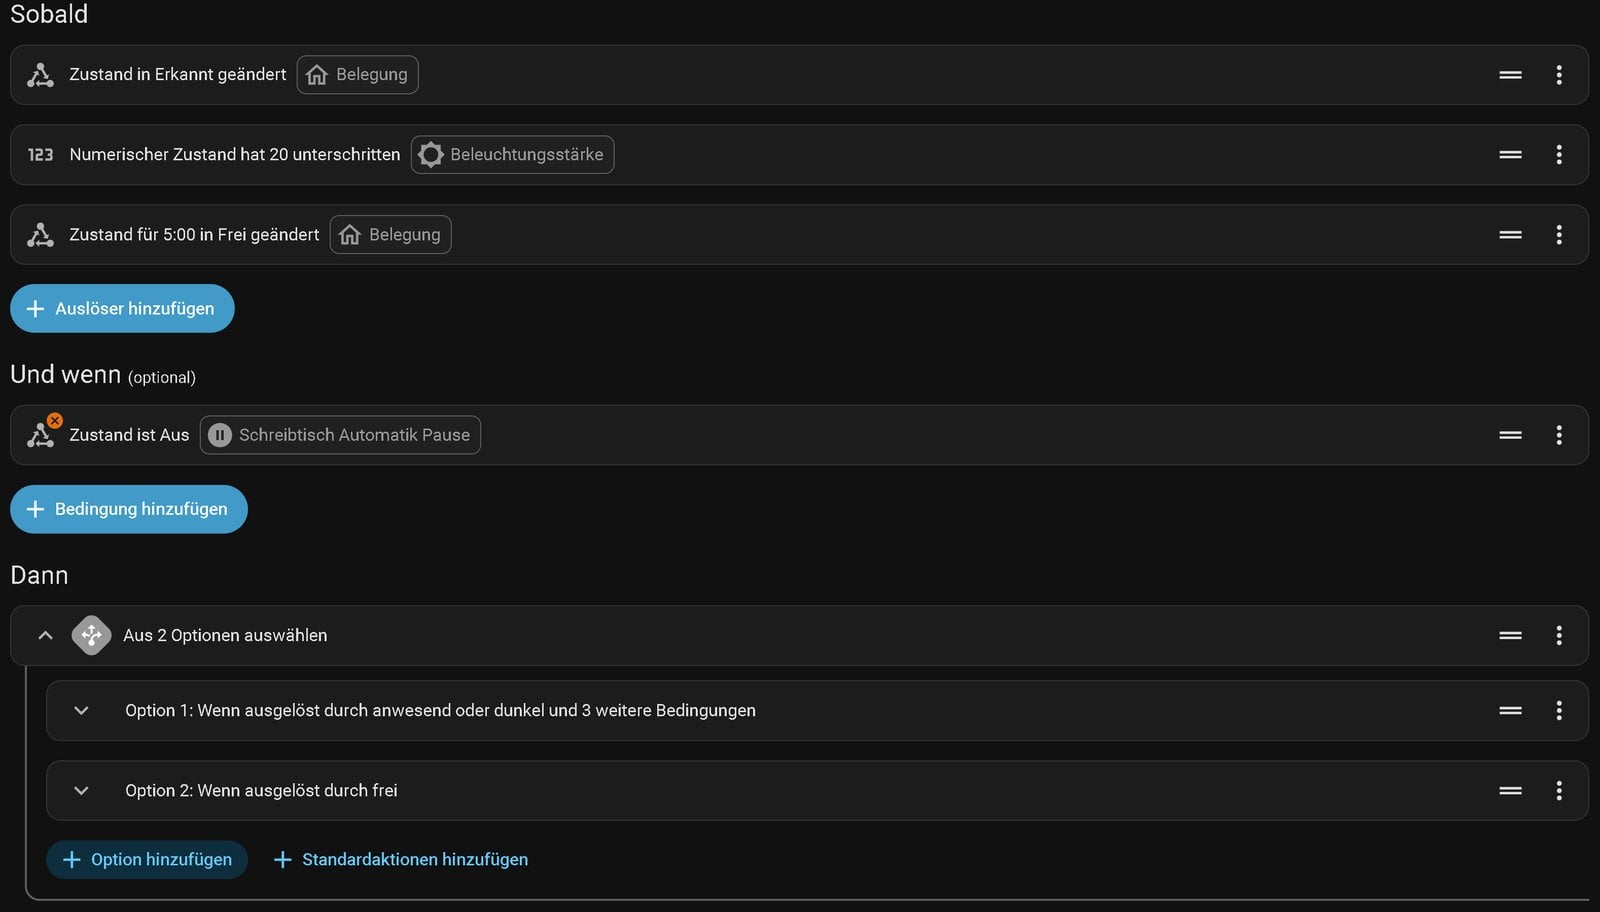
The R3’s light serves as the desk light: warm white at 40 percent as soon as someone sits down and it is darker than 20 lux, off when nobody has been there for five minutes. If you have a proper desk lamp in Home Assistant, swap only the light entity. The automation has three triggers so that it also fires when it gets dark while you are already seated:
alias: "Desk: light on presence"
mode: single
triggers:
  - id: present
    trigger: state
    entity_id: binary_sensor.desk_sensor_occupancy
    to: "on"
  - id: dark
    trigger: numeric_state
    entity_id: sensor.desk_sensor_illuminance
    below: 20
  - id: clear
    trigger: state
    entity_id: binary_sensor.desk_sensor_occupancy
    to: "off"
    for:
      minutes: 5
conditions:
  - condition: state
    entity_id: input_boolean.desk_automation_pause
    state: "off"
actions:
  - choose:
      - conditions:
          - condition: trigger
            id:
              - present
              - dark
          - condition: state
            entity_id: input_boolean.desk_focus
            state: "off"
          - condition: state
            entity_id: binary_sensor.desk_sensor_occupancy
            state: "on"
          - condition: or
            conditions:
              - condition: numeric_state
                entity_id: sensor.desk_sensor_illuminance
                below: 20
              - condition: state
                entity_id: light.desk_sensor
                state: "on"
        sequence:
          - action: light.turn_on
            target:
              entity_id: light.desk_sensor
            data:
              brightness_pct: 40
              color_temp_kelvin: 3000
      - conditions:
          - condition: trigger
            id: clear
        sequence:
          - action: light.turn_off
            target:
              entity_id: light.desk_sensor
          - action: input_boolean.turn_off
            target:
              entity_id: input_boolean.desk_focus
Two details: the condition “below 20 lux or light already on” stops the sensor’s own light from lifting the light sensor above the threshold and blocking the automation. And when the desk is vacated, the “clear” branch switches focus off as well, so the red light does not keep burning for nobody. A small extra automation resets the automation pause every morning at seven so that a forgotten pause does not last forever: a time trigger and one input_boolean.turn_off action.
Automation 2: heating to 22 °C when someone sits down
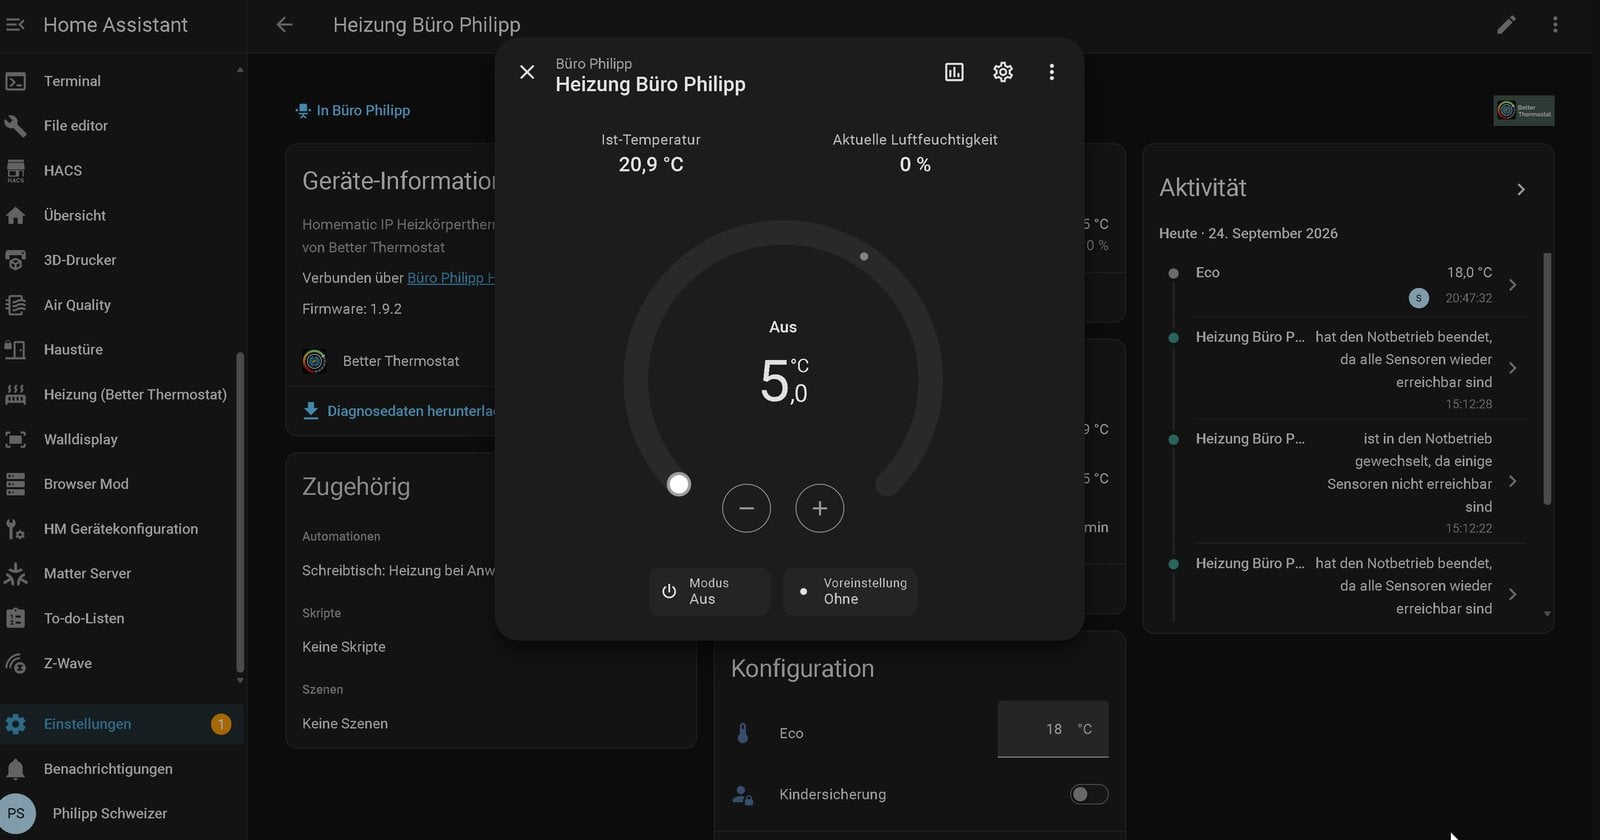
This is the part I expect the most from in winter. The office thermostat sits permanently at 18 °C (64 °F). When someone has been at the desk for three minutes, Home Assistant sets the target to 22 °C (72 °F); when the desk has been clear for 30 minutes, it goes back to the Eco preset. The three minutes keep a quick trip into the office from firing up the heating, the 30 minutes cover a coffee break. My Homematic thermostat sits behind Better Thermostat; the automation only sets the preset and the target temperature, the controller does the rest, and no separate “boost” is needed. I built this in September with the heating switched off, so whether 30 minutes is the right run-on time will only show during the heating season; I will add that experience here.
alias: "Desk: heating on presence"
mode: single
triggers:
  - id: present
    trigger: state
    entity_id: binary_sensor.desk_sensor_occupancy
    to: "on"
    for:
      minutes: 3
  - id: clear
    trigger: state
    entity_id: binary_sensor.desk_sensor_occupancy
    to: "off"
    for:
      minutes: 30
conditions:
  - condition: state
    entity_id: input_boolean.desk_automation_pause
    state: "off"
  - condition: state
    entity_id: climate.office_heating
    state: heat
actions:
  - choose:
      - conditions:
          - condition: trigger
            id: present
        sequence:
          - action: climate.set_preset_mode
            target:
              entity_id: climate.office_heating
            data:
              preset_mode: none
          - action: climate.set_temperature
            target:
              entity_id: climate.office_heating
            data:
              temperature: 22
      - conditions:
          - condition: trigger
            id: clear
        sequence:
          - action: climate.set_preset_mode
            target:
              entity_id: climate.office_heating
            data:
              preset_mode: eco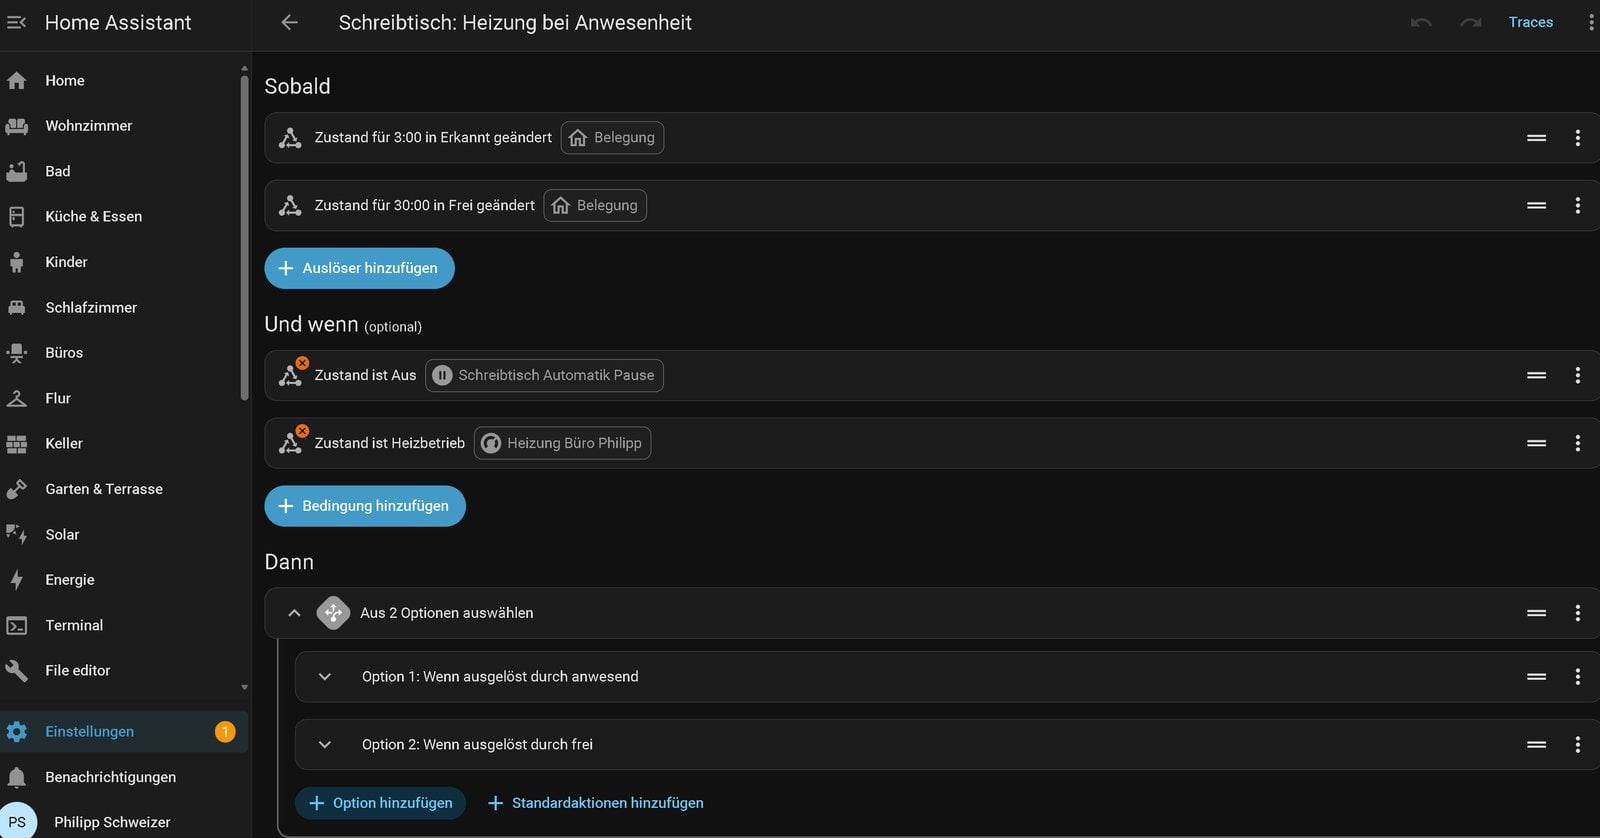
The condition on the heating mode makes the automation do nothing in summer while the thermostat is switched off. If your thermostat has no “Eco” preset, replace the last action with climate.set_temperature at 18 °C. If your thermostat works in Fahrenheit, use 64 and 72 instead. Pre-heating before you arrive is something the sensor naturally cannot do; that stays the calendar’s job.
Automation 3: ventilation alert from air quality
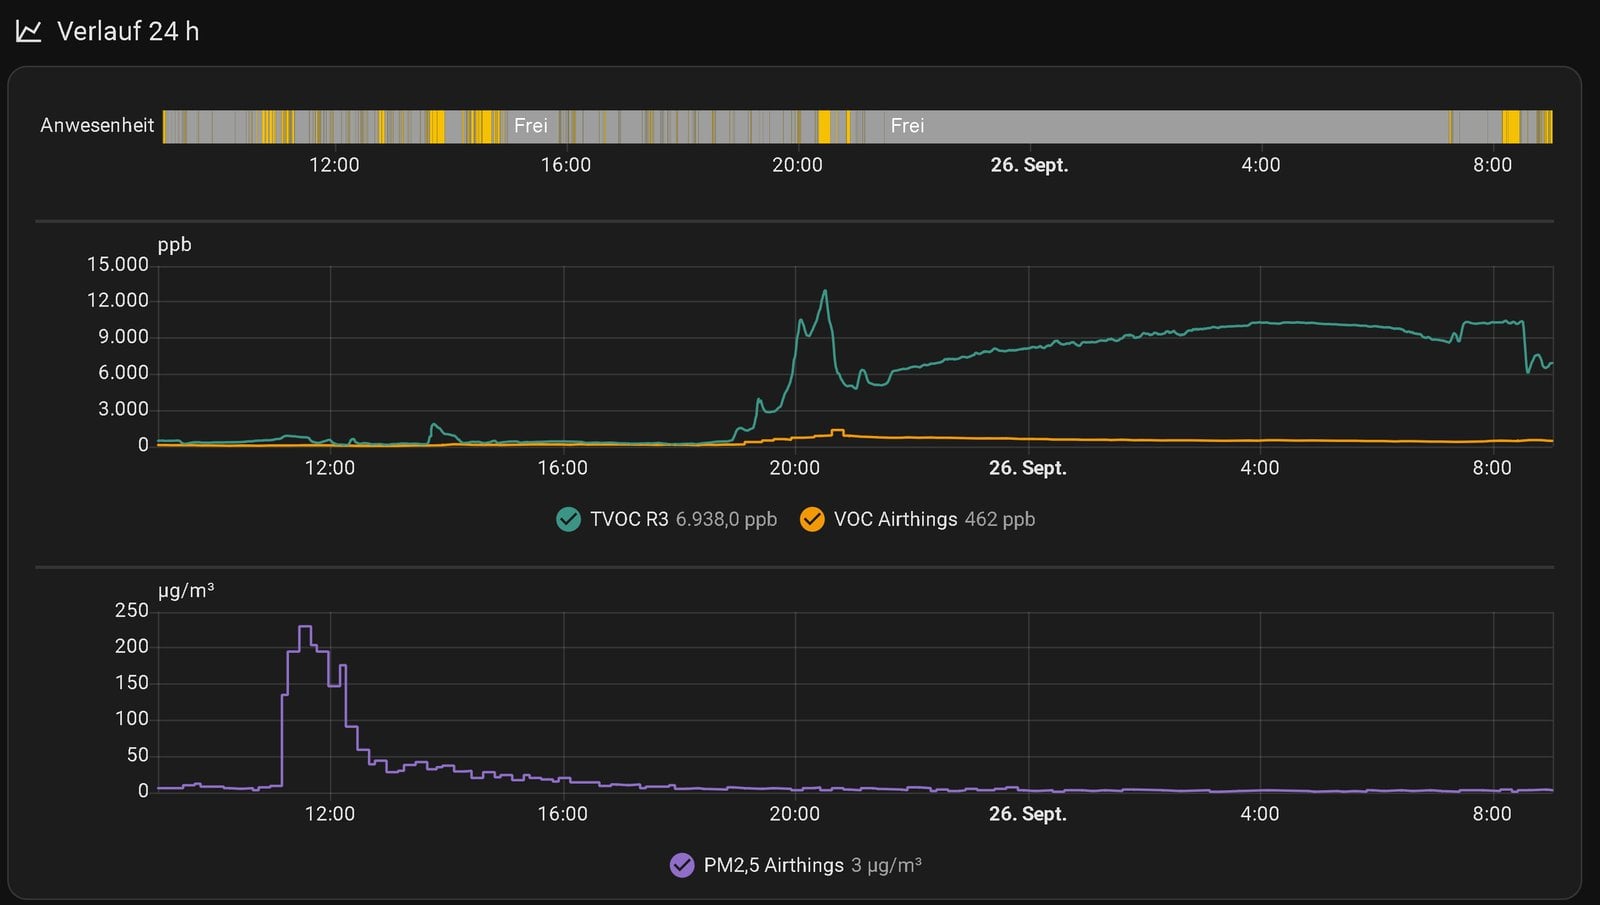
The TVOC sensor measures volatile organic compounds, anything from breath and cleaning products to the glue in a new shelf, and reports a sum value in ppb. ThirdReality grades it in four bands: up to 2000 ppb good, up to 4000 ventilate, up to 6000 warning, above that danger. Once TVOC exceeds the value in the Air threshold field, the R3 blinks red on its own, and a short press on the Reset button turns that off. Before you build an automation on it, you should know what the value actually represents. I placed the R3 right next to an Airthings View Plus, which measures VOC, CO₂ and particulate matter, for two days:
| Situation | TVOC R3 | VOC Airthings | CO₂ Airthings | PM2.5 Airthings |
|---|---|---|---|---|
| empty living room, daytime | 250–400 ppb | 60–160 ppb | 570 ppm | 2–9 µg/m³ |
| evening, one person in the room, windows closed | 5,000–10,000 ppb, rising until morning | 450–930 ppb, falling from 8 pm | 700 → 1,100 ppm, rising until morning | 2–5 µg/m³ |
| vacuuming, 20 minutes | 520 → 885 ppb | 76 → 104 ppb | unchanged | 9 → 230 µg/m³ |
The R3’s curve follows the CO₂ curve, not the Airthings VOC curve: both rise as soon as someone is in the room, both stay up all night. The reason is the sensor type. A metal-oxide sensor responds strongly to what people exhale and give off, and in a closed room that builds up at the same pace as CO₂. The Airthings applies a baseline correction that slowly pulls a value down after it has been high for hours, hence its bend at 8 pm. The R3 does not see particulate matter; during vacuuming it was the motor exhaust that triggered it, not the dust. In short: the R3’s TVOC value is a usable indicator for stale air, almost like a CO₂ sensor, but the number itself and the four manufacturer bands are meaningless. With one person in the room it sits at ten to twenty times its daytime value in the evening, and the light blinks red every evening from 6000 ppb, which is why I set the air threshold to 49999.
The automation therefore uses no fixed number but the ventilation threshold helper, and it only notifies while someone is at the desk during the day. The all-clear comes once the value has stayed below the threshold for 20 minutes:
alias: "Desk: ventilation alert"
mode: single
triggers:
  - id: stale
    trigger: numeric_state
    entity_id: sensor.desk_sensor_total_vocs
    above: input_number.desk_ventilation_threshold
    for:
      minutes: 10
  - id: fresh
    trigger: numeric_state
    entity_id: sensor.desk_sensor_total_vocs
    below: input_number.desk_ventilation_threshold
    for:
      minutes: 20
conditions:
  - condition: state
    entity_id: binary_sensor.desk_sensor_occupancy
    state: "on"
  - condition: time
    after: "07:00:00"
    before: "22:00:00"
actions:
  - choose:
      - conditions:
          - condition: trigger
            id: stale
        sequence:
          - action: notify.mobile_app_your_phone
            data:
              title: "Desk: open a window"
              message: >-
                {{ states('sensor.desk_sensor_total_vocs') }} ppb TVOC,
                above your threshold of
                {{ states('input_number.desk_ventilation_threshold') }} ppb for 10 minutes.
      - conditions:
          - condition: trigger
            id: fresh
        sequence:
          - action: notify.mobile_app_your_phone
            data:
              title: "Desk: air is fine again"
              message: "TVOC below the threshold for 20 minutes."
You find the threshold in the history after a week: look where the value sits after a morning at the desk with the window closed, and set the helper a good way above that, roughly one and a half times. In my living room that would be around 8000 ppb; in a smaller office it will be a different number. If the value does not drop noticeably within half an hour of opening the window, the source was not a person but something in the room, such as fresh paint or cleaning products.
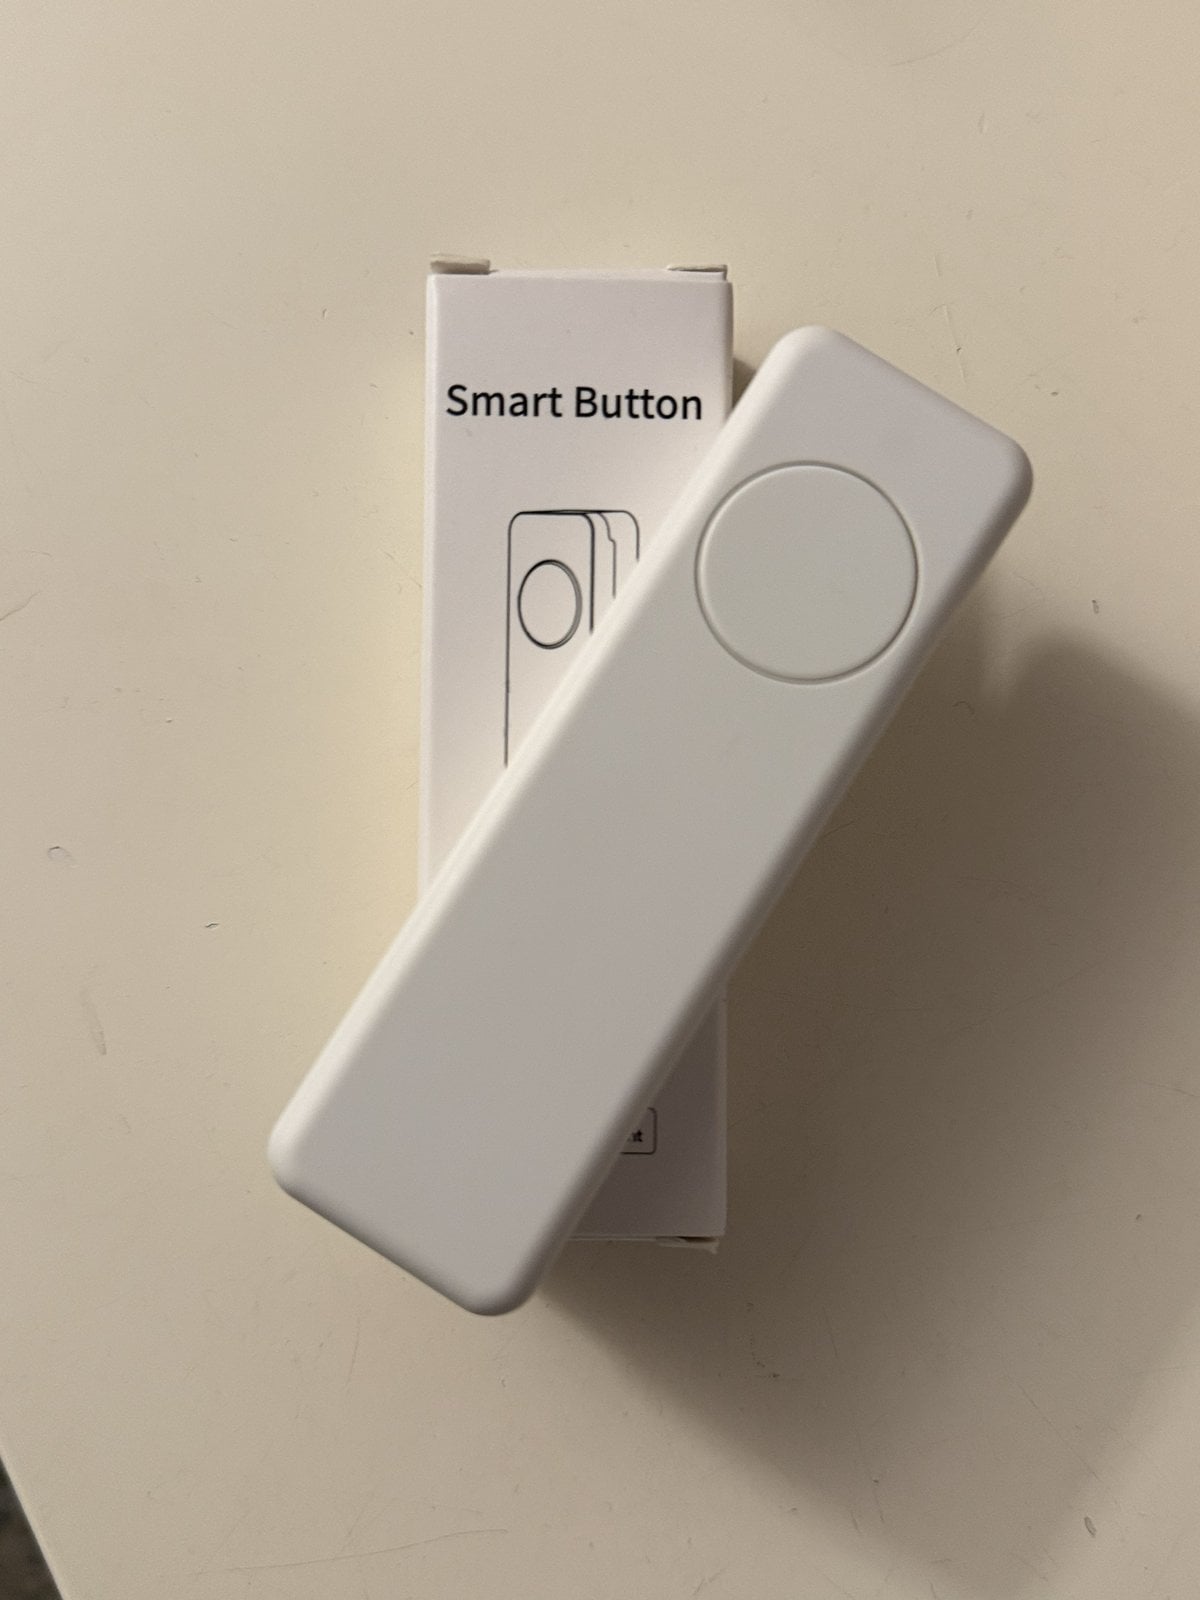
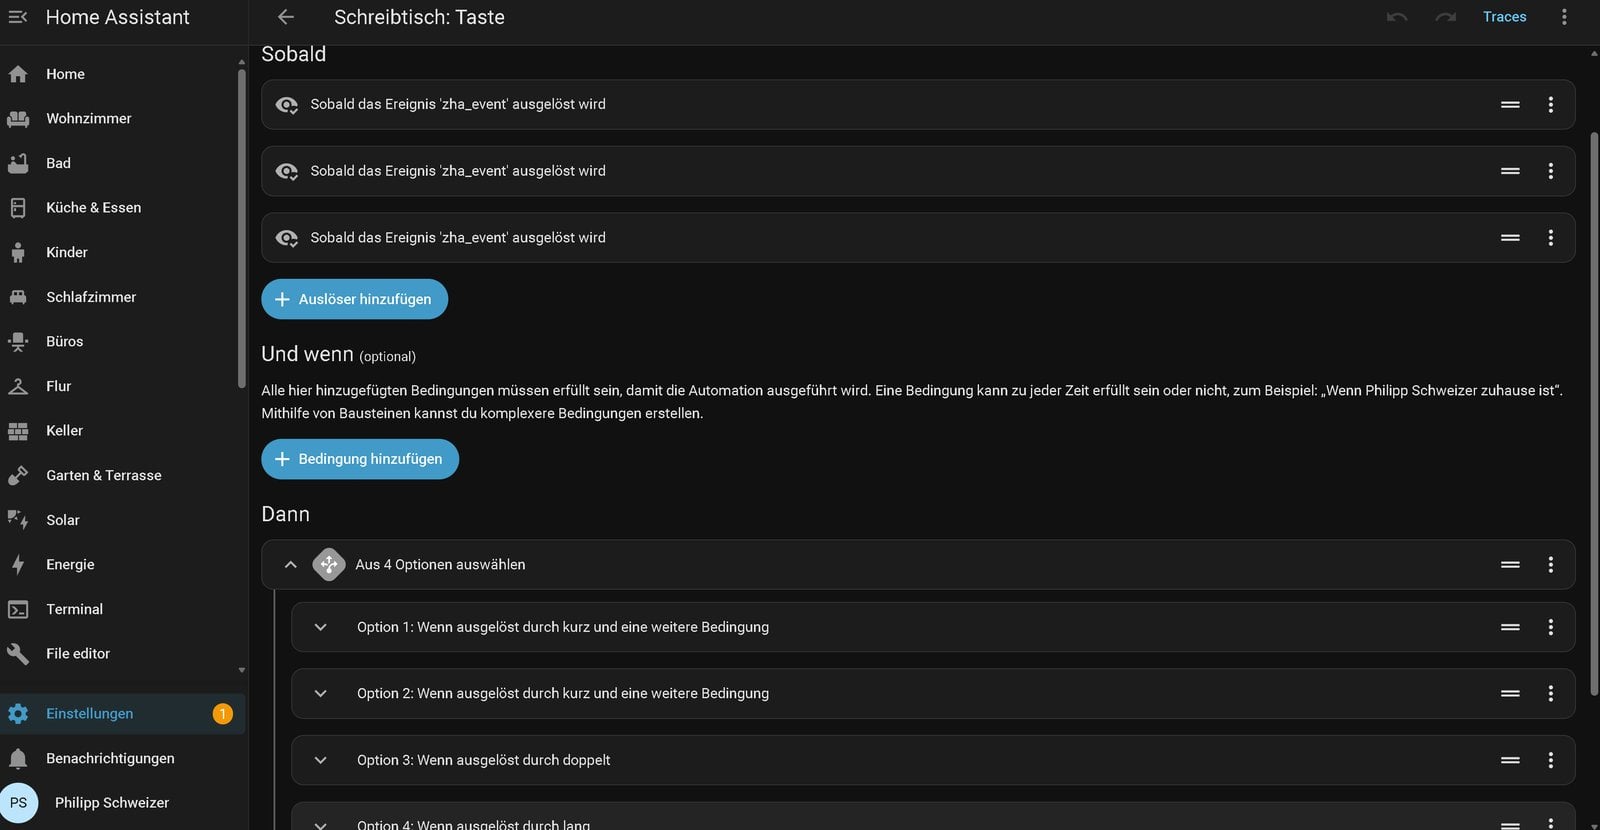
ThirdReality’s Zigbee button knows three gestures: short, double and long. In ZHA they arrive as zha_event events with the commands single, double and hold; the button’s Zigbee address is on its device page and replaces the address of my button in the YAML below. Under Zigbee2MQTT the presses arrive in the button’s action attribute instead; the exact values are on its Zigbee2MQTT device page. The assignment:
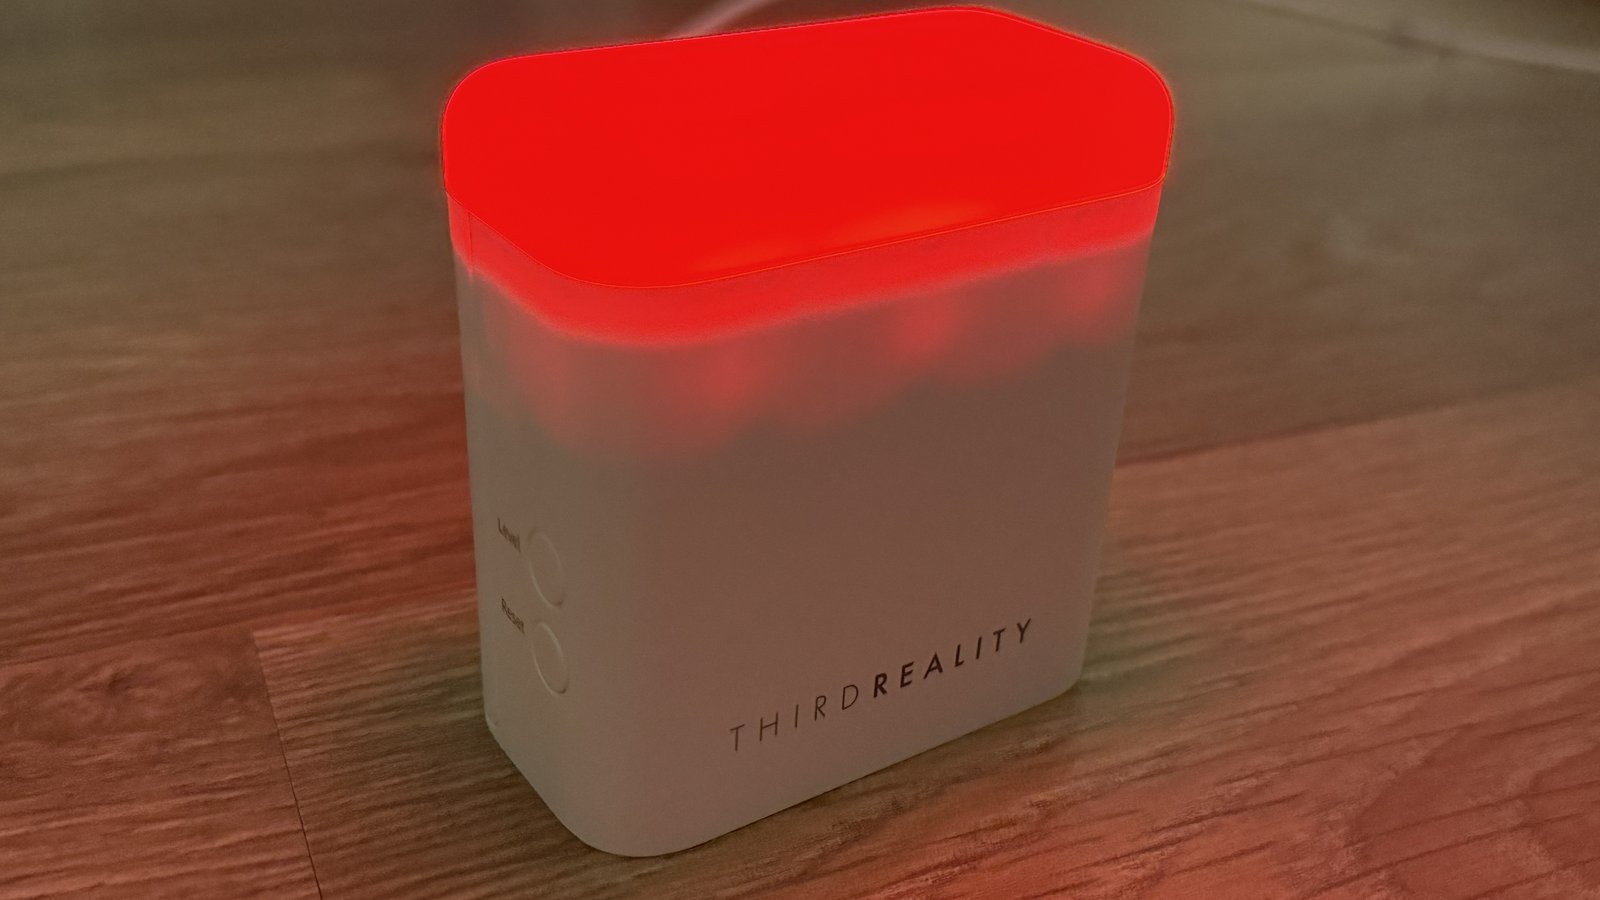
- Short: focus on, the light turns red, “do not disturb” for anyone passing the office. Press again: focus off, back to the desk light.
- Double: toggle the automation pause. The light confirms for a second and a half with green for “pause on” and red for “pause off”, then returns to its previous state.
- Long: reading light, 100 percent neutral white, focus off.
alias: "Desk: button"
mode: queued
triggers:
  - id: short
    trigger: event
    event_type: zha_event
    event_data:
      device_ieee: "ff:ff:b4:0e:06:09:af:06"
      command: single
  - id: double
    trigger: event
    event_type: zha_event
    event_data:
      device_ieee: "ff:ff:b4:0e:06:09:af:06"
      command: double
  - id: long
    trigger: event
    event_type: zha_event
    event_data:
      device_ieee: "ff:ff:b4:0e:06:09:af:06"
      command: hold
actions:
  - choose:
      # short, focus was off: focus on, light red
      - conditions:
          - condition: trigger
            id: short
          - condition: state
            entity_id: input_boolean.desk_focus
            state: "off"
        sequence:
          - action: input_boolean.turn_on
            target:
              entity_id: input_boolean.desk_focus
          - action: light.turn_on
            target:
              entity_id: light.desk_sensor
            data:
              brightness_pct: 60
              rgb_color: [255, 0, 0]
      # short, focus was on: focus off, back to the desk light
      - conditions:
          - condition: trigger
            id: short
          - condition: state
            entity_id: input_boolean.desk_focus
            state: "on"
        sequence:
          - action: input_boolean.turn_off
            target:
              entity_id: input_boolean.desk_focus
          - action: light.turn_on
            target:
              entity_id: light.desk_sensor
            data:
              brightness_pct: 40
              color_temp_kelvin: 3000
      # double: toggle the automation pause, flash a confirmation, restore the light
      - conditions:
          - condition: trigger
            id: double
        sequence:
          - action: scene.create
            data:
              scene_id: desk_light_before
              snapshot_entities:
                - light.desk_sensor
          - action: input_boolean.toggle
            target:
              entity_id: input_boolean.desk_automation_pause
          - if:
              - condition: state
                entity_id: input_boolean.desk_automation_pause
                state: "on"
            then:
              - action: light.turn_on
                target:
                  entity_id: light.desk_sensor
                data:
                  brightness_pct: 100
                  rgb_color: [0, 255, 0]
            else:
              - action: light.turn_on
                target:
                  entity_id: light.desk_sensor
                data:
                  brightness_pct: 100
                  rgb_color: [255, 0, 0]
          - delay:
              seconds: 1.5
          - action: scene.turn_on
            target:
              entity_id: scene.desk_light_before
      # long: reading light, focus off
      - conditions:
          - condition: trigger
            id: long
        sequence:
          - action: input_boolean.turn_off
            target:
              entity_id: input_boolean.desk_focus
          - action: light.turn_on
            target:
              entity_id: light.desk_sensor
            data:
              brightness_pct: 100
              color_temp_kelvin: 4000
The confirmation on a double press uses scene.create: Home Assistant stores the light’s state as a snapshot, flashes the colour, and scene.turn_on restores the old state, whether the light was off, warm white or red before. The queued mode makes quick successive presses run one after another instead of interrupting each other. On our button every press arrived as exactly one event; if you do not need double presses, disable them on the device card with “Disable double click”, and the button then reacts to every press immediately.
Dashboard and desk time
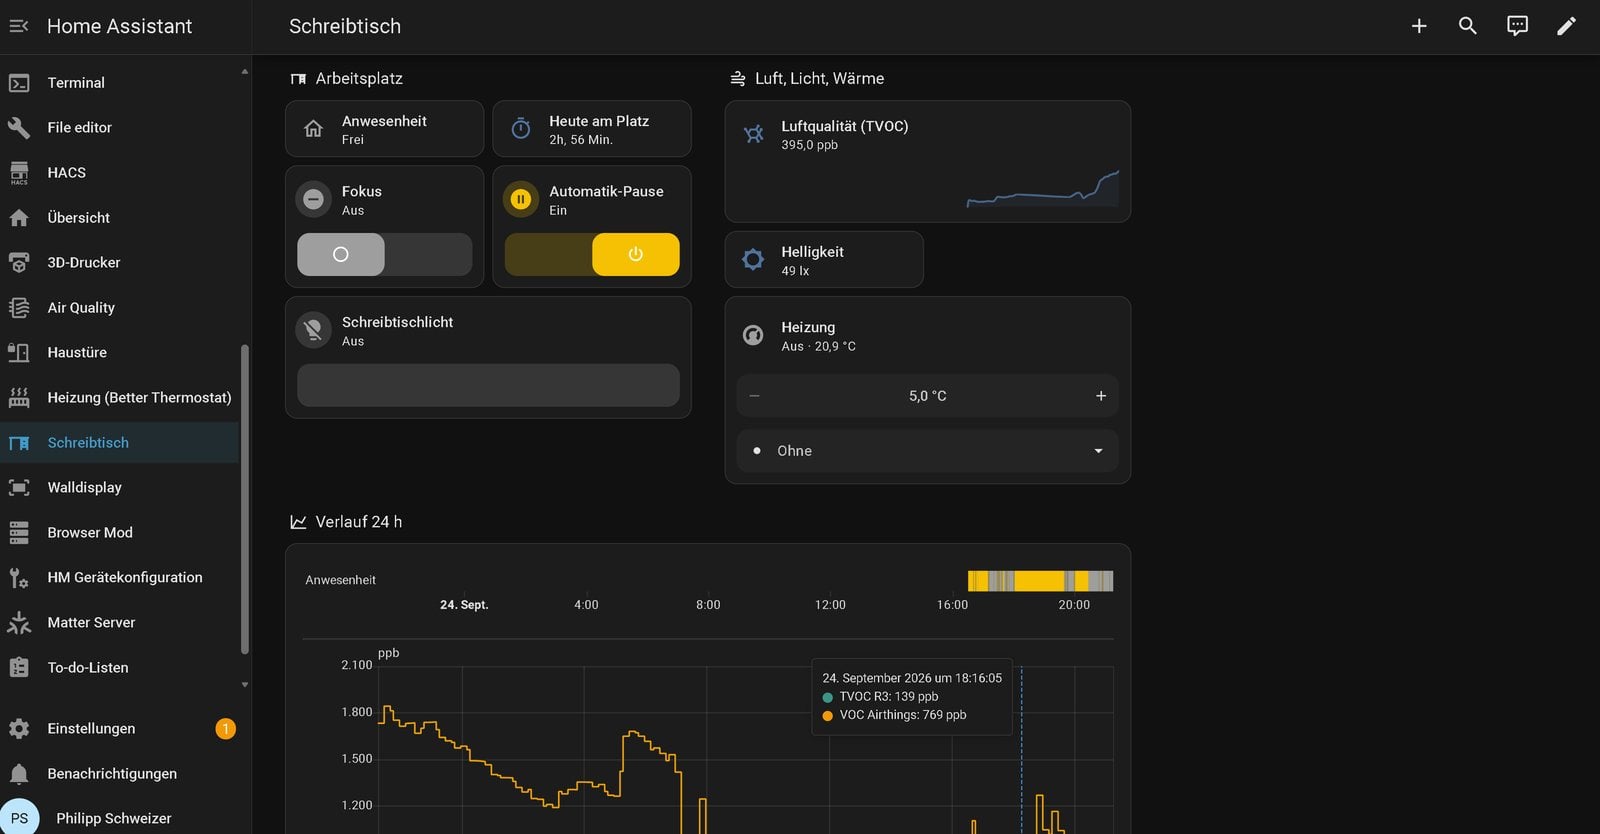
A helper of type History stats turns the occupancy sensor into a number: entity occupancy, state “on”, type “time”, start {{ today_at() }}, end {{ now() }}. Mine is called “Desk today” and read 2 h 56 min on the first evening. A small dashboard puts occupancy, focus, pause, the light with a brightness slider, the TVOC value with a trend line, the heating with its target and a 24-hour history next to it.
What the setup shows in daily use
Response time is a non-issue: the automation trace shows a quarter of a second between button press and red light. What you do notice is the other direction: the radar holds occupancy as long as someone sits within range. For light and heating that is the inertia you want. That range is a cone to the front, not all-round coverage: in the living room, parked next to the Airthings and not facing the sofa, the R3 did not see me for a whole evening while its air sensors clearly registered me. And at the edge of the range, occupancy flickers in bursts of five to ten seconds instead of holding steady. So the sensor belongs with its front towards the chair, not somewhere on a shelf. If you plan to use the sensor for something else, say as a night light next to the bed, keep in mind that a sleeping person is present to it as well; PIR night lights are the better tool there, as described in our smart night light article.
Changing the sensitivity level resets the sensor. On the 24 GHz sibling model R2 from the same manufacturer, occupancy dropped to “off” immediately and it took one to two minutes until the first new report, so if you step through the levels, wait after each step. Its metre figures were also on the optimistic side: level 4 did not detect me seated at three metres, level 5 did. For the R3 at a desk this does not matter, since it sits a metre from the chair anyway.
The R3 is a Zigbee router and strengthens the network for battery devices nearby, such as the soil moisture sensor in the plant on the windowsill. As a router the R3 needs permanent power; pull the cable and devices routed through it lose their connection briefly until they find a new path.
Frequently asked questions
Yes, that is the difference from a motion sensor. The 60 GHz radar evaluates micro-movements such as breathing and typing and, in my test, kept me present for 26 minutes straight without a single dropout.
Before pairing the R3 works on its own; after pairing it deliberately leaves the light to the smart home. Only your automation switches the light, and until one exists it stays dark.
Through the sensitivity from 1 to 6, which corresponds to the range in metres, either with the Level button on the device or the field in Home Assistant. Allow one to two minutes after every change before the sensor reports again.
With any that appears in Home Assistant as a climate entity with a target temperature. If yours has no “Eco” preset, replace the final action with a climate.set_temperature call that sets your setback temperature, for example 18 °C. A thermostat that only runs on schedules stored in the device cannot be controlled this way.
It is a relative sum value, not a laboratory measurement. In my test it rose to ten to twenty times its daytime value in the evening with one person in the room and followed the CO₂ curve of an Airthings next to it. As a trend it is a good indicator for stale air, as a number it is worthless; ignore the manufacturer’s bands and comparisons with other devices.
No. Light, heating and the ventilation alert run on the sensor alone. The button gives you focus, pause and reading light with one press; the same toggles are available on the dashboard.
Conclusion
At a desk, a presence sensor is what a motion sensor is in a hallway: the one sensor that makes automation worthwhile in the first place. The R3 adds light, lux and air in a single device and saves you a clutter of separate sensors on the desk. Heating by presence is the part most likely to pay for itself in winter, the focus button the one I already would not want to give up. What the R3 is not is an air quality instrument; its TVOC value works as a ventilation reminder, not as a number to compare.