Meshtastic on the Raspberry Pi: Node with the RAK6421 Pi HAT
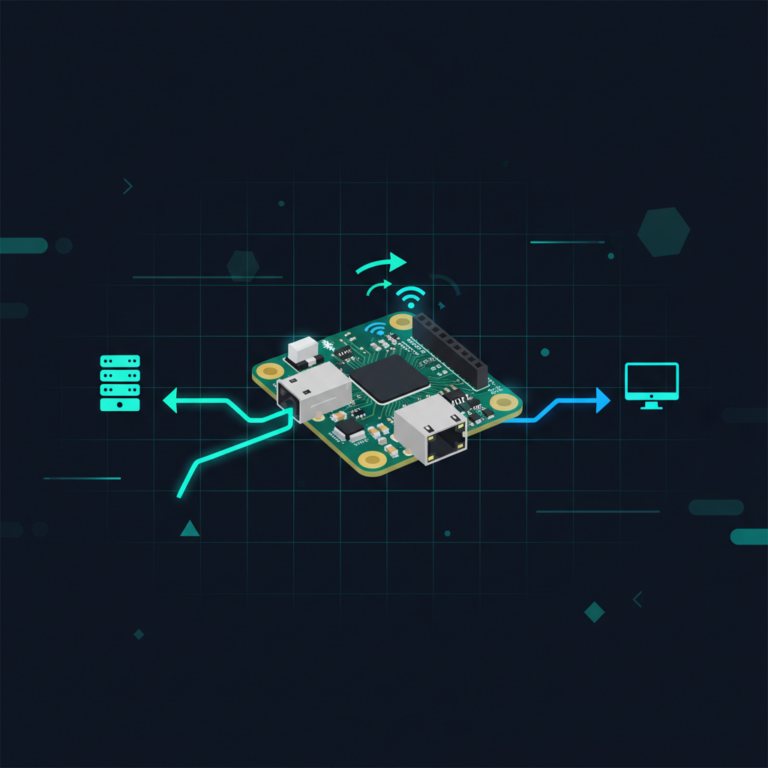
Meshtastic sends text messages and sensor data from device to device over LoRa radio – no cellular network, no Wi-Fi, no account. Most nodes run on small microcontroller boards. With the WisMesh Pi HAT RAK6421 you can also run Meshtastic on the Raspberry Pi 4 or 5: the node stays on permanently, is reachable from a browser and can later forward data to MQTT or Home Assistant.
In this guide we assemble the HAT with the RAK13300 radio module and the RAK1901 temperature sensor, install meshtasticd on Raspberry Pi OS and exchange messages with a second node, the RAK4631 Starter Kit. I tested all of this on 2 October 2026 on a Raspberry Pi 5 with 4 GB and meshtasticd 2.7.26. How the mesh works, who can read along and why not every message arrives is covered in our Meshtastic basics article – this one is about the build. Three snags from the test are noted where they belong: a conflict with the Pironman case, a node name that does not survive a restart, and a sensor that reads too warm.
Disclosure: RAKwireless provided the Pi HAT, the radio module, the sensor and the Starter Kit free of charge as test samples. The manufacturer has no influence on the content; measurements and error messages come from our own setup.
Meshtastic is an open-source project for LoRa-based radio networks. Every node sends text messages, positions and readings and relays packets from other nodes, forming a mesh. In Europe, Meshtastic uses the licence-free 868 MHz band. It only shares the radio technology with LoRaWAN: there, sensors talk to gateways and a network server such as The Things Network; with Meshtastic, the devices talk to each other directly.
1. Plug the RAK13300 radio module into IO slot 1 of the HAT, connect the antenna, mount the HAT on the Pi.
2. Enable SPI and I2C, install
meshtasticd from the Meshtastic package repository.3. Copy the preset
lora-RAK6421-13300-slot1.yaml to /etc/meshtasticd/config.d/, enable I2C and the web server in config.yaml, start the service.4. Set the region EU_868 in the web client on port 9443.
5. Set the second node to the same region and send a message.
What you need
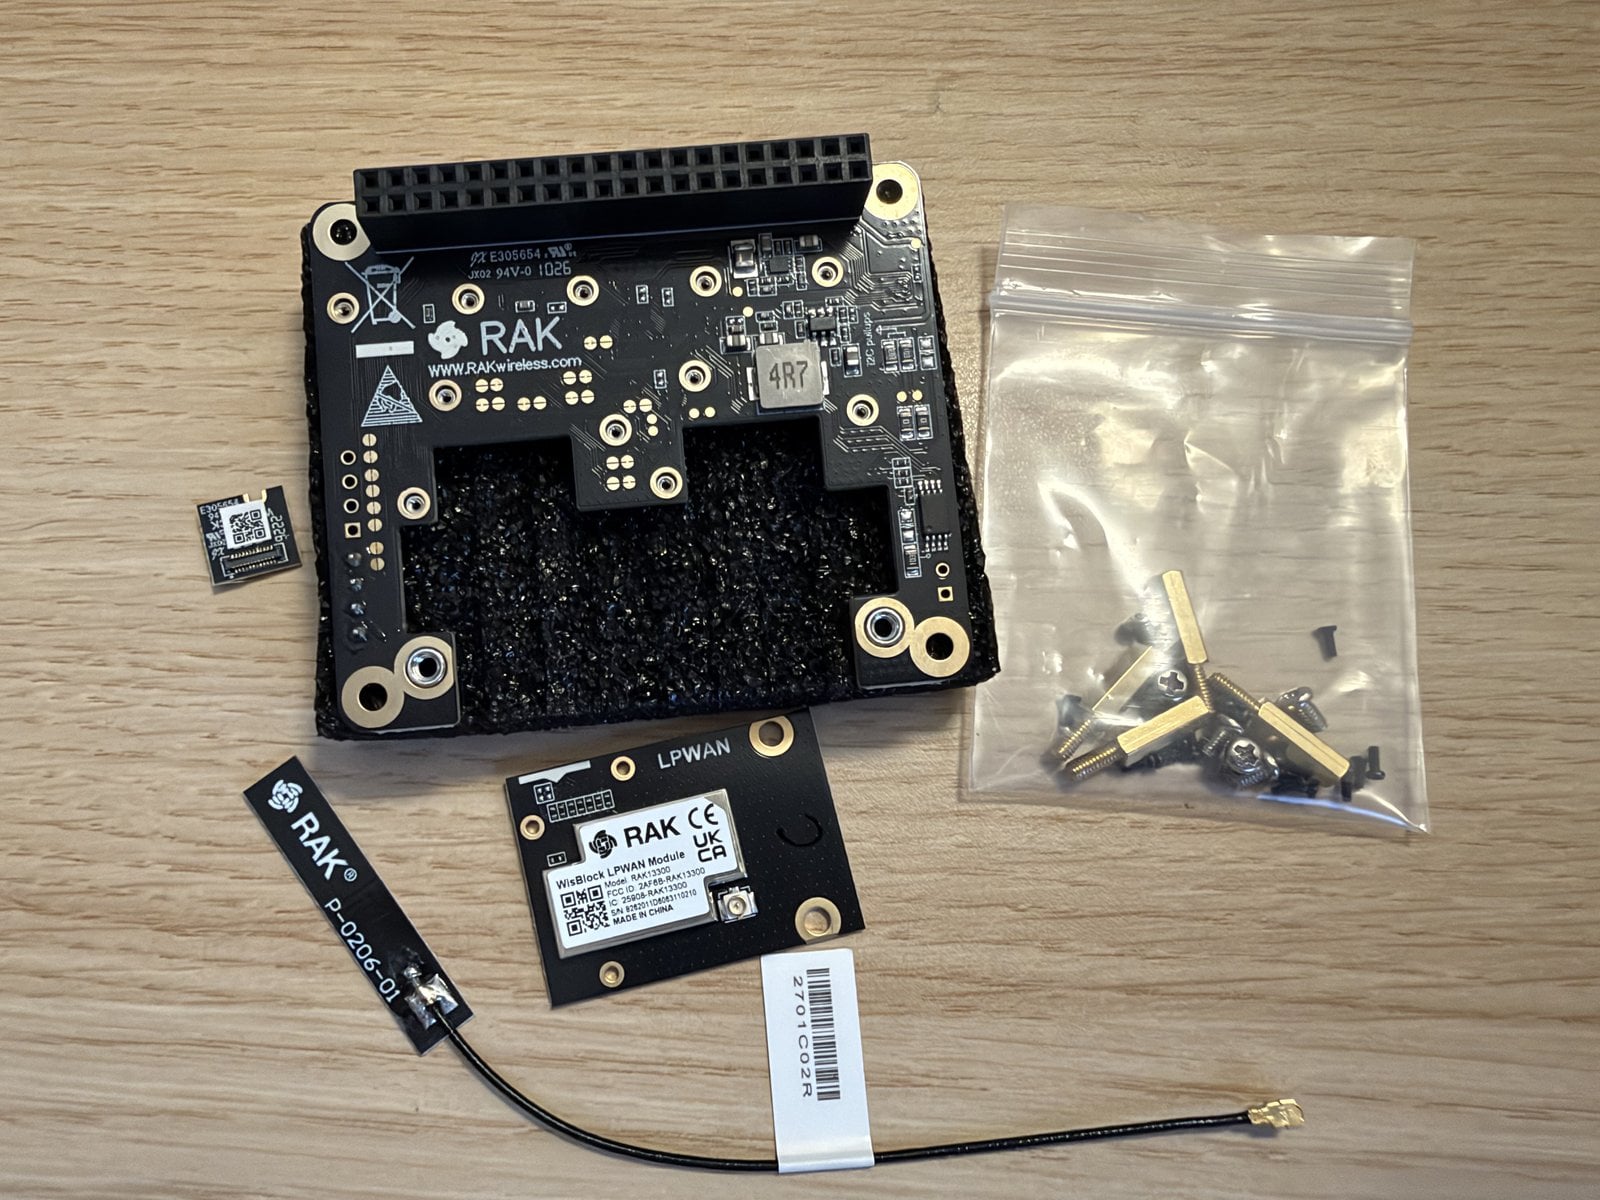
- A Raspberry Pi 4 or Raspberry Pi 5* with a power supply – on the Pi 5 the official 27 W power supply* – and a current 64-bit Raspberry Pi OS. The Lite edition is enough; everything is done via SSH and a browser.
- The WisMesh Pi HAT RAK6421. It has two slots for radio modules (IO slot 1 and 2) and four for sensors (slot A to D), but no radio module of its own.
- The LoRa radio module RAK13300 in the 868 MHz version. Ours came with a small PCB antenna with cable.
- Optionally the RAK1901 temperature and humidity sensor.
- A second Meshtastic node as the other end – in our case the WisMesh RAK4631 Starter Kit in the 868 MHz version – and a smartphone with the Meshtastic app.
The RAK parts are sold in the manufacturer’s store; these links are not affiliate links. Make sure you pick the 868 MHz variant of the radio module and the Starter Kit. On Amazon we only found the RAK Starter Kits in the US version for 915 MHz in early October 2026, which does not work in Europe.
What a Pi node is good for
Most Meshtastic nodes are small battery-powered boards you carry around. A Raspberry Pi is too big and too hungry for that. Its role is the fixed node at home:
- Base station: The Pi is always powered, listens and relays packets while the mobile nodes are out and about.
- Browser control: You reach the web client from any computer on your network without pairing a phone over Bluetooth.
- Bridge into the home network: Via MQTT, messages and readings can be handed to Home Assistant.
- Sensors without Wi-Fi: A node in the garden shed or garage reports temperature and humidity to the Pi over radio.
This guide covers the first two. How readings and messages from the mesh get into Home Assistant, via MQTT or with the integration from HACS, is shown in our guide Meshtastic in Home Assistant.
Assembling the Pi HAT
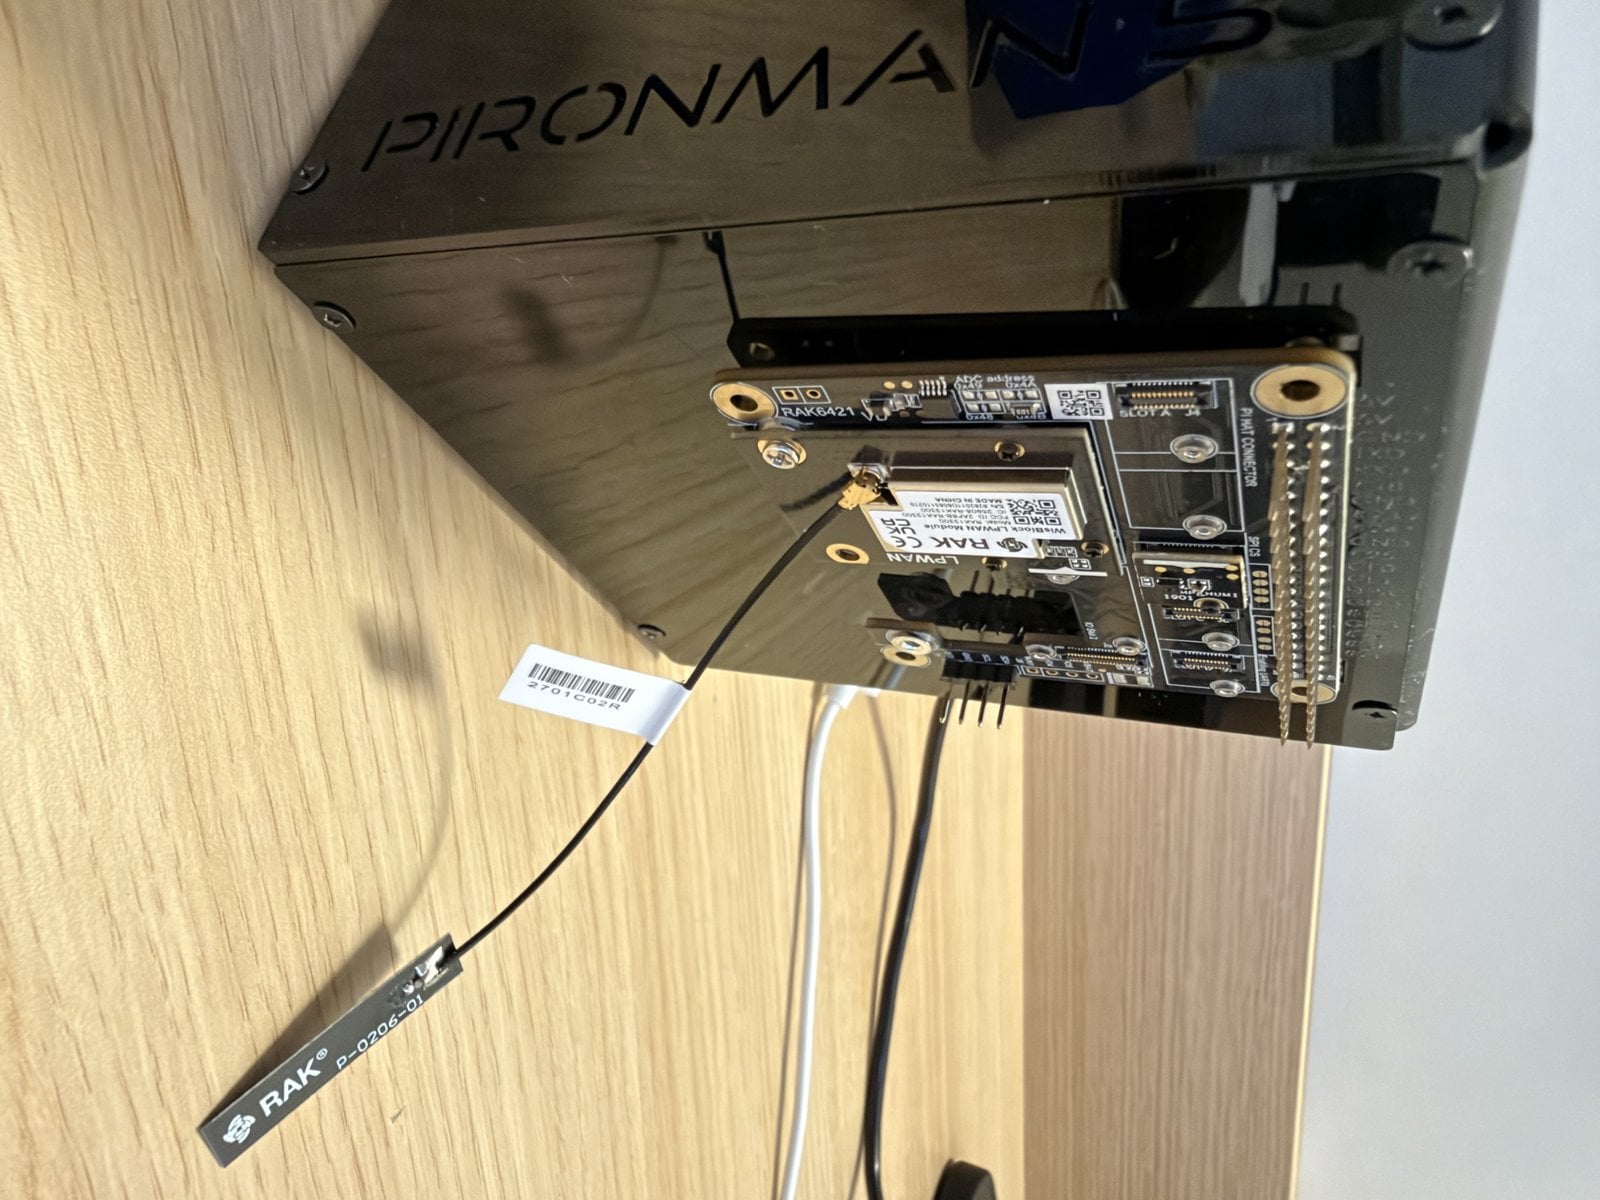
The slots are labelled on the HAT. The radio module goes into IO slot 1, the sensor into one of the small slots B, C or D. Slot A is larger and meant for the RAK12501 GPS module.
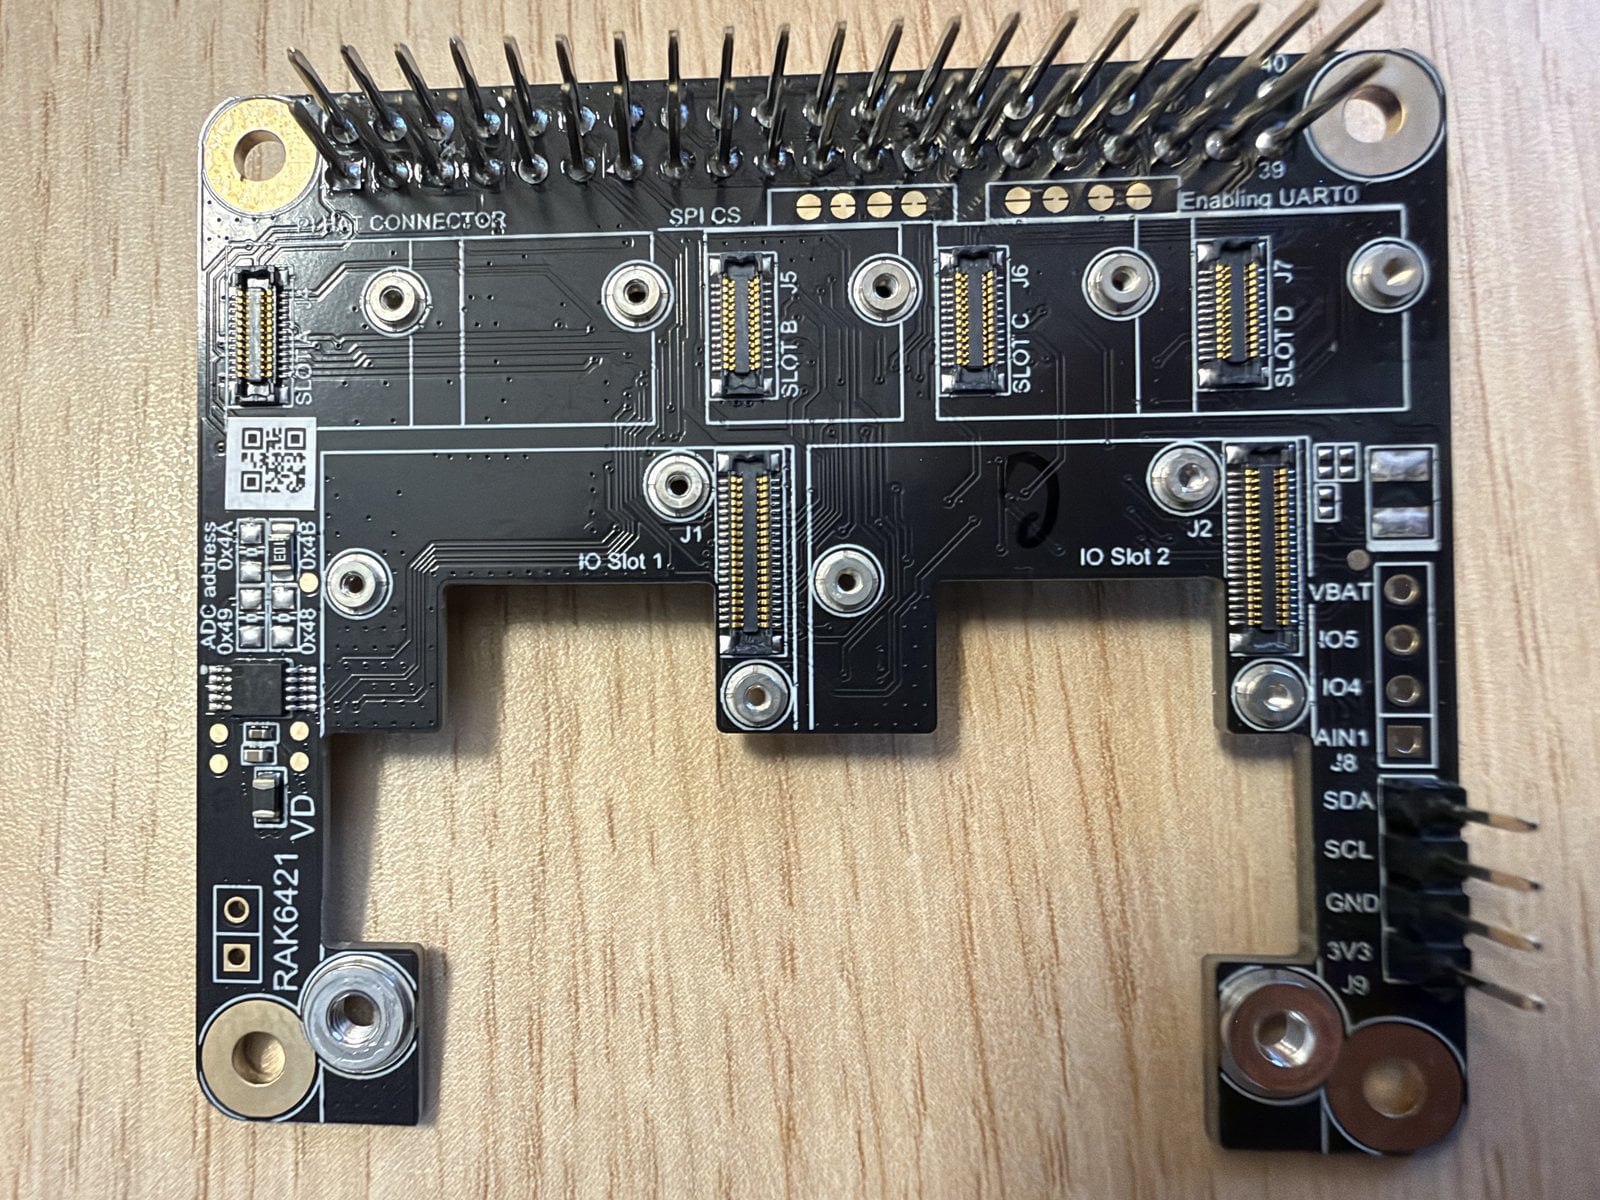
- Shut down the Raspberry Pi and disconnect the power.
- Press the RAK13300 into IO slot 1 until the connector clicks, then screw it down.
- Plug the RAK1901 into slot B and screw it down as well.
- Click the antenna cable onto the small connector on the radio module.
- Mount the HAT on the 40-pin GPIO header of the Pi.
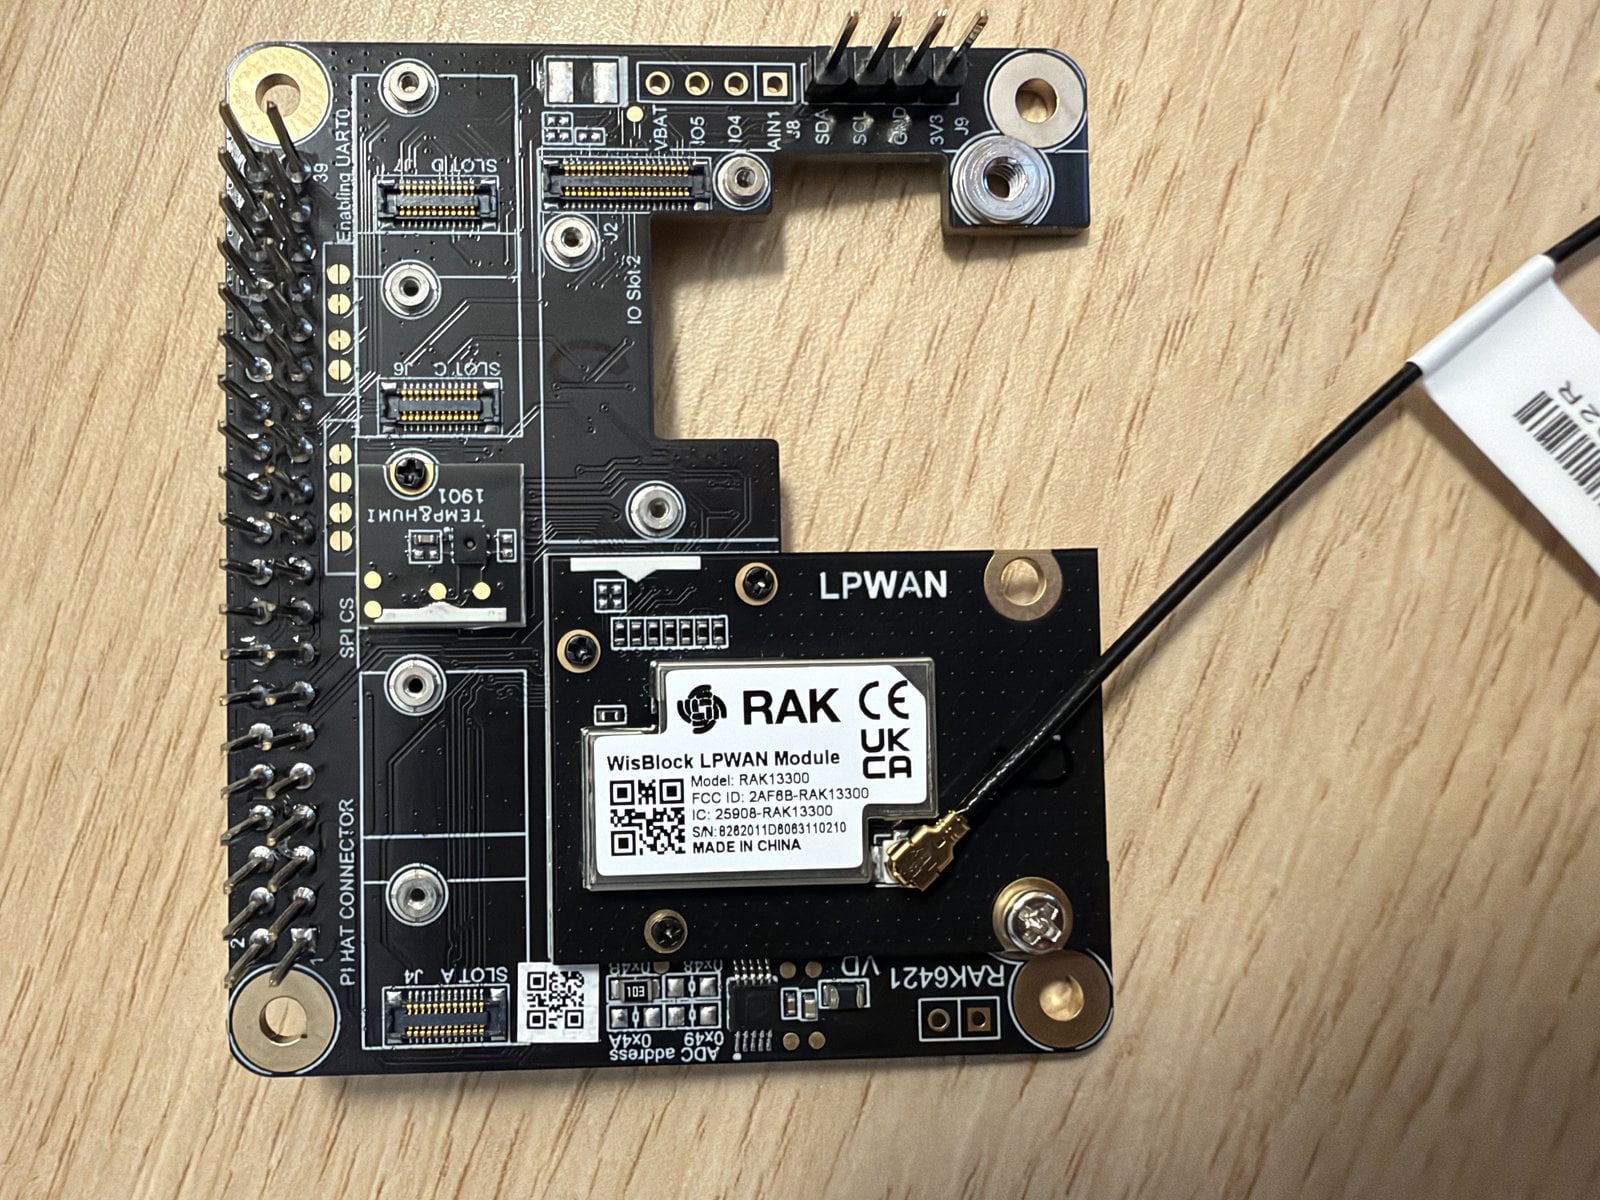
Connect the antenna before the Pi gets power. A LoRa module transmitting without an antenna can be damaged. For the same reason, only swap modules with the Pi switched off.
Preparing Raspberry Pi OS
The radio module talks to the Pi over SPI, the sensor over I2C. Both interfaces must be enabled. If you prefer the menu, see enabling SPI and I2C; on the command line, two commands do it:
sudo raspi-config nonint do_spi 0
sudo raspi-config nonint do_i2c 0
The HAT also carries a small EEPROM that is supposed to let meshtasticd detect it automatically. RAK’s RAK6421 quick start guide lists two lines for the end of /boot/firmware/config.txt:
dtparam=i2c_vc=on
dtoverlay=i2c0
After a reboot, check that the interfaces are there:
ls /dev/spidev* /dev/i2c-*The output must include /dev/spidev0.0 and /dev/i2c-1.
Installing meshtasticd
meshtasticd is the Meshtastic firmware as a Linux service. The project provides its own package repository, split by Debian version; the Meshtastic installation page lists all supported systems. This command tells you which version you are running:
grep VERSION_ID /etc/os-releaseOn our Pi the answer was 13, which is why the following commands say Debian_13. For a different version, replace the number in both places.
echo 'deb http://download.opensuse.org/repositories/network:/Meshtastic:/beta/Debian_13/ /' | sudo tee /etc/apt/sources.list.d/network:Meshtastic:beta.list
curl -fsSL https://download.opensuse.org/repositories/network:Meshtastic:beta/Debian_13/Release.key | gpg --dearmor | sudo tee /etc/apt/trusted.gpg.d/network_Meshtastic_beta.gpg > /dev/null
sudo apt update
sudo apt install meshtasticd
For us this installed version 2.7.26. The package sets up the service and starts it right away. Without a configuration it finds no radio and restarts every few seconds – that is normal at this point and goes away with the next step.
Enabling the radio, the sensor and the web interface
For common hardware the package ships ready-made configurations in /etc/meshtasticd/available.d; the presets come from the Meshtastic firmware repository. For the RAK6421 with the RAK13300 in IO slot 1, copy the matching file into config.d:
sudo cp /etc/meshtasticd/available.d/lora-RAK6421-13300-slot1.yaml /etc/meshtasticd/config.d/If the module sits in IO slot 2, take the file with slot2 in its name. The file defines which GPIO pins the radio module uses: reset on GPIO 16, interrupt on GPIO 22, busy on GPIO 24, plus GPIO 12 and 13 to power it up, and spidev0.0 as the SPI device.
For us this manual step was necessary even though the two EEPROM lines were set: the service reported Could not locate Pi HAT+. The EEPROM did answer on the I2C bus, but the Pi did not add the HAT to its device tree. We suspect our setup via the case’s GPIO header; we could not cross-check on a Pi without a case.
Next, open the main configuration:
sudo nano /etc/meshtasticd/config.yamlRemove the comment sign # in front of three lines. Keep the two-space indentation – the file is picky about whitespace.
I2C:
  I2CDevice: /dev/i2c-1

Webserver:
  Port: 9443
  RootPath: /usr/share/meshtasticd/web
Then start the service and look at the log:
sudo systemctl enable --now meshtasticd
journalctl -u meshtasticd -b --no-pager | grep -E "sx1262|SHTC3|Web Server"
These lines showed up for us (shortened):
SHTC3 found at address 0x70
sx1262 init success
Web Server framework started on port: 9443
sx1262 is the radio chip on the RAK13300, SHTC3 the sensor chip on the RAK1901. Messages like Could not open / read /prefs/config.proto on the first start are harmless: there are no saved settings yet.
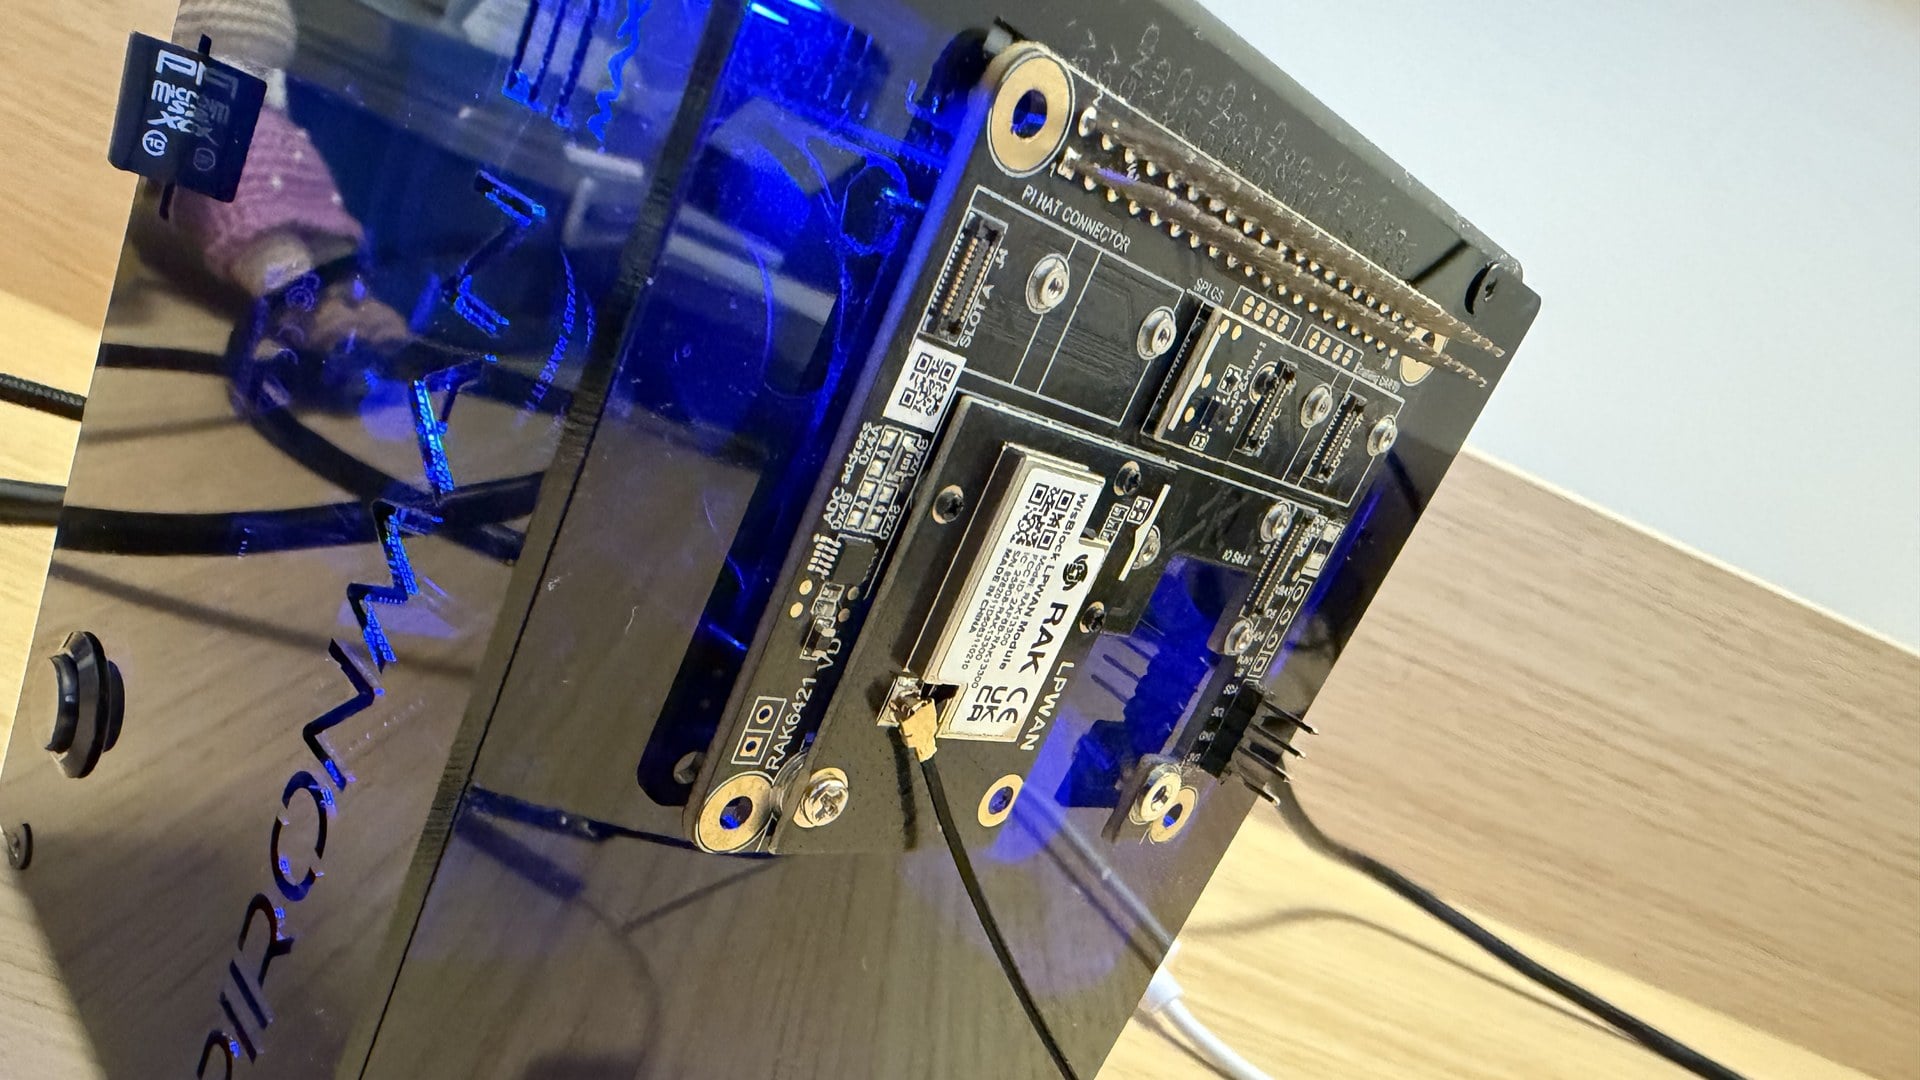
In a Pironman 5 Max, the radio module only ran stably for us after the Pironman service was stopped. Two things collide. The case’s IR receiver occupies GPIO 13, which the radio module needs;
dtoverlay=sunfounder-pironman5,ir=off in config.txt fixes that. In addition, the service drives the case LEDs via spidev0.0 and writes to it every second, even with the lighting switched off. The radio module failed every two to three minutes with RadioLib err=-705. After sudo systemctl disable --now pironman5 the error did not come back. The case’s OLED and fan control are off then. The LEDs came on again later anyway – probably because they share the data line with the radio module.
Opening the web client and setting the region
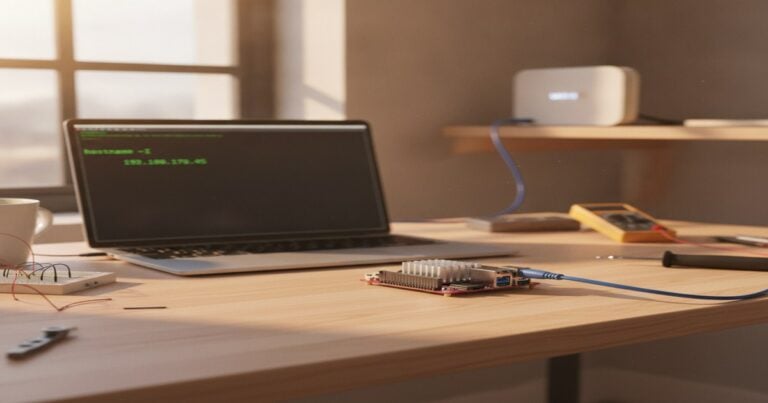
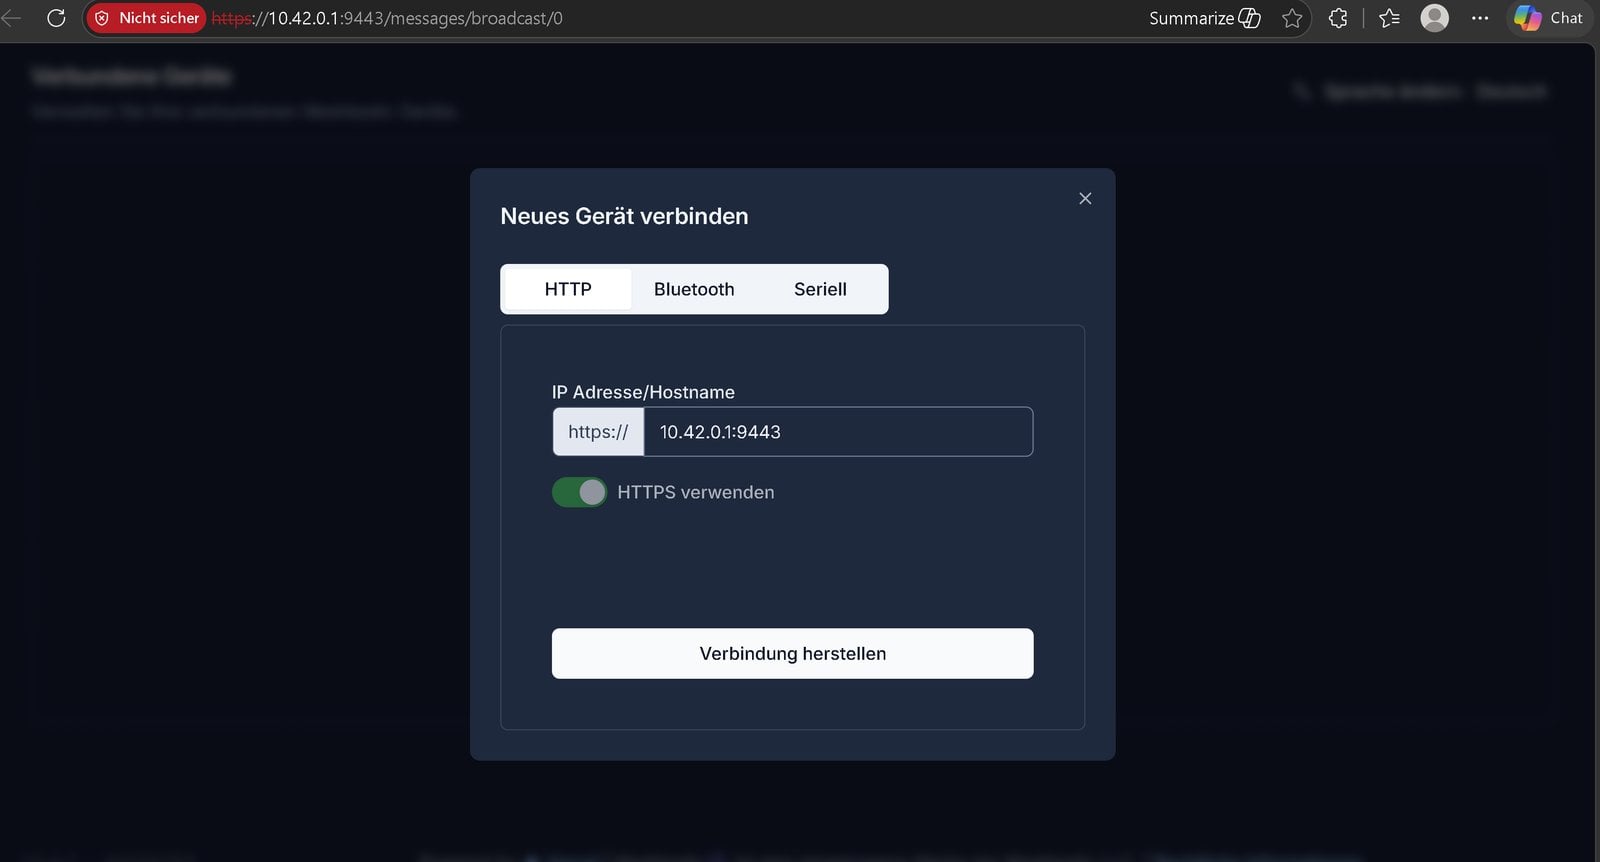
You reach the interface in a browser at https://IP-ADDRESS:9443; hostname -I tells you the Pi’s address. The browser warns about the self-signed certificate; confirm it once. In the “Connect new device” dialog, stay on the HTTP tab, enter IP address and port and leave “Use HTTPS” switched on.
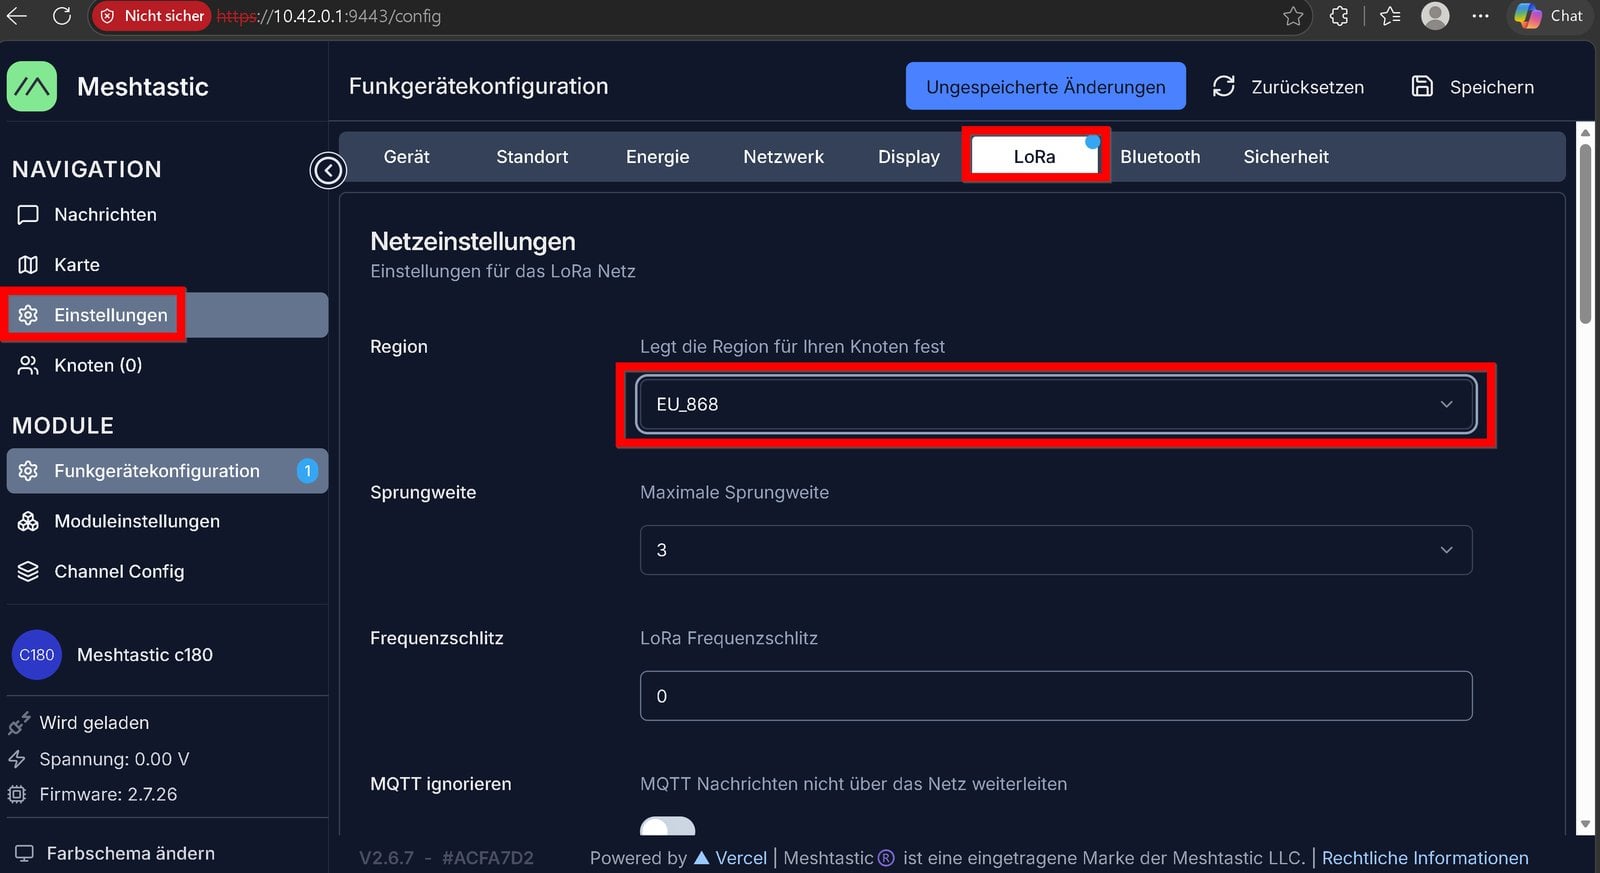
A fresh node has no region and therefore does not transmit. Under Settings → Radio Config → LoRa, set the region to EU_868 and click “Save” at the top right. The service restarts and then transmits on 869.525 MHz with the LongFast preset; our log reported 22 dBm transmit power.
The default LongFast channel uses a publicly known key. Anything you write there can be read by every Meshtastic node in range – for anything confidential, create your own channel with its own key. Position and readings also travel over this channel. Direct messages to a single node are, according to the documentation, encrypted with that node’s public key since version 2.5, so only the recipient can read them. The web client did not ask us for a login: anyone on the same network who knows the address can reconfigure the node. So do not expose port 9443 to the internet.
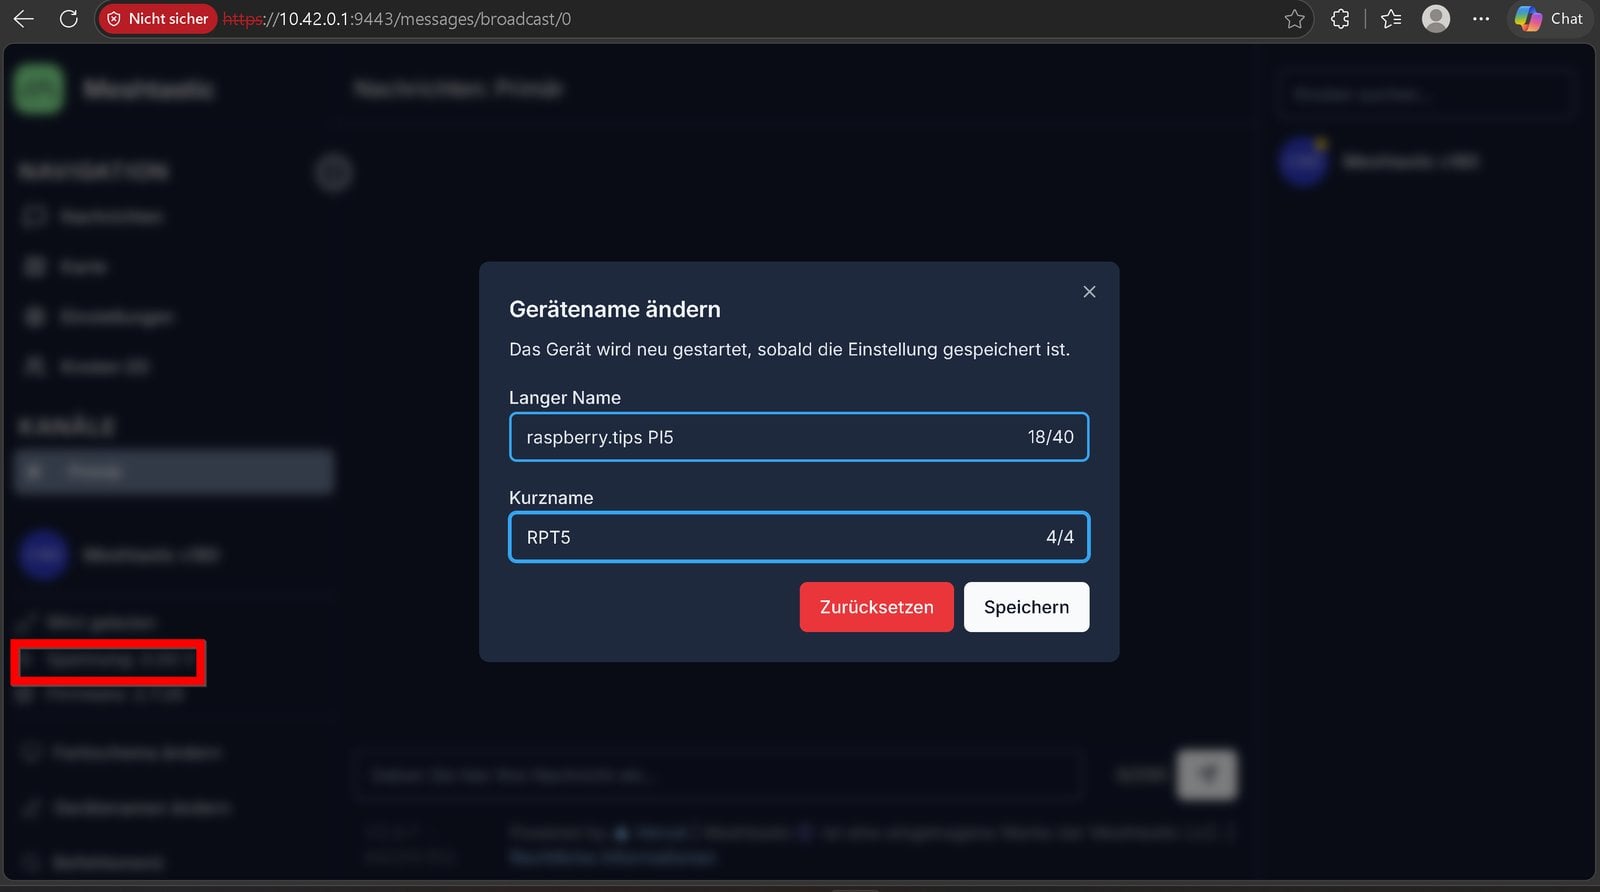
You change the name via “Change device name” at the bottom of the left sidebar. The long name may have 40 characters, the short name four; the short name appears in node lists and on the map.
If the name is gone after a restart
With version 2.7.26, our node was called Meshtastic c180 again after every restart of the service, whether we had set the name in the web client or on the command line. Region and sensor settings were kept. According to the log, the service wrote the new name only to its node database, not to the device file device.proto that it reads on startup.
What helped was setting the name and then moving the device file aside once. If it is missing, the service recovers the name from the node database and recreates the file:
sudo systemctl stop meshtasticd
sudo mv /var/lib/meshtasticd/.portduino/default/prefs/device.proto /root/device.proto.bak
sudo systemctl start meshtasticd
After that the name survived further restarts for us. Whether later versions still behave this way is open – so first check whether your name actually disappears after sudo systemctl restart meshtasticd.
Activating the RAK1901 sensor
The sensor is detected at startup, but its values are only transmitted once the telemetry module is switched on. In the web client, go to Settings → Module Config → Telemetry, switch on “Module enabled” under the environment update interval and save.
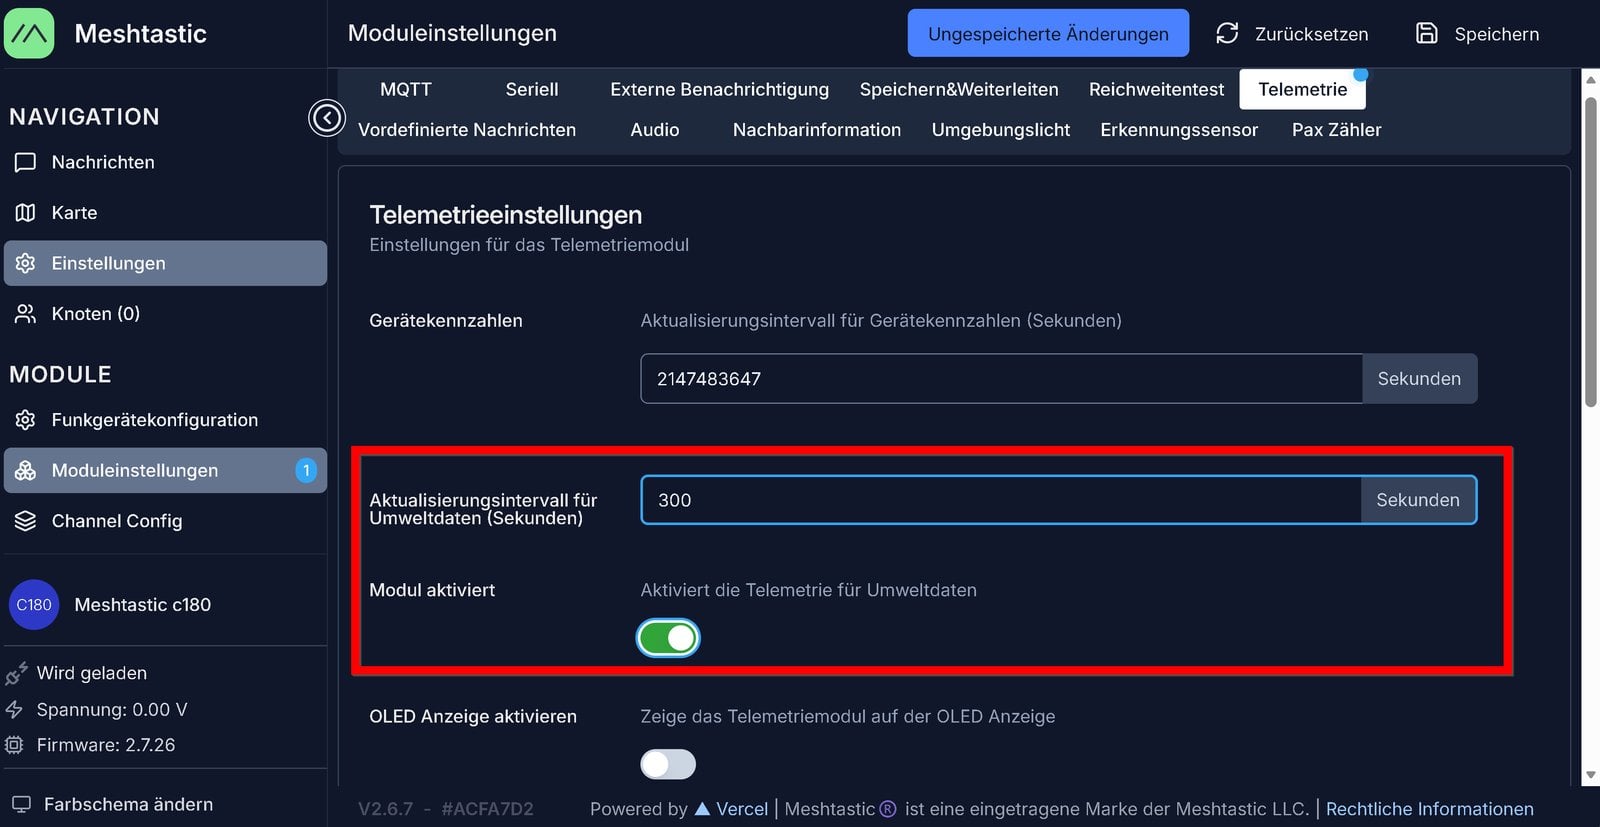
We had entered 300 seconds as the interval; the node then reported 1800 seconds. So expect one reading every 30 minutes.
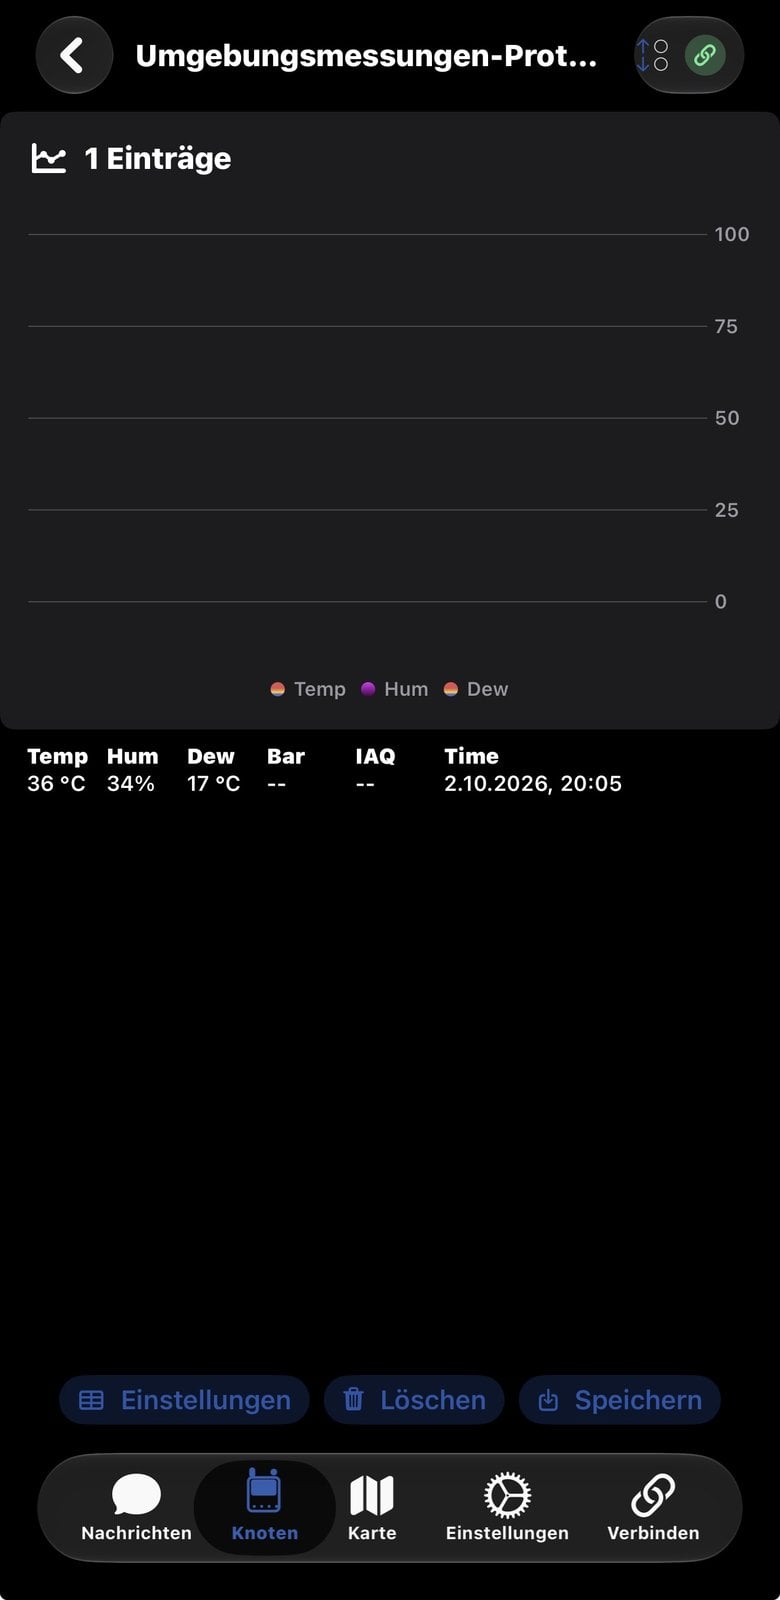
We could not find the readings of our own node anywhere in the web client. They became visible in the Meshtastic app on the second node. On the Pi itself they are in the log:
journalctl -u meshtasticd --no-pager | grep "relative_humidity"As a room sensor, the RAK1901 on the HAT is of limited use. It reported 33.8 °C shortly after startup and 36 °C an hour later, with an estimated 21 °C in the room – we had no reference thermometer. The sensor sits a few centimetres from the running Pi 5, whose processor idled at 46 to 50 °C. For useful room readings it would have to move away from the Pi, for example onto its own small node.
Setting up the second node: the RAK4631 Starter Kit
A single node has nobody to talk to. The other end is the WisMesh RAK4631 Starter Kit: a base board with radio and GPS module, plus a small OLED display and antennas. The radio module is labelled “RAK4630”, by the way – that is the chip that sits on the RAK4631 board.
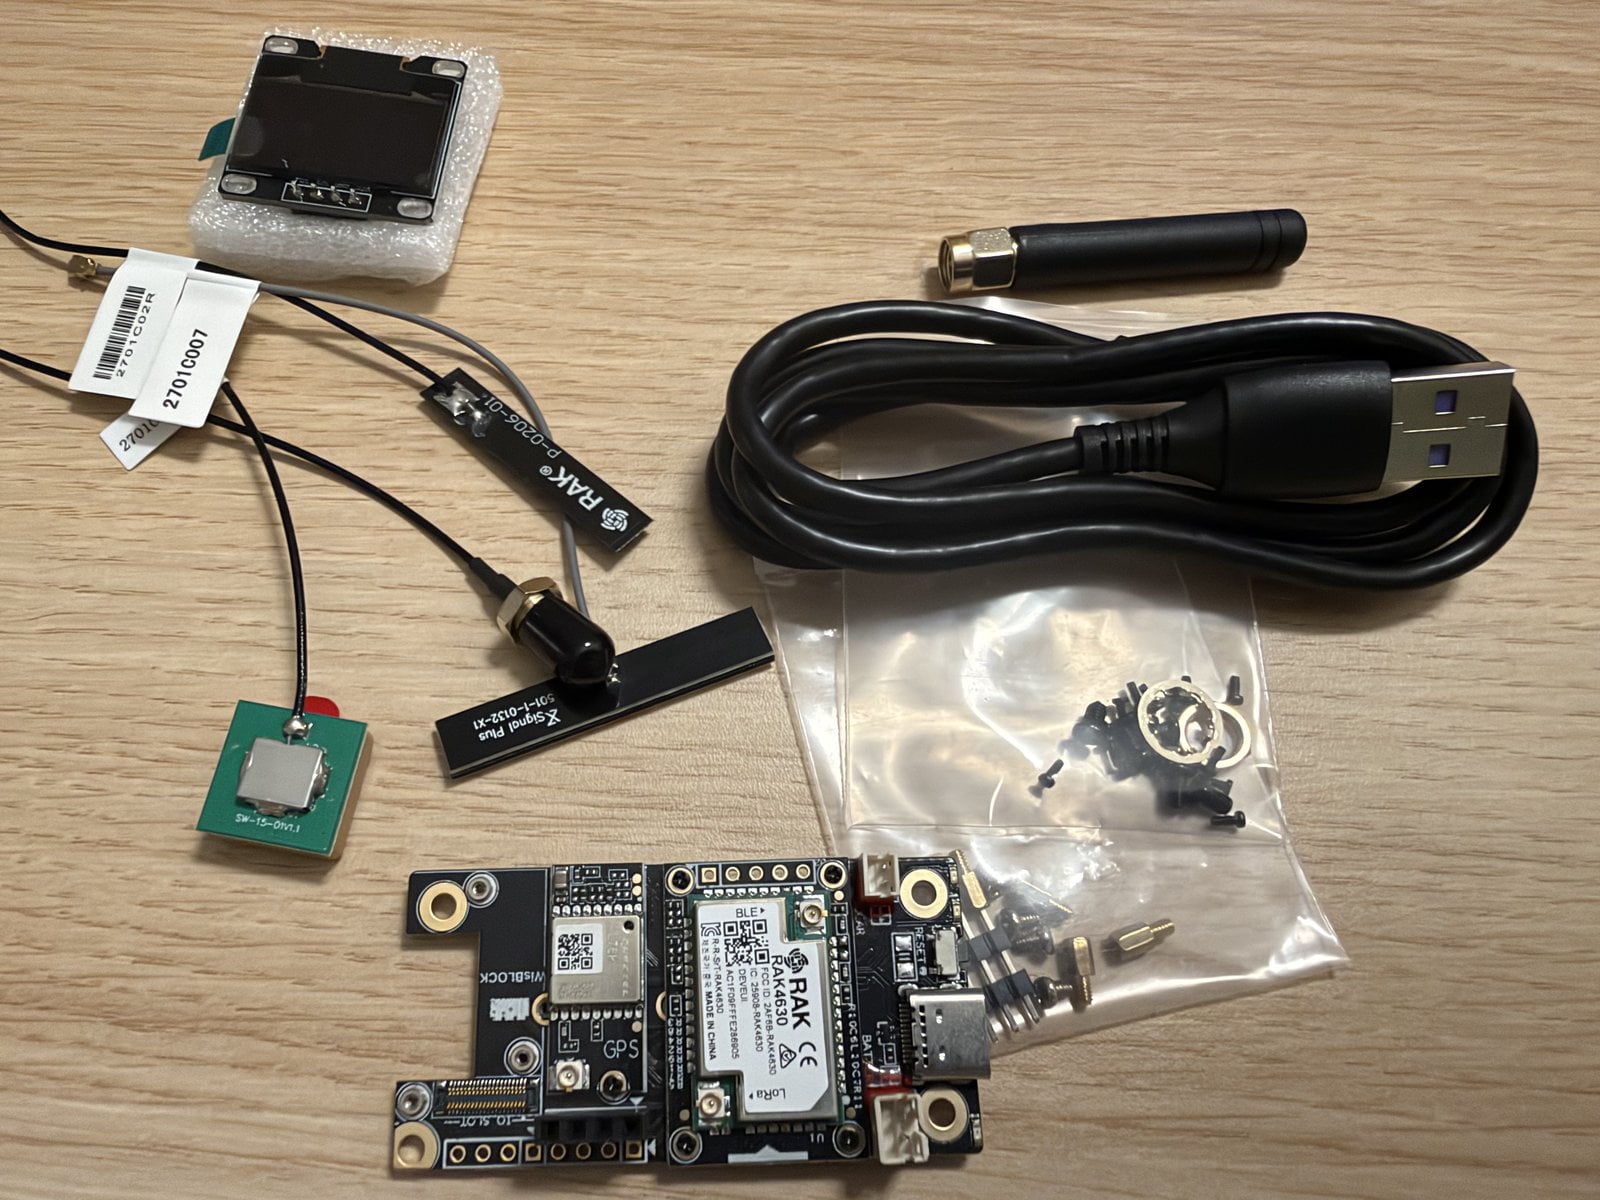
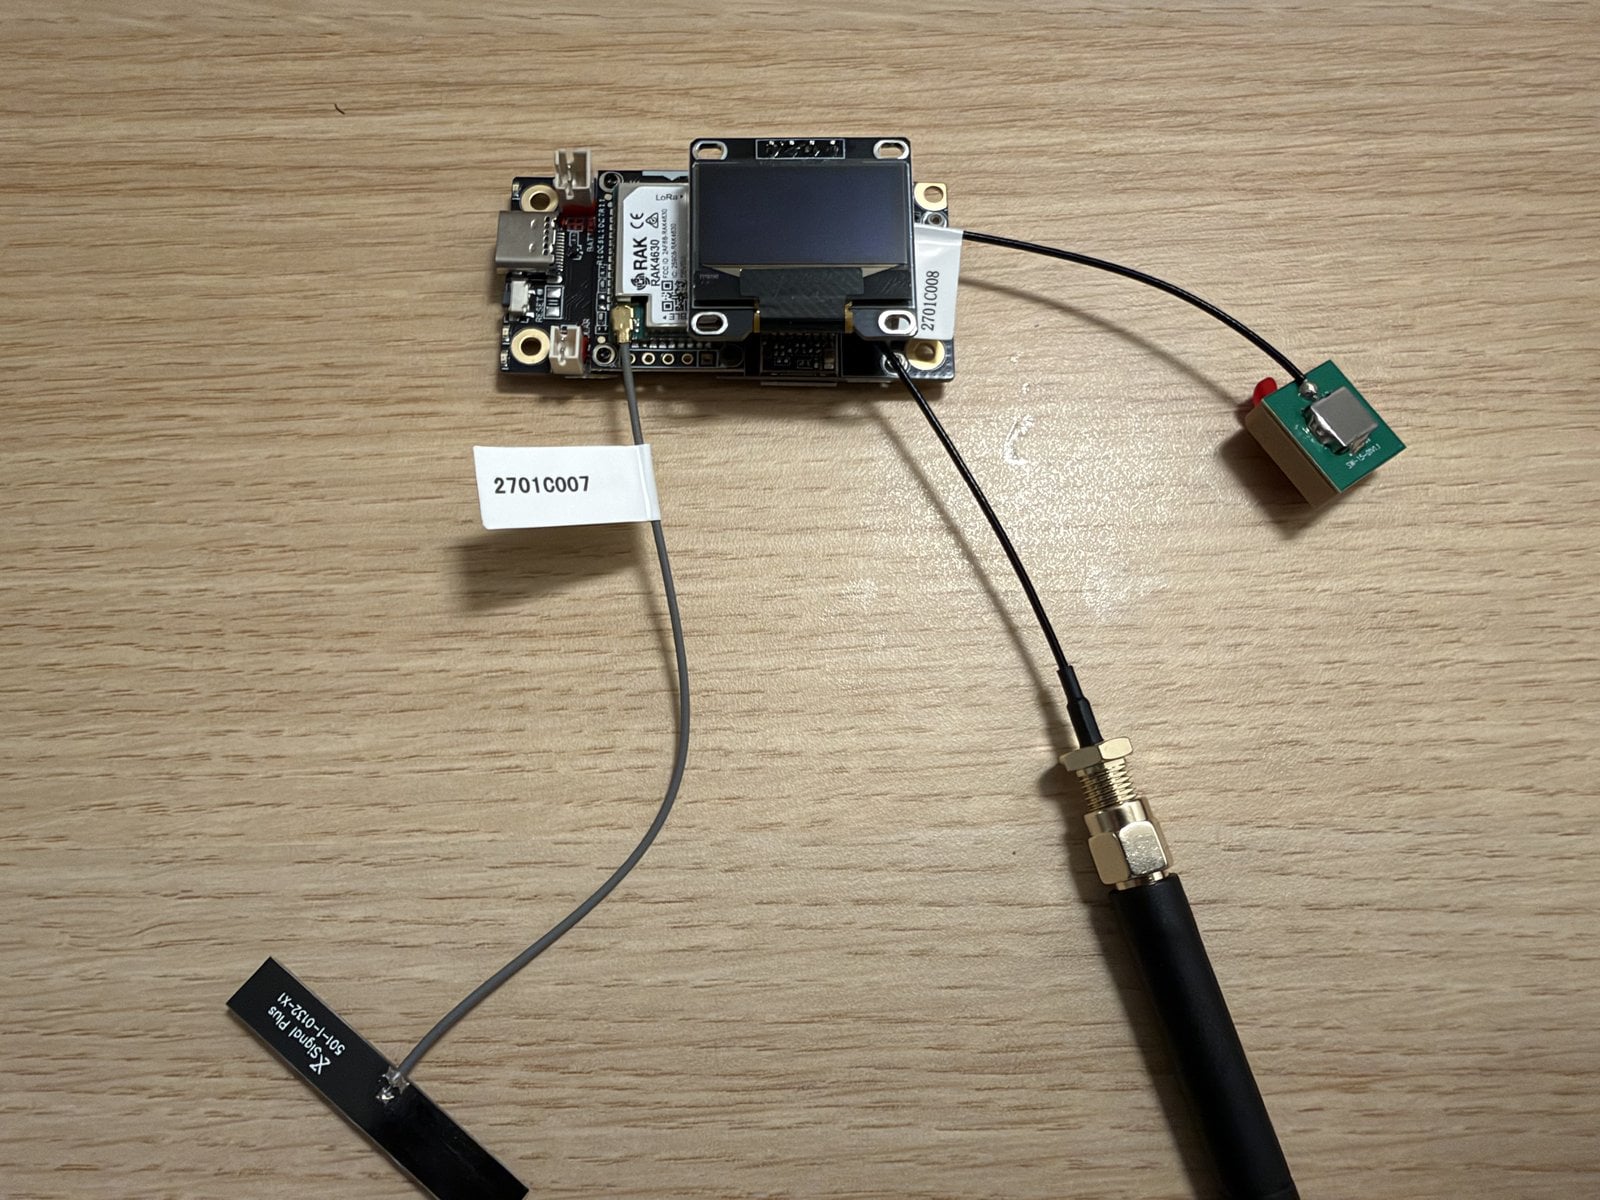
Assembly takes two steps: push the OLED onto the pin header and connect the three antennas for LoRa, Bluetooth and GPS. For LoRa, a whip antenna and a PCB antenna were included; we took the whip. Again: antennas first, then power via USB-C.
The Meshtastic firmware was preinstalled, version 2.7.15 in our case. Setup runs through the Meshtastic app for iOS or Android:
- In the app under “Connect”, select the device; it is called
Meshtastic_plus four characters. - Enter the pairing code shown on the OLED. Stay in the app – when we switched to another app, the pairing was cancelled.
- Tap the red entry “Set LoRa Region”, choose “European Union 868MHz” and save. The board restarts.
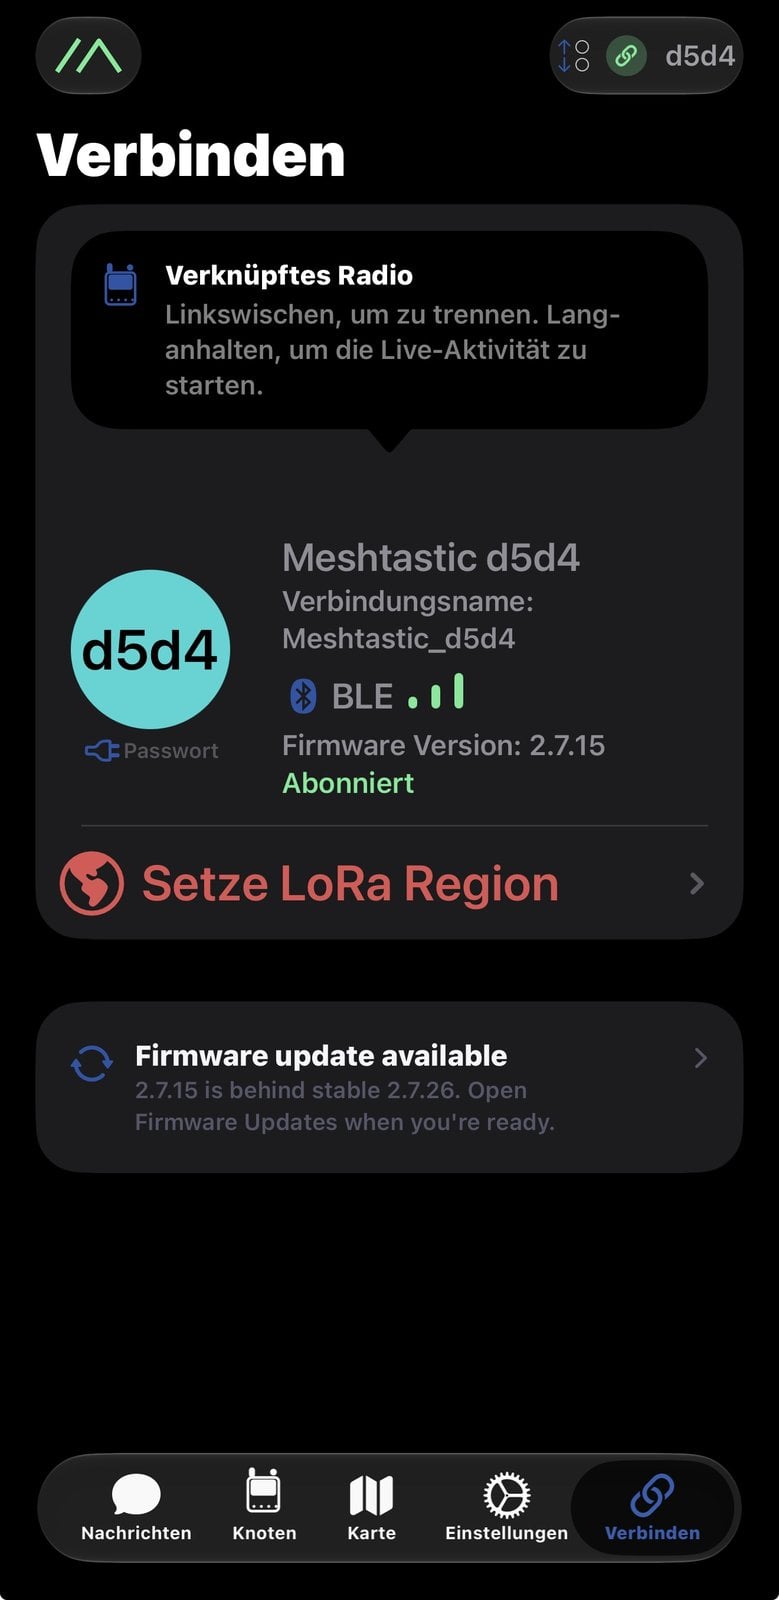
The app offered an update to 2.7.26. We skipped it: the connection to the Pi running 2.7.26 worked anyway.
Sending the first message through the mesh
Once both nodes are on EU_868, they hear each other. On the Pi, the command line shows this; install the Meshtastic tool for it:
sudo apt install pipx
pipx install "meshtastic[cli]"
pipx ensurepath
After logging in again, meshtastic --host localhost --nodes lists all known nodes. The Starter Kit showed up for us with a signal-to-noise ratio (SNR) of 6 dB and 0 hops, i.e. received directly; both devices were on the same desk.
In the app, the Pi was missing at first. A node only appears there once the other end has received something from it, and the Pi had last announced itself while the Starter Kit still had no region. A test message from the Pi fixes that:
meshtastic --host localhost --sendtext "Hello from the Raspberry Pi"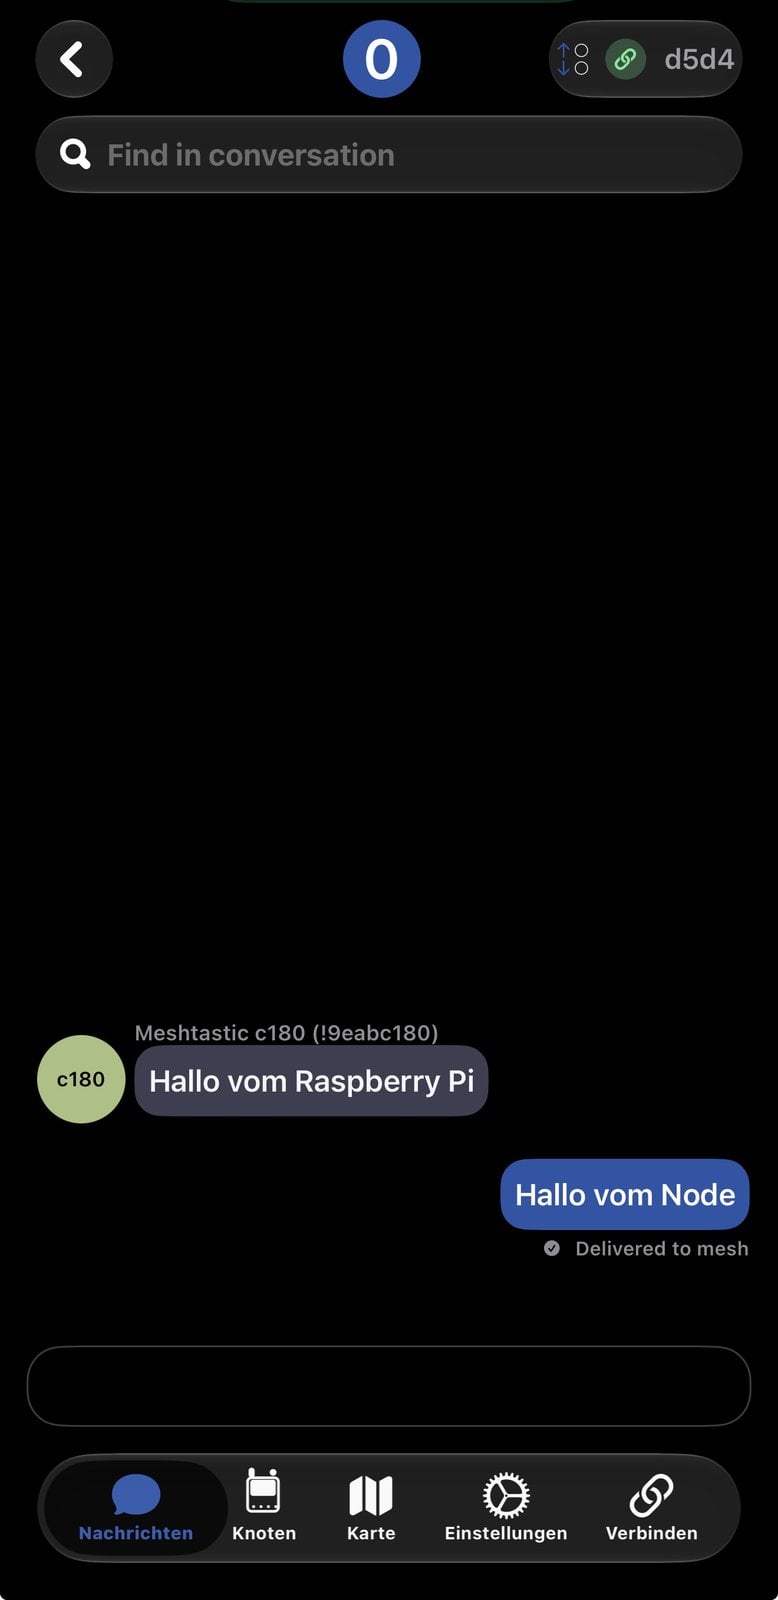
The reply from the phone lands in the Pi’s log as Received text msg, with 7 dB SNR in our case.
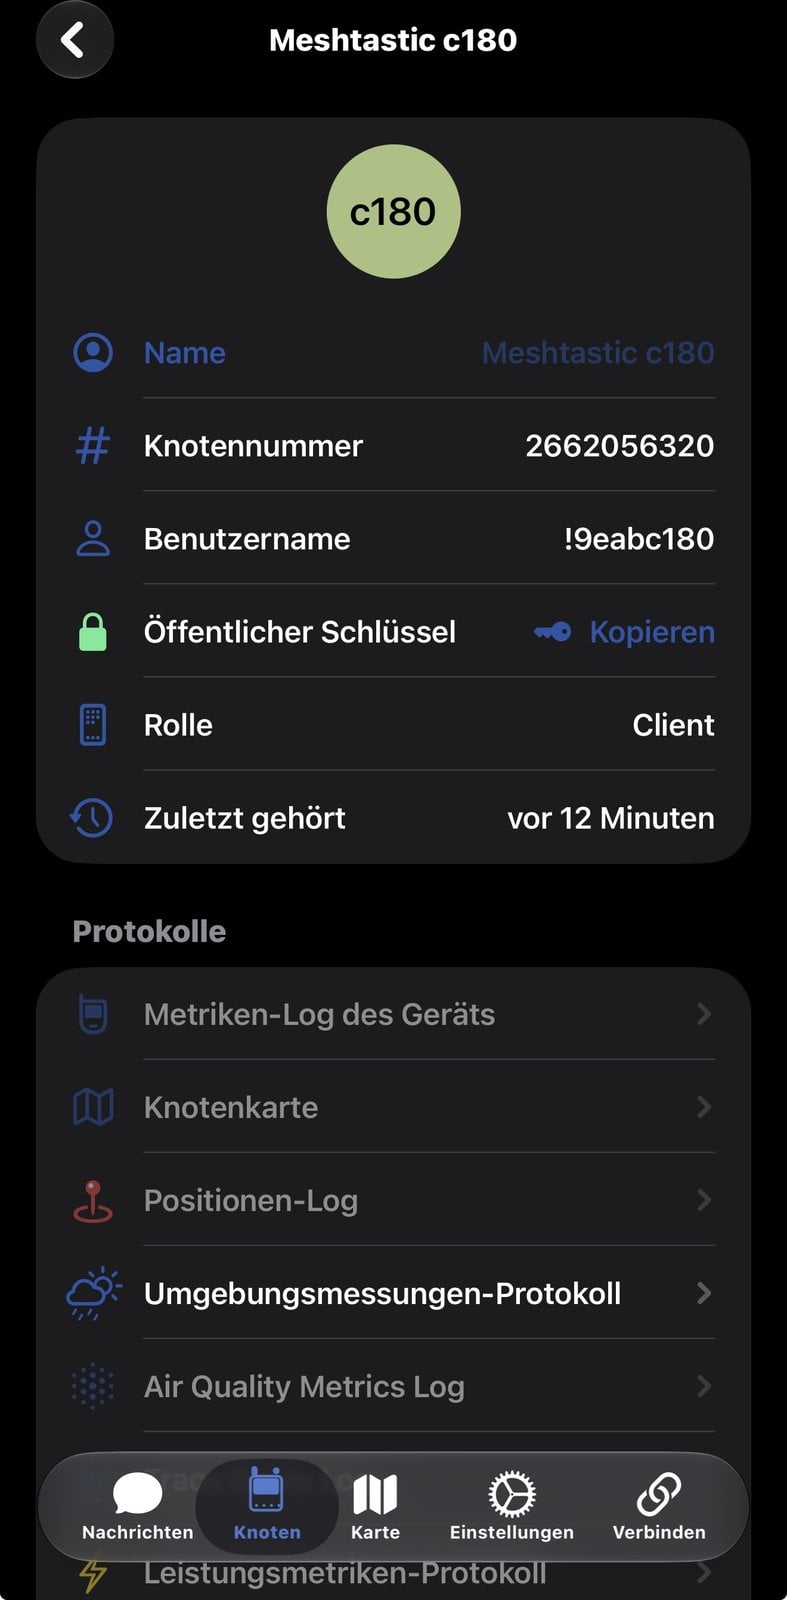
The Pi’s detail view in the app only opened after it had re-sent its node info. That carries the name and the public key; before that, the node list showed a yellow open padlock next to the entry. The Pi sends its node info about 30 seconds after every start of the service, so a sudo systemctl restart meshtasticd is enough.
From a pair of nodes to a mesh
Two nodes are the smallest case; Meshtastic is built for more. Every node that receives a packet transmits it again until its hop counter runs out; the default is three hops. A message thus also reaches recipients the sender itself cannot hear. There is no fixed route: packets are passed from node to node, and each node remembers what it has already repeated.
Foreign nodes are part of this too. All devices with region EU_868 and the LongFast preset use the same channel and appear in your node list on their own as soon as you receive them. Our Pi relays all packets in the “Client” role and did so with those of the Starter Kit – in the log as Rebroadcast received message. More on hop counters, encryption and delivery in the basics article.
We did not see any foreign nodes on the test evening: in a good two hours only packets from our two devices arrived. The small PCB antenna lay in the room next to the case, and LoRa wants a clear line of sight for range. How much the antenna position matters was obvious in our case: from inside the room, the link only reached a few kilometres; with a stick antenna hanging out of the window, we got up to 60 kilometres. If you want to bridge longer distances, focus on a good antenna position first, outdoors if in doubt. Whether a mesh already exists in your area is shown by a map like meshmap.net. It only contains nodes that share their position and report to the internet, though – an empty spot does not mean nobody is transmitting there.
Testing the range
To find out how far your own antenna reaches, Meshtastic ships a range test module. A fixed node sends numbered packets at short intervals, and you walk off with the second one. As long as the numbers arrive without gaps, you are in range. The procedure according to the documentation:
- On the Pi, enable the module and let it send every 30 seconds, the recommended interval for LongFast.
- Enable the module on the mobile node as well, in the app under the module settings at “Range Test”. Without that, the app does not show the test packets.
- Walk off with the node and the phone. The app stores the position for every packet received; on the iPhone you can save the node’s position log afterwards.
- Switch the sender off again afterwards. The test packets use a lot of airtime and disturb other nodes on the channel; the module switches itself off after eight hours.
meshtastic --host localhost --set range_test.enabled true --set range_test.sender 30
meshtastic --host localhost --set range_test.sender 0 --set range_test.enabled false
The first line starts the sender on the Pi, the second ends the test.
Troubleshooting
| Message or symptom | Cause | Fix |
|---|---|---|
Could not locate any devices, service keeps restarting | No configuration in config.d, HAT not detected automatically | Copy the preset from available.d to config.d |
Wanted region 0, using UNSET | Region not set, the node does not transmit | Set region EU_868 and save |
RadioLib err=-705 every few minutes | Another program writes to spidev0.0, in our case the Pironman service | Check with sudo lsof /dev/spidev0.0 and stop the second user |
| Node name reset after restart | Name is not written to device.proto (2.7.26) | Move the device file aside once, see above |
| Node missing in the other end’s app | No packet received from it yet | Send a test message or restart the service |
| Web client does not load | Port and RootPath in config.yaml still commented out | Enable both lines, restart the service |
Frequently asked questions
The meshtasticd service runs on Raspberry Pi OS and other Linux systems. According to the manufacturer, the WisMesh Pi HAT RAK6421 is meant for the Raspberry Pi 4 and the Raspberry Pi 5; we tested it on a Pi 5.
No. In Europe, Meshtastic uses the licence-free 868 MHz band. The node must be set to the EU_868 region: the firmware then aligns frequency, transmit power and airtime with the rules for that region.
Both use LoRa as the radio technology. With LoRaWAN, sensors send to gateways that pass the data on to a network server. With Meshtastic, the nodes talk to each other directly and relay packets among themselves; no gateway or internet access is needed.
No, according to the documentation meshtasticd does not support Bluetooth. Access goes over the network: in the browser via the web client on port 9443, or from the command line via API port 4403.
Two. A single node can transmit, but only with a counterpart can you see whether messages and readings arrive. A small board like the RAK4631 Starter Kit, paired with the smartphone via Bluetooth, is enough as the second node.
Conclusion
The RAK6421 turns a Raspberry Pi into a Meshtastic node with manageable effort: plug in the modules, install the package, copy a preset, set the region. Automatic detection of the HAT did not work for us, but with the preset copied by hand the radio module ran immediately. If you use a case that occupies GPIO pins itself, check beforehand whether SPI and GPIO 13 are free.
The Pi node plays to its strengths when it passes the data from the mesh on. How it hands readings and messages to Home Assistant, where they turn into automations, is shown in Meshtastic in Home Assistant. Have fun on the air!